background image

Basic Operation 

Turning on and off the TV                                                                                                               


Turn on the TV 

Connect the power cable, and press the 

  button to turn on the TV. 


Turn off the TV 

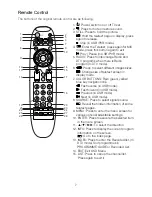
Press the 

  button on the remote control to enter standby mode.   

Do not leave your set in standby mode for long periods of time. It is best to unplug the 
set from the mains and aerial.   
When there is an accident power off, it is recommended to unplug the power cable 
from the power socket. 


No signal 

There is No Signal menu on screen when there is no input signal. In TV mode, if there 
is no signal in 5 minutes, the TV will turn off automatically. In 

PC-RGB

 mode, the TV set  

will 

automatically turn off in 1 minute if no input signal. When VGA cable is connected,  

the 

TV turns on automatically. 

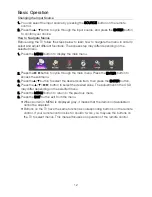
Programme Selection                                                                                                                     


Using the CH+/CH- on the panel of TV or on the remote control. 

Press CH+ to increase channel number. 
Press CH - to decrease channel number. 


Using 0- 9 digital buttons. 

You can select the channel number by pressing 0 to 9. (In ATV, DTV mode) 


Example 

To select - channel (e.g. Channel 5): Press 5. 
To select -- channel (e.g. Channel 20): Press 2 and 0 in a short time. 

Volume Adjustment                                                                                                                         


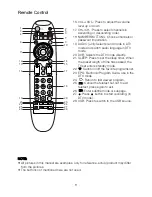
Press the VOL+/- button to adjust the volume. 


If you want to switch the sound OFF, press the 


You can release mute by pressing the 


or increase the volume. 


11

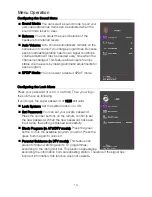
Installation Guide                                                                                                                         

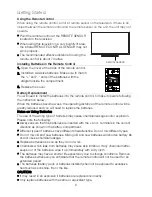
When the TV is initially powered on, a sequence of on-screen prompts will assist in 
configuring basic settings. 

1. Selecting a language 

Select the desired OSD language, then press the 

 button


to go to the next page. 

2. Selecting a picture mode 

Select the desired picture mode, then press the 

 button to go to the next page. 

3. Selecting a country 

Select the appropriate country, then press the 

 button to start auto tuning. 

4. Auto Tuning 

Scans for channels automatically and stores them in the TV’s memory. 

Содержание LED50C2000A

Страница 1: ...LED50C2000A...

Страница 2: ......

Страница 3: ...Picture Menu Configuring the Sound Menu Configuring the Option Menu Configuring the Lock Menu Installing Batteries in the Remote Control Connecting Antenna and Other Devices Using the Remote Control...

Страница 4: ...not attempt to modify this product in any way without written authorization from supplier Unauthorized modification could void the user s authority to operate this product It is not recommended to ke...

Страница 5: ...verturn of the product please always ensure the whole product was placed within the table surface in horizontal CAUTION connecting the Power Cord Most appliances recommend they be placed upon a dedica...

Страница 6: ...heat source such as radiators heat registers stoves or other apparatus including amplifiers that produce heat 6 Clean only with a dry cloth 9 Do not defeat the safety purpose of the polarized or grou...

Страница 7: ...y cord or plug is damaged liquid has been spilled or objects have fallen into the apparatus the apparatus has been exposed to rain or moisture does not operate normally or has been dropped ON DISPOSAL...

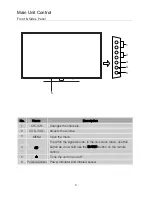
Страница 8: ...e 3 MENU Open the menu 4 To switch the signal source In the on screen menu use this button as you would use the ENTER button on the remote control 5 Turns the unit on and off 6 Power Indicator and Inf...

Страница 9: ...HDMI PC input 10 ANT Antenna input DIGITAL AUDIO OUT SPDIF port PC DVI AUDIO PC Rear Panel 7 7 7 8 9 9 10 11 12 13 12 USB USB port 9 13 AV AV audio video signal input 8 YPbPr YPbPr input HDMI input 1...

Страница 10: ...een yellow blue key navigation link Fast reverse in USB mode Fast forward in USB mode Previous in USB mode Next in USB mode 8 SOURCE Press to select signal source Reveal the hidden information of some...

Страница 11: ...and switch audio language in DTV mode 20 DVB Selects the DTV mode directly 21 SLEEP Press to set the sleep timer When the preset length of time has passed the TV set enters standby mode 22 Switch on o...

Страница 12: ...mix old and new batteries Mixing old and new batteries will shorten battery life and or cause chemical leakage Replace batteries as soon as they do not work Chemicals which leak from batteries may ca...

Страница 13: ...output function USB Drive The equipment with AV output function such as VCR DVD set top boxes etc Video Audio L Audio R When using digital audio optical output socket please note the plug direction wh...

Страница 14: ...the remote control Press CH to increase channel number Press CH to decrease channel number Using 0 9 digital buttons You can select the channel number by pressing 0 to 9 In ATV DTV mode Example To sel...

Страница 15: ...cycle through the main menu Press the ENTER button to access the submenu 3 Press the button to select the desired sub item then press the ENTER button 4 Press the button to select the desired value Th...

Страница 16: ...nel Press the blue button to skip the channel Press the button to set the favorite channel Signal Information In DTV mode Display the current Signal Information Configuring the Picture Menu Picture Mo...

Страница 17: ...ode Configuring the Lock Menu Press your password it is 0 0 0 0 at first Then you will go the sub menu as following If you forget the super password of 1225 still valid Lock System Set the system lock...

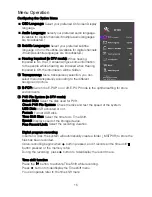
Страница 18: ...E POP Switch the E POP on or off E POP mode is the optimal setting for store environments PVR File System In DTV mode Select Disk Select the disk used for PVR Check PVR File System Check the disk and...

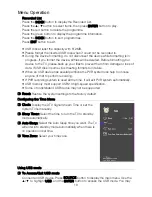
Страница 19: ...ing formats turn failure When an USB device has several partitions the PVR system can help to choose anyone of that to perform recording If PVR recording system is used all the time it will exit PVR s...

Страница 20: ...given format Main Operating Interface PHOTO MUSIC MOVIE TEXT 1 Use the button to select PHOTO MUSIC MOVIE or TEXT Press ENTER button enter into sub menu 2 Use the arrow buttons and ENTER button to ent...

Страница 21: ...u can press button to light up the screen INFO Press the green button to see the detailed information of the current channel Schedule Press the yellow button to display the schedule list Remind If you...

Страница 22: ...a page is displayed you can double the size of the text to make it easier to read 1 Press the button to enlarge the top half of the page 2 Press the button again to enlarge the bottom half of the pag...

Страница 23: ...n tuned with auto activated Picture appears slowly after switching on This is normal the image is muted during the product startup process Please contact your service center if the picture has not app...

Страница 24: ...ipe the scre Make sure th excess water is off the screen and then let it air dry before yo our TV Cleaning the cabinet T n o remove dirt or dust wipe the cabinet with a soft dry lint free cloth Please...

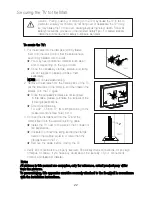
Страница 25: ...sary screws are not supplied In this case please purchase the screws of the following specifications Screw Specifications For a 32 55 Inch TV M4 M8 according to the measurement of screw hole X L10 3 c...

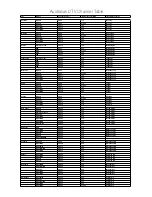
Страница 26: ...11 219 5 Artarmon Digital ABC VHF 12 226 5 Artarmon Digital SBS UHF 34 571 5 Gore Hill Gold Coast Digital 7 UHF 53 704 5 Mt Tamborine Digital 9 UHF 59 746 5 Mt Tamborine Southern Cross 10 UHF 43 634 5...

Страница 27: ......

Отзывы: