Page 4
SKU 96382
for technical questions, please call 1-800-444-3353.
be aware of air hoses and connections.
Take care to not trip over hoses. Make sure
all connections are tight and air hoses are properly rated.
Maintenance.
For your safety, maintenance should be performed regularly by a quali-
fied technician.
warning: the warnings, cautions, and instructions discussed in this instruction manual
cannot cover all possible conditions and situations that may occur. it must be under-
stood by the operator that common sense and caution are factors which cannot be built
into this product, but must be supplied by the operator.
unpacKinG
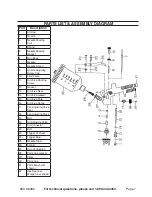
When unpacking, check to make sure that all the parts are included. (See the Parts List and
Assembly Drawing at the end of this manual.) If any parts are missing or broken, please call
Harbor Freight Tools at the number on the cover of this manual as soon as possible.
asseMbly
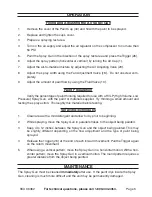
For best results, a regulator should be connected to the Spray Gun, as shown below.
moisture
filter
Clean the sprayer out by flushing with a nonflammable solvent.
Check all seals before connecting to the air supply.
Slide the Paint Cup Gasket (28) over the Cup Connector (27) and place the Filter (29)
in the Cup Connector.
Screw the Paint Cup (30) onto the Cup Connector (27) and tighten firmly.
Connect a 3/8” air hose with a connection compatible to 1/4-18 NPS to the air com-
pressor air outlet.
While holding the open end of the air supply hose, momentarily turn on the compressor
air to clean out any debris within the hose.
Connect the air supply hose to the Air Connector (21).
23.
24.
1.
2.
3.
4.
5.
6.
7.
Spray
Gun
Male Quick
Coupler
Air Hose
Air Compressor
Female Quick
Coupler
Male Quick
Coupler
Female Quick
Coupler
Regulator


