background image

Instructions-Parts

XP

 and XP-h


Proportioners

Mechanically linked fixed ratio plural-component system used for proportioning, mixing, 
and spraying two component coatings. For professional use only.

See page 11 for maximum working pressure and model 
information.

Important Safety Instructions

Read all warnings and instructions in this 

manual and in related manuals. Save 

these instructions.

r_571100_3A0420A_1a-2

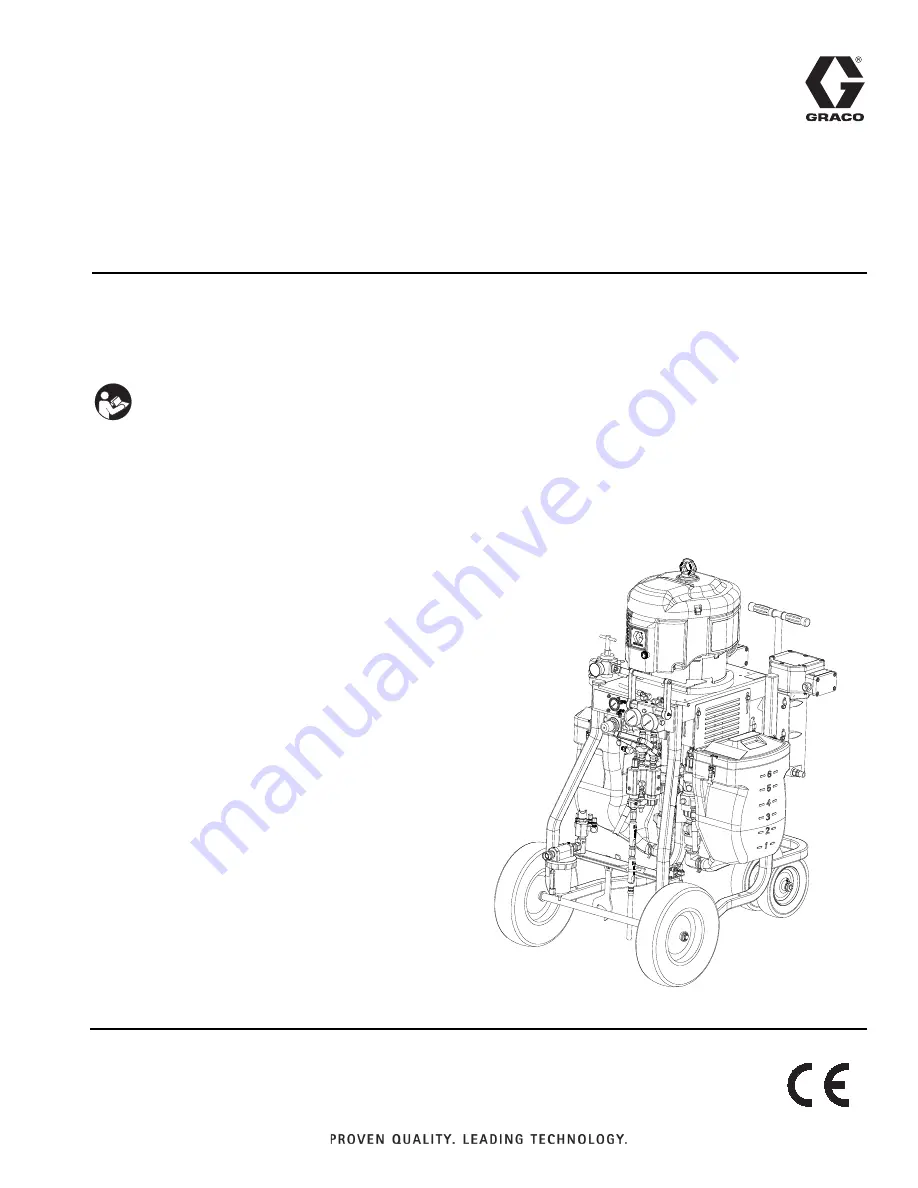
XP70

 system shown with hoppers and optional 

solvent flush pump and heaters.

3A0420V

EN

Содержание XP-h

Страница 1: ...two component coatings For professional use only See page 11 for maximum working pressure and model information Important Safety Instructions Read all warnings and instructions in this manual and in related manuals Save these instructions r_571100_3A0420A_1a 2 XP70 system shown with hoppers and optional solvent flush pump and heaters 3A0420V EN ...

Страница 2: ...e A and B Fluids 25 Prime Solvent Flush Pump 26 Recirculate Prior to Spraying or Re Prime After a Pump Runs Dry 27 Spray 28 B Side Mix Manifold Restriction 29 Flush Mixed Material 30 Flush Mix Manifold Hose and Spray Gun 30 Empty and Flush Entire System new system or end of job 31 Shutdown 33 Park 33 System Verification 34 Maintenance 35 Hose Electrical Resistance 35 Filters 35 Seals 35 Cleaning P...

Страница 3: ...524 Viscon HP Heater Instructions Parts 309525 Heated Hose Kit Instructions Parts 313259 Hopper or Hose Heat Circulation Kit 406861 Viscon HP Heater Adapter Kit Instruc tions Parts Solvent Flush 310863 Feed and Solvent Flush Kits 312794 Merkur Pump Assembly Instructions Parts Accessories and Kits 309852 Polyurethane Circulation and Return Tube Kits Instructions Parts 311486 DataTrak Conversion Kit...

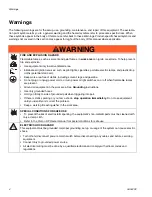
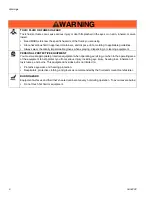
Страница 4: ...gasoline Do not plug or unplug power cords or turn power or light switches on or off when flammable fumes are present Ground all equipment in the work area See Grounding instructions Use only grounded hoses Hold gun firmly to side of grounded pail when triggering into pail If there is static sparking or you feel a shock stop operation immediately Do not use equipment until you identify and correct...

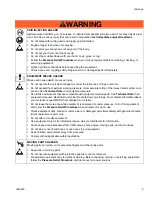
Страница 5: ...ts that are compatible with equipment wetted parts See Technical Data in all equipment manuals Read fluid and solvent manufacturer s warnings For complete information about your material request MSDS from distributor or retailer Do not leave the work area while equipment is energized or under pressure Turn off all equipment and follow the Pressure Relief Procedure when equipment is not in use Chec...

Страница 6: ...ONAL PROTECTIVE EQUIPMENT You must wear appropriate protective equipment when operating servicing or when in the operating area of the equipment to help protect you from serious injury including eye injury hearing loss inhalation of toxic fumes and burns This equipment includes but is not limited to Protective eyewear and hearing protection Respirators protective clothing and gloves as recommended...

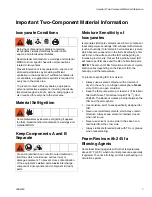
Страница 7: ... when not in use Never use solvent on one side if it has been con taminated from the other side Always lubricate threaded parts with TSL or grease when reassembling Foam Resins with 245 fa Blowing Agents Some foam blowing agents will froth at temperatures above 90 F 33 C when not under pressure especially if agitated To reduce frothing minimize preheating in a circulation system Spraying or dispen...

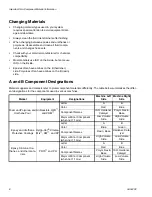
Страница 8: ... to plural component materials differently The table below summarizes the differ ent designations for the components used in various machines Market Equipment Designations Machine Left Side Machine Right Side Foam and Polyurea and Urethane Pour All Reactors HFR and VRM Letter A B Color Red Blue Component Names ISO Hardener Catalyst Polyol Resin Base Major or Minor Component when not 1 1 mix Low Vo...

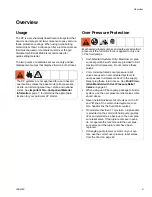
Страница 9: ... applied to only one of the fluid pumps Cart Mounted Systems Only Maximum air pres sure set point blow off valves are provided to limit maximum fluid pressure Do not remove these valves Color coded automatic over pressure relief valves are used on cart mounted systems to dump excess fluid pressure back to the supply Never plug these return hoses See Fluid Circu lation Manifold with Over Pressure R...

Страница 10: ...rculation and return tube kits if you are feed ing material from drums or remote hoppers See manual 309852 if you are feeding urethane mate rial 7 Install hopper or hose heat circulation kit 24M224 if ordered See 313259 for instructions NOTE Supply return lines must be used 8 Connect the feed pumps fluid strainers and air hoses as necessary If your system does not use hoppers then see manual 31276...

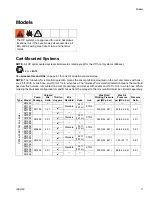
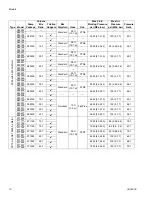
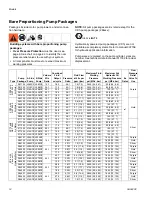
Страница 11: ...ly The XP systems are approved for use in hazardous locations only if the base model all accessories all kits and all wiring meet local state and national codes Type Model Pump Package Volume Mix Ratio 7 Gallon Hoppers Mix Manifold Hose Gun Max Fluid Working Pressure psi MPa bar Max Air Pressure psi MPa bar Pressure Ratio XP35 with NXT 3400 Air Motor 281000 Standard 35 ft 10 7 m XTR5 281101 281100...

Страница 12: ... 331 100 0 7 7 48 1 282402 282405 282406 283101 282100 1 0 1 Quickset 10 ft 3 0 m FlexPlus 4500 31 310 100 0 7 7 45 1 283102 283201 282200 2 0 1 4800 33 331 100 0 7 7 48 1 283202 283301 282300 3 0 1 4500 31 310 100 0 7 7 45 1 283302 283401 282400 4 0 1 4800 33 331 100 0 7 7 48 1 283402 XP70 with NXT 6500 Air Motor 571000 Standard 35 ft 10 7 m XTR7 571101 571100 1 0 1 7250 50 500 95 0 65 6 5 76 1 5...

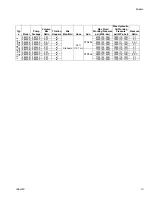
Страница 13: ... 7 m XTR504 4700 32 324 1800 12 124 1 1 284204 284202 2 01 5050 35 348 1800 12 124 2 1 284254 284252 2 5 1 5000 34 345 1650 11 114 2 5 1 284304 284302 3 01 4700 32 324 1800 12 124 3 1 284404 284402 4 01 5000 34 345 1800 12 124 4 1 284106 284103 1 01 XTR704 7150 50 500 1700 12 117 1 1 284206 284203 2 01 7200 50 496 1650 11 114 2 1 284256 284253 2 5 1 6800 47 469 1800 12 124 2 5 1 284306 284303 3 01...

Страница 14: ...072C0 2 5 1 252 52 1 2 7 10 2 5000 34 345 95 0 65 6 5 282300 L22AC0 L072C0 3 0 1 288 45 1 3 1 11 7 4500 31 310 100 0 7 7 282330 L18AC0 L054C0 3 3 1 234 56 1 2 5 9 5 5000 34 345 95 0 65 6 5 282400 L22AC0 L054C0 4 0 1 270 48 1 2 9 11 0 4800 33 331 100 0 7 7 XP70 with NXT 6500 Air Motor 571100 L090C0 L090C0 1 0 1 180 72 1 1 9 7 2 7250 50 500 100 0 7 7 Silver 571150 L085C0 L058C0 1 5 1 144 91 1 1 5 5 ...

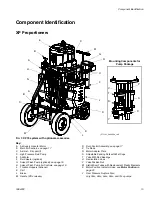
Страница 15: ... L Brake M Handle lift to release N Fluid Control Assembly see page 17 P Tie Rods R Motor Adapter Plate S Adjustable Packing Nuts with Wet Cups T Yoke With Rod Bearings U Recirculation Lines V Yoke Position Nut W Static Mixer Tubes with Replacement Plastic Elements X Motor Position Indicator Lines see Motor Position on page 22 Y Over Pressure Rupture Disc only 38cc 48cc 54cc 58cc and 72cc pumps FI...

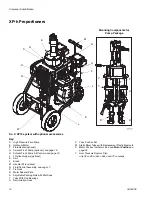
Страница 16: ... N Fluid Control Assembly see page 17 P Tie Rods R Motor Adapter Plate S Adjustable Packing Nuts with Wet Cups T Yoke With Rod Bearings U Recirculation Lines V Yoke Position Nut W Static Mixer Tubes with Replacement Plastic Elements X Motor Position Indicator Lines see Motor Position on page 22 Y Over Pressure Rupture Disc only 38cc 48cc 54cc 58cc and 72cc pumps FIG 2 XP70 system with optional acc...

Страница 17: ...uid Circulation Fittings AJ B Component Adjustable Fluid Restrictor see page 29 AK A and B Mix Manifold Check Valves AL Solvent Inlet Check Valve AM Automatic Spring Loaded Color Coded Over Pressure Relief Valves with grease fittings see page 42 AN A and B Combined Outlet 3 8 npt m AH ti19167a Standard Mix Manifold shown FIG 4 CA CD CB CC Key CA Main Motor Shutoff Valve Relieving CB Main Motor Air...

Страница 18: ...Fluid Inlet BD Muffler BE Prime Flush Sample valve BF Fluid Outlet Hose BG Circulation hose BA BB suction hose not shown BD BG BF r_571100_3a0420a_4a 2 BE FIG 6 Key DA Solvent Pump Air Shutoff Valve Relieving DB Solvent Pump Air Pressure Regulator DC Solvent Pump Air Pressure Gauge DD Air Outlet DE Air Inlet DC DB DA r_571101_3a0420a_5a 2 DD DE ...

Страница 19: ...off Handle AE Controls A and B fluid flow for mixing and dispensing Close before flush ing Solvent Flush Valve AD Controls solvent flow to the mix manifold hose and spray gun Static mixer gun hose kit Thoroughly mixes the two fluids and delivers the mixed fluid to the spray gun Includes static mixer and hoses to the spray gun Optional Accessories Optional Fluid Heaters N Heats the resin and harden...

Страница 20: ...f hoses regularly If total resistance to ground exceeds 29 megohms replace hose immedi ately Air compressor follow manufacturer s recommenda tions Spray gun ground through connection to a properly grounded fluid hose and pump Fluid supply container follow local code Object being sprayed follow local code Solvent pails used when flushing follow local code Use only conductive metal pails placed on a...

Страница 21: ...iscon HP heater manual for electrical con nection instructions and guidelines in hazardous loca tions If your system is rated for hazardous areas and you have explosion proof heaters you must have a quali fied electrician connect heater wiring Ensure wiring and installation comply with local electrical codes for hazardous areas Improperly installed or connected equipment will cre ate a hazardous c...

Страница 22: ... continue to next step 2 Loosen the eight fasteners and remove the two pump guards 3 Place wrench on adapter rod 104 then use sup plied tool to loosen the serrated yoke nut V above the yoke T 4 Loosen the three nuts P2 below the motor tie rods 5 Grab the piston rod and slide the position of the motor E until the indicator lines are aligned with your ratio See FIG 7 and FIG 8 6 Tighten the three nu...

Страница 23: ...uid mix hose 25 cleanup mixer 27 28 whip hose 30 and spray gun 31 See FIG 11 2 Add mixed material hose as necessary between the mix hose 25 and cleanup mixer 27 28 Connect Fluid Hose Bundles Remote Mix Manifold Only Connect additional fluid hoses to the fluid manifold AA when the mix manifold AB is remote Hoses must be properly sized and balanced for your mix ratio See mix manifold manual for deta...

Страница 24: ...the A and B pumps pressure can be relieved back to the hoppers J a Close the main air shutoff valve CA b Open the circulation handle AC NOTE For longer valve life in abrasive fluids it is advisable to relieve high pressure out through the gun when possible 12 If you suspect the spray tip or hose is clogged or that pressure has not been fully relieved after follow ing the steps above very slowly lo...

Страница 25: ...jor volume of material fill the B side green with minor volume of material unless 1 1 mix ratio 3 Move the recirculation lines U to empty containers 4 Close the dual shutoff handle AE and open the cir culation handle AC 5 XP Systems only Open the main air shutoff valve CA Then slowly open the air regulator CB 6 XP h Systems only Set pump valve on Then turn down the pressure control knob 7 Dispense...

Страница 26: ...isengage the trigger lock and trigger the gun into a grounded pail Use a pail lid with a hole to dispense through Seal around the hole and gun with a rag to prevent splash back Be careful to keep fingers away from the front of the gun 8 Open the solvent pump air valve DA Slowly turn the solvent pump air regulator DB clockwise to prime the solvent pump and push air out of the mix hose and gun Trigg...

Страница 27: ...1 Follow Prime Empty System page 25 2 Close the dual shutoff handle AE 3 Ensure the recirculation hoses U are in the correct hoppers J 4 Open the circulation valve handle AC 5 For XP Systems a Turn down the air pressure regulator CB and then open the main air shutoff valve CA Use the air pressure regulator to slowly increase the air pressure to the pumps until they start run ning slowly b Run the ...

Страница 28: ...CB to 30 psi 0 21 MPa 2 1 bar 4 Remove tip Disengage the trigger lock and trigger the gun into a grounded metal pail Use a metal pail lid with a hole to dispense through to avoid splash ing Dispense out of the mix hose until a well mixed coating flows from the gun 5 Engage the trigger lock Install the tip on the gun 6 Adjust the main pump air regulator CB to the nec essary spraying pressure and ap...

Страница 29: ...e machine with a short mix hose to the spray gun It can also be used in the ratio check procedure If the mix manifold AB is mounted on the machine you do not need to adjust the restrictor Leave open two turns minimum To Adjust the Restrictor Adjust the restrictor stem clockwise while spraying until you see a slight rise in the B side pressure gauge The point where the pressure starts to rise is a ...

Страница 30: ...ual shutoff handle AE 3 Open the solvent pump air valve DA Slowly turn the solvent pump air regulator DB clockwise to increase air pressure 4 Open the solvent flush valve AD 5 Disengage the trigger lock and trigger gun into a grounded pail Use a pail lid with a hole to dispense through Seal around the hole and gun with a rag to prevent splash back Be careful to keep fingers away from the front of ...

Страница 31: ...help prevent materials from settling or gell ing in the pumps lines and valves Flush the system when any of the following situations occur anytime the system will not be used for more than one week depending on materials used if the materials used have fillers that will settle if using materials that are moisture sensitive before servicing if the machine is going into storage replace the flush sol...

Страница 32: ...flushed 13 Close the circulation handle AC and open the dual shutoff handle AE 14 Dispense fresh solvent through the mix manifold valves and out the gun 15 Turn off the air motors and follow Pressure Relief Procedure page 24 16 Close the dual shutoff handle AE 17 Remove pump fluid filters if installed and soak in solvent Clean and replace the filter cap Always replace the filter o rings NOTE Fill ...

Страница 33: ...Mix Manifold Hose and Spray Gun page 30 3 Close the main air shutoff valve CA Park 1 Open the circulation handle AC and adjust the air regulator CB so that the pump runs slowly 2 Close the circulation handle AC when the pump is at the bottom of the stroke 3 Close the air regulator CB and open the circulation handle AC ...

Страница 34: ... s entire length at the time listed on the data sheet NOTE Spots that take longer to cure indicate insuf ficient pump loading leakage or lead lag errors at a remote mix manifold Appearance Test Spray material onto foil Look for variations in color gloss or texture that may indicate improperly catalyzed material Monitor Fluid Supply An empty pump will quickly accelerate to a high speed and may dama...

Страница 35: ...sprayer and turn off all power See Shutdown page 33 7 Clean the external surfaces only using a rag soaked in solvent that is compatible with the spray material and surfaces being cleaned 8 Allow enough time for the solvent to dry before using the system Recommended Spare Parts Keep these spare parts on hand to reduce downtime See Recommended Spare Parts page 60 Change the Mix Ratio In order to cha...

Страница 36: ...fold restrictor Fluid supply low Refill or change container Pump operates but hardener output pressure drops on upstroke Dirty worn or damaged hardener pump piston valve or piston pack ings Clean repair pump see 311762 Pump operates but hardener output pressure drops on downstroke Dirty worn or damaged hardener pump intake valve Clean repair pump see 311762 Pump operates but hardener output pressu...

Страница 37: ...ed hose size Clean inlet strainer or hopper screen Air mixed in fluid from excessive agi tation or circulation Flush and add new fluid Problem Cause Solution TROUBLE AREA Resin Pump Leakage 1 Throat packing 2 Piston packing 3 Piston ball check Resin Pump Falling Rising Hardener Pump Falling Falling Rising Rising TROUBLE AREA Hardener Pump Leakage 1 Throat packing 2 Piston packing 3 Piston ball che...

Страница 38: ...e tie plate 101 5 Use hoist to remove the pump assembly by the lift ring and carefully lift out of cart 1 Remove Displacement Pump 1 Follow Shutdown page 33 2 If hoppers are installed remove the hopper and hopper bracket from the cart See Hoppers page 43 3 If feed pumps are installed close the inlet ball valve Remove inlet union 61 4 Remove the spring clamp 130 and coupling 119 or 120 5 Use a wren...

Страница 39: ...See FIG 12 on page 40 Replace Air Control Assembly 1 Close the main air shutoff valve on the air supply line and on the system Depressurize the air line 2 Disconnect the air motor air lines and system air line 3 Remove the nut 8 and washer 5 Remove the bottom air control manifold assembly from the cart 4 Loosen the upper air control assembly from the air motor 5 Follow the steps in reverse order t...

Страница 40: ...Repair 40 3A0420V FIG 12 Air Control Assembly 258983 201 215 214 213 216 211 202 203 204 209 208 207 205 206 210 214 209 206 r_571101_3A0420A_1a 2 Air Flow Air Flow 5 8 For XP systems only ...

Страница 41: ...5 to the cart 1 6 Remove the two screws 37 and fluid circulation manifold 35 from the cart 1 Replace Over Pressure Relief Valves 1 Flush before repairing equipment if possible See Empty and Flush Entire System new system or end of job page 31 2 Follow Pressure Relief Procedure page 24 3 Ensure handle 312 is in the down position Remove the screws 313 jam nut 304 handles 311 handle rod 312 clips 318...

Страница 42: ...th fittings NOTE Both valves should settle firmly into the spray position inward against the seats in the valve Both valve stems should rotate out to their most extended positions when the handle is pulled down to the circulate position Fluid Circulation Manifold Replacement Guide NOTE Original XP70 valves did not include a silver valve sleeve When replacing these original valves replace with the ...

Страница 43: ...rom pump 5 Remove the recirculation line from the hopper and place in a waste container 6 Lift the hopper off of the mounting bracket 7 Repeat for second hopper Optional Solvent Pump 1 Follow Pressure Relief Procedure page 24 2 Disconnect the fluid line and air lines from the sol vent pump 3 Loosen the four screws that attach the solvent pump to the cart 1 Lift and pull pump from the slots 4 Refer...

Страница 44: ...d heater 3 Refer to the Viscon HP heater manual to service or repair Refer to the heater adapter kit manual 406861 for installation instructions 4 Reconnect the fluid lines and electrical wiring Replace 1 Follow steps 1 through 2 in the Fluid Heaters Ser vice and Repair section 2 Loosen the four mounting screws lock washers and plain washers on back of the heater Slide the heater up and remove fro...

Страница 45: ...Repair 3A0420V 45 ...

Страница 46: ... Parts Cart Mounted System 1 15 14 13 16 11 3 17 18 9 8 7 5 10 12 17 64 50 53 38 54 13 13 11 52 1 Apply anaerobic pipe sealant to all non swiveling pipe threads 2 r_571101_3a0420a_30a r_571101_3a0420a_30a XP cart shown ...

Страница 47: ...22 4 18 5 6 24 55 56 58 59 60 61 62 24 24 22 41 37 35 36 32 27 28 26 52 48 18 5 1 57 69 49 A 49 B 51 70 27 28 32 27 28 25 29 30 31 r_571101_3a0420a_44a 1 r_571101_3a0420a_45a TI17434a 90 89 65 inside hopper Standard Mix Manifold Models 66 XP unit shown ...

Страница 48: ...Parts 48 3A0420V Cart Mounted System Continued 31 30 36 35 Quickset Mix Manifold Models TI19233a ...

Страница 49: ...WHEEL flat free urethane 2 15 258982 HANDLE cart 1 16 101242 RING retaining ext 2 19 16F206 LABEL handles 1 21 111218 CAP tube square 4 24 H75003 HOSE coupled 7250 psi 0 50 ID 3 ft 2 37 106212 SCREW cap hex head 2 38 116139 GRIP handle 2 47 206995 FLUID TSL 1 qt 1 49 15U654 LABEL identification A B 1 50 555357 SCREW 4 53 124259 BRAKE plunger clamp 1 54 124291 PIN spring 2 58 116704 ADAPTER 9 16 18...

Страница 50: ...ack 1 1 1 1 1 1 1 1 1 1 1 29 150287 COUPLING 1 1 1 1 1 1 1 1 1 1 1 30 H42510 HOSE coupled 4500 psi 0 25 ID 10 ft 1 1 1 1 1 1 1 1 1 1 1 31 XTR504 GUN XTR5 1 1 1 1 1 1 1 1 1 1 1 32 162024 COUPLING 2 2 2 2 2 2 2 2 2 2 2 35 262784 MANIFOLD recirculation 1 2 valves 1 1 1 1 1 1 1 1 1 1 1 1 1 1 1 1 1 1 1 1 1 36 262807 MANIFOLD mix 1 2 valves 1 1 1 1 1 1 1 1 1 1 1 41 158683 FITTING elbow 90 degree 2 2 2 2...

Страница 51: ...xer 3 3 3 3 3 3 3 3 3 3 3 3 3 3 3 28 248927 KIT mixer element 25 pack 1 1 1 1 1 1 1 1 1 1 1 1 1 1 1 29 150287 COUPLING 1 1 1 1 1 1 1 1 1 1 1 1 1 1 1 31 XTR504 GUN XTR5 1 1 1 1 1 1 1 1 1 1 1 1 1 1 1 32 162024 COUPLING 2 2 2 2 2 2 2 2 2 2 2 2 2 2 2 35 262783 MANIFOLD recirculation 1 2 valves 1 1 1 1 1 1 1 1 1 1 1 1 1 1 1 1 1 1 1 1 1 1 1 1 1 1 1 36 262807 MANIFOLD mix 1 2 valves 1 1 1 1 1 1 1 1 1 1 1...

Страница 52: ...2 2 28 248927 KIT mixer element 25 pack 1 1 1 1 1 1 1 1 31 248844 GUN Flex 1 1 1 1 1 1 1 1 32 162024 COUPLING 1 1 1 1 1 1 1 1 35 262783 MANIFOLD recirculation 1 2 valves 1 1 1 1 1 1 1 1 36 24M398 MANIFOLD Quickset 1 1 1 1 1 1 1 1 41 158683 FITTING elbow 90 degree 2 2 2 2 2 2 2 2 51 124450 CLAMP spring constant tension 2 2 2 2 55 24E872 BRACKET hopper 2 2 2 2 56 262479 HOPPER blue 1 1 1 1 57 262480...

Страница 53: ... 248927 KIT mixer element 25 pack 1 1 1 1 1 1 1 1 1 1 1 1 1 29 150287 COUPLING 1 1 1 1 1 1 1 1 1 1 1 1 1 30 H72510 HOSE coupled 7250 psi 0 25 ID 10 ft 1 1 1 1 1 1 1 1 1 1 1 1 1 31 XTR704 GUN XTR7 1 1 1 1 1 1 1 1 1 1 1 1 1 32 162024 COUPLING 2 2 2 2 2 2 2 2 2 2 2 2 2 35 262806 MANIFOLD recirculation 1 2 valves 1 1 1 1 1 1 1 1 1 1 1 1 1 36 262807 MANIFOLD mix 1 2 valves 1 1 1 1 1 1 1 1 1 1 1 1 1 41 ...

Страница 54: ...1 1 1 1 29 150287 COUPLING 1 1 1 1 1 1 1 1 1 1 30 H52510 HOSE coupled 5600 psi 25 ID 10 ft 1 1 1 1 1 1 1 1 1 1 31 XTR504 GUN XTR5 1 1 1 1 1 1 1 1 1 1 32 162024 COUPLING 2 2 2 2 2 2 2 2 2 2 35 262783 MANIFOLD recirculation 1 2 valves 1 1 1 1 1 1 1 1 1 1 36 262807 MANIFOLD mix 1 2 valves 1 1 1 1 1 1 1 1 1 1 41 158683 FITTING elbow 90 degree 2 4 2 4 2 4 2 4 2 4 48 101566 NUT lock 2 2 2 2 2 2 2 2 2 2 ...

Страница 55: ... KIT mixer element 25 pack 1 1 1 1 1 1 1 1 1 1 29 150287 COUPLING 1 1 1 1 1 1 1 1 1 1 30 H72510 HOSE coupled 7250 psi 25 ID 10 ft 1 1 1 1 1 1 1 1 1 1 31 XTR704 GUN XTR7 1 1 1 1 1 1 1 1 1 1 32 162024 COUPLING 2 2 2 2 2 2 2 2 2 2 35 262806 MANIFOLD recirculation 1 2 valves 1 1 1 1 1 1 1 1 1 1 36 262807 MANIFOLD mix 1 2 valves 1 1 1 1 1 1 1 1 1 1 41 158683 FITTING elbow 90 degree 2 4 2 4 2 4 2 4 2 4 ...

Страница 56: ...onto pumps 17 18 as shown Do not apply lubricant Torque to 70 80 ft lb 95 108 N m Apply lithium grease to mating tapered surfaces 1 2 3 4 5 6 7 r_258914_3A0420A_2a r_258914_3A0420A_3a 101 102 103 104 109 108 107 110 123 121 101 134 131 116 116 112 130 130 138 122 128 106 105 117 117 or 118 108 137 136 139 129 135 122 120 119 1 1 1 1 2 3 4 113 5 3 133 140 3 6 111 7 7 Model 571100 shown ...

Страница 57: ... MOTOR 6500 de icing 1 1 1 1 1 1 1 1 1 1 1 1 1 104 262467 ROD adapter 1 1 1 1 1 1 1 1 1 1 1 1 1 1 1 1 1 1 16M654 ADAPTER motor 1 1 1 1 1 1 1 1 1 1 1 1 1 1 1 117 L085C0 PUMP LOWER 85cc 1 L090C0 PUMP LOWER 90cc 2 1 2 1 2 L115C0 PUMP LOWER 115cc 1 1 1 1 L14AC0 PUMP LOWER 145cc 1 1 1 2 1 2 1 1 1 1 1 1 1 L18AC0 PUMP LOWER 180cc 1 1 1 1 1 L22AC0 PUMP LOWER 220cc 1 1 2 1 1 L29AC0 PUMP LOWER 290cc 1 1 1 1...

Страница 58: ... 202 207675 MANIFOLD air 1 203 113218 VALVE ball 1 204 100509 PLUG 1 4 npt 1 205 100403 PLUG 1 8 npt 1 206 160327 FITTING union 90 3 4 male x female 2 207 101689 GAUGE pressure air 1 208 155699 FITTING elbow street 3 8 npt 3 209 119992 FITTING pipe nipple 3 4 x 3 4 npt 2 210 117628 FITLTER air auto drain 3 4 npt 1 210a 106204 ELEMENT filter 3 4 npt 1 211 157785 FITTING union 3 4 male x female 2 21...

Страница 59: ...a0420a_1c 318 318 302 2 3 4 4 304 320 320 311 304 3 3 6 5 5 6 Ref Part Description Qty 301 16D693 BLOCK manifold recirculation 1 302 262520 VALVE over pressure relief silver XP70 2 262809 VALVE over pressure relief gold XP50 2 262808 VALVE over pressure relief purple XP35 2 303 156684 UNION 1 2 in male x female 2 304 112309 NUT hex jam 2 305 198241 PLUG port pressure 11 16 24 2 307 114434 GAUGE pr...

Страница 60: ...e with XP h 284x01 assemblies XP50 262809 gold also for use with XP h 284x02 assemblies XP70 262520 silver also for use with XP h 284x03 assemblies 15K692 Seal Mix Manifold Check Valve Cartridge NOTE 15K692 must be replaced when cleaning the check valves 1 2 in Mix Manifold Inlet Ball Valves 24M601 Ball valve repair kit 262740 Spare valve no handle 262739 Spare valve single handle 248927 Spare Mix...

Страница 61: ...rom a 55 gallon drum to XP system See manual 312769 for more information 10 1 Drum Feed Kit 256433 For supplying highly viscous material from a 55 gallon drum to XP system See manual 312769 for more infor mation 20 Gallon Hopper Kit 255963 Floor Stand for 20 Gal Hopper 262824 1 1 2 in ID Hose Flex Feed Kit 262820 XP Wall Mount Bracket 262812 Works with air or hydraulic XP systems Leg Stand 24M281 ...

Страница 62: ...feed kit and one Twistork agitator kit for mixing and supplying viscous materials from a 55 gallon drum to XP system See manual 312769 for more infor mation Wall Powered Pressure Monitor Kit 262940 Air Powered Pressure Monitor Kit 262942 Automatically monitors difference between A and B pressures when at spray pressure and shuts down the system if there is a problem GH Power Pack 24X011 Hydraulic ...

Страница 63: ...ecommended maintenance and periodic rebuilds for critical parts Power Efficiency Factor XP70 75 cu ft compressed air 1 gallon sprayed material at 100 psi 2 12 m3 compressed air 1 liter sprayed material at 7 bar 0 7 MPa Air consumption per 1 gallon 3 78 l of flow XP70 75 scfm at 100 psi gpm 2 12 m3 min at 7 bar 0 7 MPa XP50 60 scfm at 100 psi gpm 1 7 m3 min at 7 bar 0 7 MPa XP35 50 scfm at 100 psi ...

Страница 64: ...P35 XP50 or XP70 system with no heaters solvent flush pump or hoppers 425 lb 193 kg Bare XP h System with no heaters solvent flush pump or hoppers 450 lb 204 kg XP35 XP50 or XP70 Pump only 286 lb 130 kg XP h Pump only 290 lb 132 kg WL D 32 in 813 mm 52 in 1321 mm 60 in 1524 mm r_571100_3a0420_101a r_571100_3a0420_100a 35 in 889 mm Full System Bare System Top View Side View XP System XP h System 63...

Страница 65: ...Dimensions 3A0420V 65 6 75 in 171 45 mm 16 90 in 429 26 mm 40 in 1016 mm 15 25 in 387 35 mm 22 in 558 8 mm 32 in 812 8 mm Floor Mounting Dimensions Top View ...

Страница 66: ...ions below is the minimum opening size for mounting a bare proportioner 7 5 in 190 5 mm 3 75 in 95 25 mm 5 06 in 128 52 mm 10 375 in 263 525 mm 3 8 16 4x 10 125 in 257 175 mm 14 35 in 364 49 mm 9 25 in 234 95 mm 0 25 in 6 35 mm 150 4x 120 4x 2 25 in 57 15 mm 4 05 in 102 87 mm ...

Страница 67: ...Dimensions 3A0420V 67 Wall Mount Bracket 262812 Dimensions 15 0 in 381 mm ti19046a 17 9 in 455 mm 18 4 in 467 mm 11 8 in 300 mm 9 75 in 248 mm ...

Страница 68: ...3A0420V Floor Stand 24M281 Dimensions Hydraulic Unit Dimensions ti19047a 21 2 in 538 mm 30 3 in 770 mm 17 8 in 451 mm 32 7 in 829 mm ti19048a 53 in 1346 mm 30 3 in 770 mm 17 8 in 451 mm Shown installed on floor stand ...

Страница 69: ...Dimensions 3A0420V 69 ...

Страница 70: ...ot disclose any defect in material or workmanship repairs will be made at a reasonable charge which charges may include the costs of parts labor and transportation THIS WARRANTY IS EXCLUSIVE AND IS IN LIEU OF ANY OTHER WARRANTIES EXPRESS OR IMPLIED INCLUDING BUT NOT LIMITED TO WARRANTY OF MERCHANTABILITY OR WARRANTY OF FITNESS FOR A PARTICULAR PURPOSE Graco s sole obligation and buyer s sole remed...

Отзывы: