46
2. Inspect each refractory module for damage. Small
cracks and chips in the refractory are normal. If
large pieces of the refractory modules are missing,
contact your Central Boiler dealer.
3. Install the secondary air charge tube making sure the
alignment pin is seated in the alignment hole in the
refractory modules.
3-13. Optional Gas-fi red Wood Ignition
Burner Maintenance
For annual inspection, cleaning and maintenance of the
optional gas-fi red wood ignition burner, contact your
Central Boiler dealer or qualifi ed service technician.
3-14. Primary Air Elbow
1. Disconnect the electrical power to the outdoor
furnace at the main power source; then turn off the
gas supply at the appliance service valve.
WARNING
Do not proceed without testing that power is
disconnected. Make sure the power cannot be
reconnected while servicing the solenoids (i.e.,
use lock out, tag out).
2. Open the rear access door; then open the airbox
cover.
3. Disconnect the power leads from the solenoid.
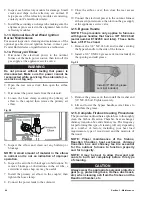
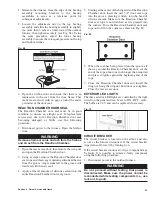
4. Loosen the hose clamp securing the primary air
elbow to the coupler; then remove the primary air
elbow.
Fig. 58
©2013 Central Boiler
Air Tube
5. Inspect the elbow and clean out any build-up or
blockage.
NOTE: A small amount of material in the elbow
is normal and is not an indication of improper
operation.
6. Inspect the air tube for blockage or obstructions. To
remove blockage or obstructions in the air tube, a
screwdriver and a shop vac may be useful.
7. Install the primary air elbow in the coupler; then
tighten the hose clamp.
8. Connect the power leads to the solenoid.
9. Close the airbox cover; then close the rear access
door.
10. Connect the electrical power to the outdoor furnace
at the main power source; then turn on the gas supply
at the appliance service valve.
3-15. Bypass Handle
NOTE: This procedure only applies to furnaces
with bypass handles that have a 3/8" NF-24 bolt
(serial number E102458 and later). These bolts
have a 9/16" hex head.
1. Remove the 3/8" NF-24 bolt and washer securing
the bypass handle to the side of the furnace.
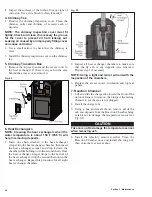
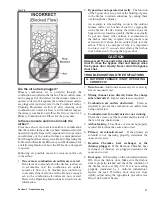
2. Install a 3/8" UNF-24 grease zerk (not included) in
the opening and add grease.
Fig. 59
Install 3/8" UNF-24 grease
zerk (not included)
3. Remove the grease zerk; then install the washer and
3/8" NF-24 bolt. Tighten securely.
4. Lift and lower the bypass handle several times to
distribute the grease.
3-16. Complete Firebox Cleaning Procedures
The procedures outlined here explain how to thoroughly
clean the fi rebox, Reaction Chamber, heat exchanger,
chimney transition box and chimney tee. The frequency
for performing this type of cleaning will vary depending
on a number of factors, including your heat load
requirements, type of wood used, and the moisture of
the wood.
NOTE: Proper maintenance of the firebox,
Reaction Chamber, heat exchanger, chimney
transition box and chimney tee are essential
for the outdoor furnace to function properly
and for longevity.
NOTE: It may be best to allow the wood and
coals to burn out completely before this type
of cleaning.
CAUTION
Always wear the appropriate personal protective
gear (e.g., protective gloves, clothes, dust mask,
etc.) when cleaning ash from the fi rebox and the
Reaction Chamber, etc.
Section 3 - Maintenance
Содержание e-Classic 1450 IR
Страница 17: ...15 Section 1 Outdoor Furnace Installation...
Страница 29: ...27 Section 1 Outdoor Furnace Installation Fig 30 Fig 31...
Страница 30: ...28 Section 1 Outdoor Furnace Installation Fig 32 Fig 33...
Страница 66: ...64 E CLASSIC 1450 WIRING DIAGRAM Section 6 General Information...
Страница 67: ...65 Section 6 General Information E CLASSIC 1450 WIRING DIAGRAM OPTIONAL POWER IGNITION...
Страница 69: ...67 NOTES...
Страница 70: ...68 NOTES...
Страница 71: ...69 NOTES...

