


12
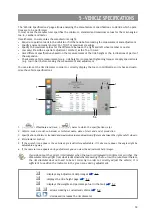
: switch between the car or the truck procedure
: switch between the mode with 2 or 4 measuring heads
: menu
: settings page
: customer databank page
: test
: calibration
: goes directly to measurement without selecting the vehicle
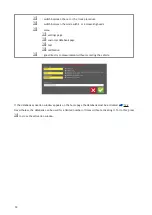
If the databank activation window appears on the home page the databank must be activated
13.2
Nevertheless, the databank can be used for a limited number of times without activating it. To do this, press
to close the activation window.
Содержание DWA1100
Страница 6: ...4...
Страница 20: ...18 saves the informations and exits 4 2 Customer informations Press to insert customer informations...
Страница 62: ......