A.
A
A.
A
A.
A
150
This screw is on
centre of roof.
Back
Roof Support
Assembly
3”
1-1/2”
S3
(one screw hidden at back)
5”
5”
5”
Front
S3
S3
F:
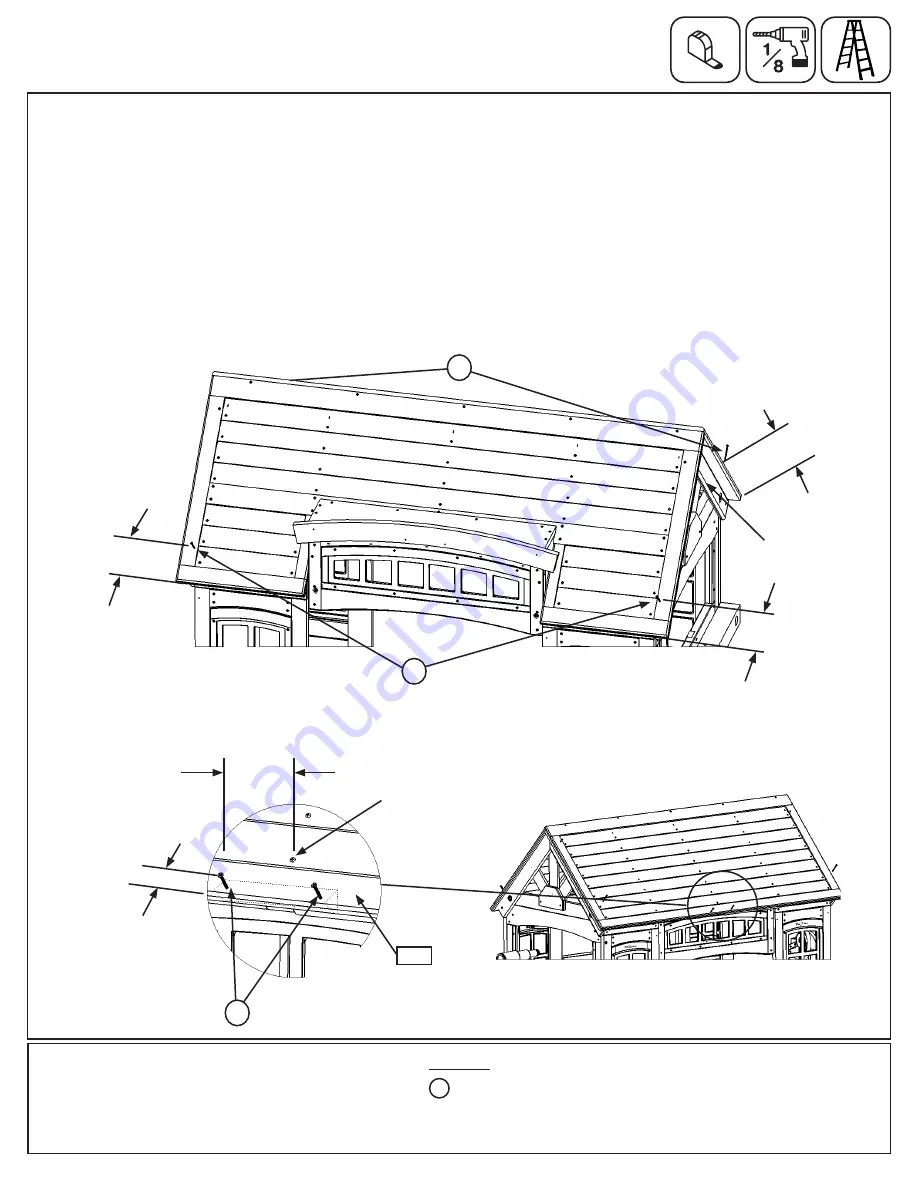
At each corner of the Roof Assembly, measure 5” up from the bottom and pre-drill pilot holes into the centre of
the Roof Support Assemblies with a 1/8” drill bit. (fig. 21.7)
G:
Attach the Roof Assembly to the Roof Support Assemblies with 2 (S3) #8 x 2-1/2” Wood Screws per side, as
shown in fig. 21.7.
H:
On the Back side of the fort, pre-drill pilot holes into the Roof Assembly, 3” on either side of the middle roof
screw and 1-1/2” up from the bottom of the assembly as shown in fig. 21.8 and 21.9. Make sure to pre-drill into
(150) Roof Gusset which is behind the Roof Assembly. Attach Roof Assembly to (150) Roof Gusset with 2 (S3)
#8 x 2-1/2” Wood Screws. (fig. 21.9)
Step 21: Attach Roof Assembly to Fort
Part 4
Fig. 21.7
6 x
#8 x 2-1/2” Wood Screw
S3
Hardware
Fig. 21.9
Fig. 21.8
85
Содержание WESTON LODGE DELUXE - F25529
Страница 129: ...NOTES 129 support cedarsummitplay com ...


