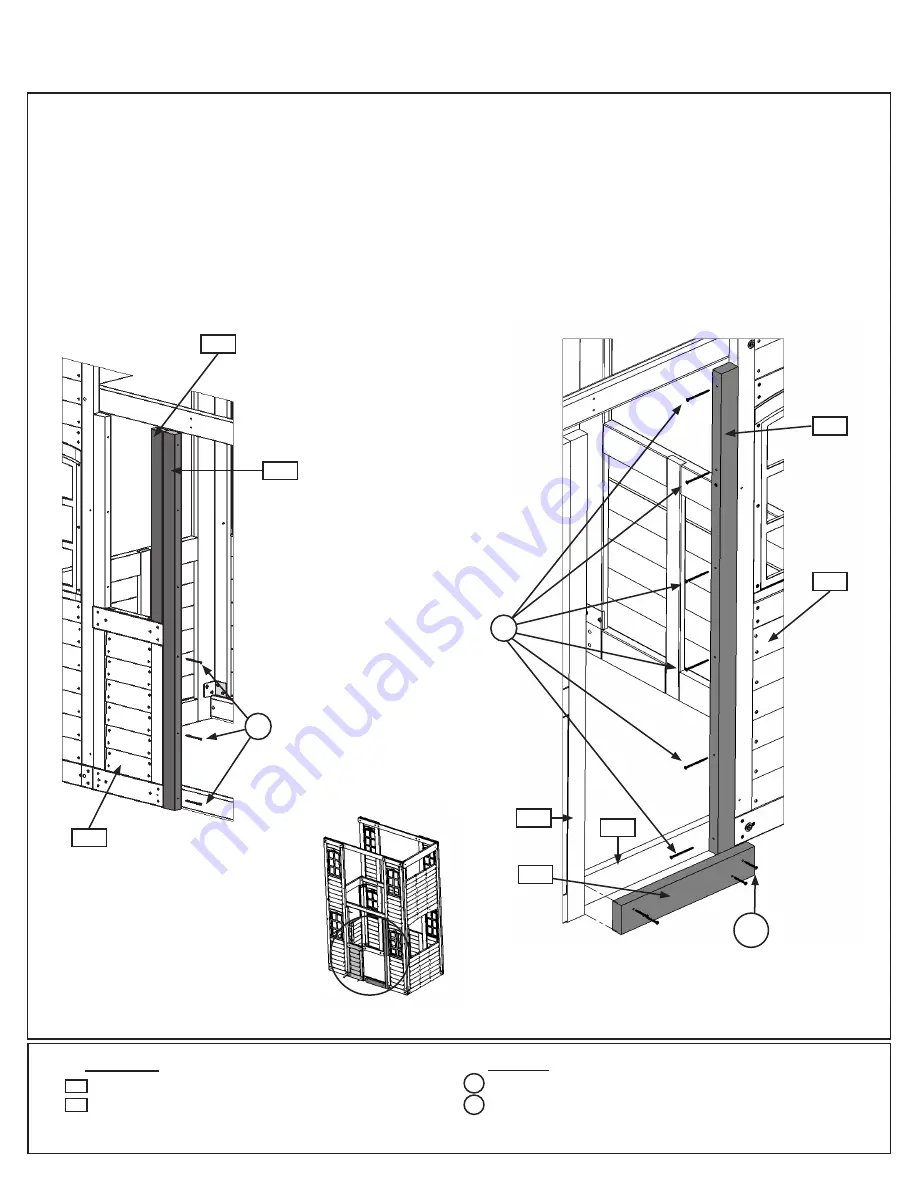
Fig. 6.7
Step 6: Door Wall Assembly
Part 3
D:
Place the assembly from Step 6, Part 1 tight to (064) Chalkwall Panel so (062) Chalkwall Side sits tight on top
of (064) Chalkwall Panel, then attach with 3 (S4) #8 x 3” Wood Screws, as shown in fig. 6.5.
E:
Tight to (030) Narrow Window Panel on the left side and flush to the bottom of (041) Wall Tie, attach (063)
Door Side to (030) Narrow Window Panel with 6 (S4) #8 x 3” Wood Screws. (fig. 6.6 and 6.7)
F:
Between both (063) Door Sides attach (065) Door Bottom to (041) Wall Tie with 4 (S15) #8 x 1-3/4” Wood
Screws (fig. 6.7)
063
Hardware
1 x
Door Side 1-1/4 x 2-1/4 x 54”
1 x
Door Bottom 1-1/4 x 3-1/4 x 17-3/4”
063
Wood Parts
065
S4
030
041
065
S15
063
4 x
#8 x 1-3/4” Wood Screw
9 x
#8 x 3” Wood Screw
S15
S4
Fig. 6.6
064
S4
063
062
Fig. 6.5
x 4
41
Содержание WESTON LODGE DELUXE - F25529
Страница 129: ...NOTES 129 support cedarsummitplay com ...


