Hardware
16 x
#12 x 3/4” Pan Screw
S8
1 x
Chalkwall Panel 1-1/4 x 28-1/2 x 102”
1 x
SL Side Panel 1-1/4 x 38-1/2 x 54-1/8”
1 x
Post 2 x 4 x 102”
Wood Parts
Other Parts
4 x
2 x 2-1/4” Corner Panel Bracket
2527
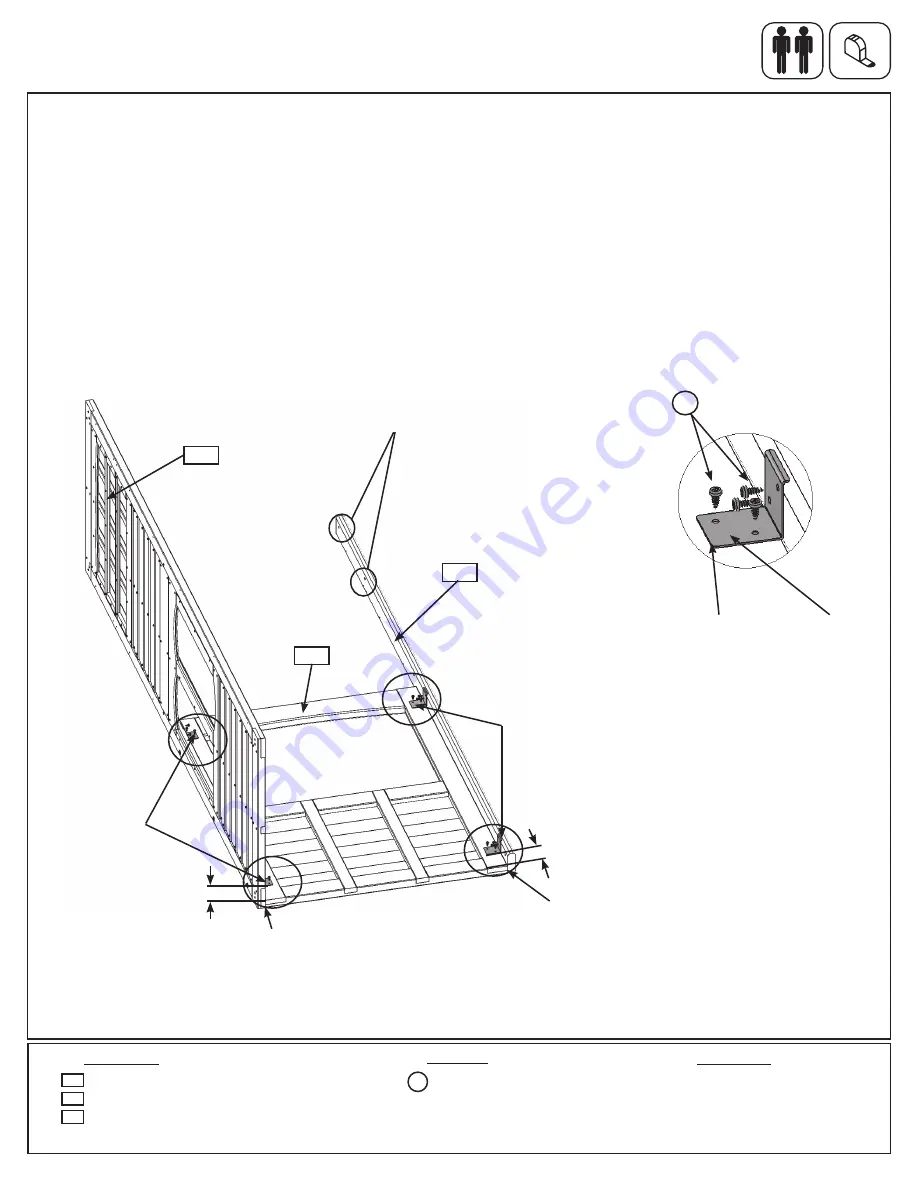
Step 5: Slide Wall Panel Assembly
Part 1
A:
Place (2529) SL Side Panel on the ground then measure 4” up from the bottom of the panel and 4” down from
the top of the panel on both sides and attach four 2 x 2-1/4” Corner Panel Brackets to the panel with 2 (S8) #12 x
3/4” Pan Screws per bracket. The flat edge of the bracket must be sitting flat against the panel. (fig. 5.1 and 5.2)
B:
With a helper hold (2527) Chalkwall Panel up against the left side edge of (2529) SL Side Panel so the bottom
edges are flush. Attach Corner Panel Brackets to (2527) Chalkwall Panel with 2 (S8) #12 x 3/4” Pan Screws per
bracket. (fig. 5.1 and 5.2)
C:
Place (2473) Post up against the right side of (2529) SL Side Panel so the bottom edges are flush, noticing the
hole locations in the top of the board, then attach Corner Panel Brackets to (2473) Post with 2 (S8) #12 x 3/4” Pan
Screws per bracket. (fig. 5.1 and 5.2).
2529
2473
Flat edge
Fig. 5.2
2527
Fig. 5.1
S8
2 x 2-1/4”
Corner Panel
Bracket
2473
x 4 per
bracket
2 x 2-1/4” Corner
Panel Bracket
4”
2529
4”
Flush
Flush
2 x 2-1/4” Corner
Panel Bracket
Bottom
Notice holes
facing up
27
Содержание Abbeydale Clubhouse F23920
Страница 90: ...NOTES 90 support cedarsummit com ...
Страница 91: ...NOTES ...


