


VRC2100 Vending Reader
19
Installation Guide
4.2 Remotely Read and Change VRC2100 Configuration
The VRC2100 must first be powered up and the network port configured
as described in sections 3.1 through 3.5 of this guide, as appropriate,
before proceeding with the following instructions. Also, the VRC2100
must be configured using the switches before the VRC2100 Flash Updater
and Configurator utility can be used correctly.
1.
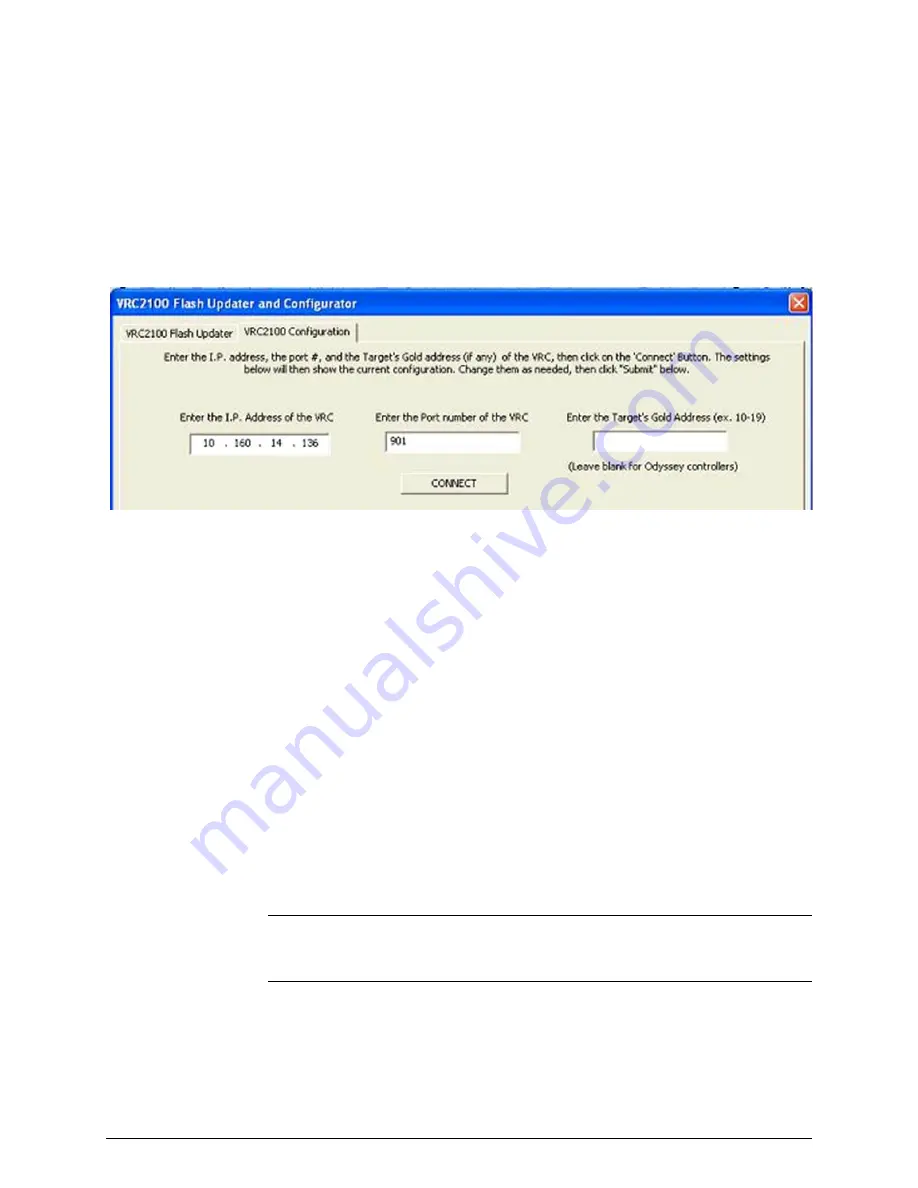
On the
VRC2100 Configuration
tab of the
VRC2100 Flash
Updater and Configurator
screen, enter the IP address of the
individual reader to be configured in the
Enter the I.P. Address of
the VRC
field. The IP address can usually be found on the bottom of
the nameplate on the back panel of the reader. In a daisy-chain
group, use the IP address of the Master.
2.
Enter the terminal server port number of the individual reader in the
Enter the Port number of the VRC
field. In a daisy-chain group,
use the port number of the Master.
3.
Enter the polling address number for the specific reader to be
configured in the
Enter the Target’s Gold Address (ex. 10-19)
field (this is usually a number from 10 to 19). This entry is currently
ignored for Odyssey.
4.
Click
CONNECT
. The program will send a configuration request to
the reader which will respond, filling in the form with its current
configuration. If the reader does not respond, check the setup and try
again.
Note:
To restore the original settings before clicking
SUBMIT
CHANGES
, click the
Refresh Values from VRC
button to refresh the
screen with the current values from the reader.