background image

Preface
Legal Notices

xxv

AH0054602-00  J

2006/95/EC low voltage directive

:

TUV EN60950-1:2006+A11+A1+A12+A2 2nd Edition
TUV IEC 60950-1: 2005 2nd Edition Am1: 2009 + Am2: 2013 CB

CB Certified to IEC 60950-1 2nd Edition

Содержание 41 Series

Страница 1: ...AH0054602 00 J Third party information brought to you courtesy of Dell EMC User s Guide Converged Network Adapters 41xxx Series ...

Страница 2: ... Removed support for ESXi 6 0 U3 and later for 25G adapters Added support for vSphere ESXi 6 5 U2 and vSphere ESXi 6 7 U1 System Requirements on page 4 Following Step 4 added a note The maximum number of supported qedentv Ethernet interfaces on an ESXi host is 32 because the vmkernel allows only 32 interfaces to register for manage ment callback Installing VMware Drivers on page 29 Added a note de...

Страница 3: ...ing iWARP on Windows on page 167 In the To configure the NFS server procedure Added a new Step 1 that describes how to create an nfs server directory and grant permission In Step 2 added rw to the command Replaced Step 4 for loading the service Configuring NFS RDMA on page 175 In the To configure the NFS client procedure Added a new Step 1 that describes how to create an nfs client directory and g...

Страница 4: ...e VLAN ID must be assigned to all the interfaces and on the switch Adding a vLAN ID to Host Virtual NIC on page 240 Deleted the obsolete section Default and Maximum VMMQ Virtual NIC Configuring VMMQ on page 254 In Step 4 deleted the note and example Creating a VM and Enabling VMMQ on VMNet workadapters in the VM on page 257 In the first bullet deleted the statement The Management OS VNIC has four ...

Страница 5: ...erview Functional Description 1 Features 1 Adapter Specifications 3 Physical Characteristics 3 Standards Specifications 3 2 Hardware Installation System Requirements 4 Safety Precautions 5 Preinstallation Checklist 6 Installing the Adapter 6 3 Driver Installation Installing Linux Driver Software 8 Installing the Linux Drivers Without RDMA 10 Removing the Linux Drivers 10 Installing Linux Drivers U...

Страница 6: ...ptions 27 Installing VMware Driver Software 27 VMware Drivers and Driver Packages 28 Installing VMware Drivers 29 VMware NIC Driver Optional Parameters 31 VMware Driver Parameter Defaults 32 Removing the VMware Driver 33 FCoE Support 33 iSCSI Support 34 4 Upgrading the Firmware Running the DUP by Double Clicking 35 Running the DUP from a Command Line 37 Running the DUP Using the bin File 38 5 Adap...

Страница 7: ...he iSCSI Targets 92 Detecting the iSCSI LUN and Injecting the QLogic Drivers 92 Configuring iSCSI Boot from SAN on Linux 94 Configuring iSCSI Boot from SAN for RHEL 7 5 and Later 95 Configuring iSCSI Boot from SAN for SLES 12 SP3 and Later 96 Configuring iSCSI Boot from SAN for Other Linux Distributions 97 Configuring iSCSI Boot from SAN on VMware 109 Setting the UEFI Main Configuration 109 Config...

Страница 8: ...unters 138 Configuring RoCE on the Adapter for Linux 143 RoCE Configuration for RHEL 144 RoCE Configuration for SLES 144 Verifying the RoCE Configuration on Linux 145 vLAN Interfaces and GID Index Values 147 RoCE v2 Configuration for Linux 148 Identifying the RoCE v2 GID Index or Address 148 Verifying the RoCE v1 or RoCE v2 GID Index and Address from sys and class Parameters 149 Verifying the RoCE...

Страница 9: ...ng NFS RDMA 175 iWARP RDMA Core Support on SLES 12 SP3 and OFED 4 8x 176 9 iSER Configuration Before You Begin 179 Configuring iSER for RHEL 180 Configuring iSER for SLES 12 183 Using iSER with iWARP on RHEL and SLES 184 Optimizing Linux Performance 186 Configuring CPUs to Maximum Performance Mode 186 Configuring Kernel sysctl Settings 186 Configuring IRQ Affinity Settings 187 Configuring Block De...

Страница 10: ...ing IOMMU for SR IOV in UEFI based Linux OS Installations 220 Configuring SR IOV on VMware 221 13 NVMe oF Configuration with RDMA Installing Device Drivers on Both Servers 228 Configuring the Target Server 229 Configuring the Initiator Server 231 Preconditioning the Target Server 232 Testing the NVMe oF Devices 233 Optimizing Performance 234 IRQ Affinity multi_rss affin sh 235 CPU Frequency cpufre...

Страница 11: ...the VM 257 Enabling and Disabling VMMQ on a Management NIC 258 Monitoring Traffic Statistics 258 Configuring VXLAN 258 Enabling VXLAN Offload on the Adapter 259 Deploying a Software Defined Network 259 Configuring Storage Spaces Direct 260 Configuring the Hardware 260 Deploying a Hyper Converged System 261 Deploying the Operating System 261 Configuring the Network 261 Configuring Storage Spaces Di...

Страница 12: ... in VMware 275 Testing Network Connectivity 275 Testing Network Connectivity for Windows 275 Testing Network Connectivity for Linux 276 Microsoft Virtualization with Hyper V 276 Linux specific Issues 276 Miscellaneous Issues 276 Collecting Debug Data 277 A Adapter LEDS B Cables and Optical Modules Supported Specifications 279 Tested Cables and Optical Modules 280 Tested Switches 284 C Dell Z9100 S...

Страница 13: ...nfiguration Page 42 5 4 Main Configuration Page Setting Partitioning Mode to NPAR 42 5 5 Firmware Image Properties 44 5 6 Device Level Configuration 45 5 7 NIC Configuration 46 5 8 System Setup Data Center Bridging DCB Settings 50 5 9 FCoE General Parameters 51 5 10 FCoE Target Configuration 52 5 11 iSCSI General Parameters 54 5 12 iSCSI Initiator Configuration Parameters 55 5 13 iSCSI First Targe...

Страница 14: ...ngs Target for VMware 112 6 26 VMware iSCSI BFS Selecting a Disk to Install 113 6 27 VMware iSCSI Boot from SAN Successful 114 6 28 System Setup Selecting Device Settings 116 6 29 System Setup Device Settings Port Selection 117 6 30 System Setup NIC Configuration 118 6 31 System Setup FCoE Mode Enabled 119 6 32 System Setup FCoE General Parameters 120 6 33 System Setup FCoE General Parameters 121 ...

Страница 15: ... 12 9 System Setup for SR IOV Integrated Devices 216 12 10 Editing the grub conf File for SR IOV 217 12 11 Command Output for sriov_numvfs 218 12 12 Command Output for ip link show Command 218 12 13 RHEL68 Virtual Machine 219 12 14 Add New Virtual Hardware 220 12 15 VMware Host Edit Settings 224 13 1 NVMe oF Network 227 13 2 Subsystem NQN 231 13 3 Confirm NVMe oF Connection 232 13 4 FIO Utility In...

Страница 16: ...xvi AH0054602 00 J User s Guide Converged Network Adapters 41xxx Series 14 16 Advanced Properties Enabling VXLAN 259 14 17 Example Hardware Configuration 260 15 1 RSSv2 Event Log Error 268 ...

Страница 17: ... Support 65 6 2 iSCSI General Parameters 76 6 3 DHCP Option 17 Parameter Definitions 85 6 4 DHCP Option 43 Sub option Definitions 86 6 5 DHCP Option 17 Sub option Definitions 88 6 6 FCoE Out of Box and Inbox Boot from SAN Support 115 7 1 OS Support for RoCE v1 RoCE v2 iWARP iSER and OFED 131 7 2 Advanced Properties for RoCE 135 7 3 Cavium FastLinQ RDMA Error Counters 140 7 4 DCQCN Algorithm Parame...

Страница 18: ...et QL41162HLRJ DE 10Gb Converged Network Adapter low profile bracket QL41162HMRJ DE 10Gb Converged Network Adapter QL41164HMCU DE 10Gb Converged Network Adapter QL41164HMRJ DE 10Gb Converged Network Adapter QL41262HFCU DE 10 25Gb Converged Network Adapter full height bracket QL41262HLCU DE 10 25Gb Converged Network Adapter low profile bracket QL41262HMCU DE 10 25Gb Converged Network QL41264HMCU DE...

Страница 19: ...6 Boot from SAN Configuration covers boot from SAN configuration for both iSCSI and FCoE Chapter 7 RoCE Configuration describes how to configure the adapter the Ethernet switch and the host to use RDMA over converged Ethernet RoCE Chapter 8 iWARP Configuration provides procedures for configuring Internet wide area RDMA protocol iWARP on Windows Linux and VMware ESXi 6 7 systems Chapter 9 iSER Conf...

Страница 20: ...on conventions provides additional information without an alert symbol indicates the presence of a hazard that could cause damage to equipment or loss of data with an alert symbol indicates the presence of a hazard that could cause minor or moderate injury indicates the presence of a hazard that could cause serious injury or death Text in blue font indicates a hyperlink jump to a figure table or s...

Страница 21: ... mm is the month dd is the day and yyyy is the year Topic titles between quotation marks identify related topics either within this manual or in the online help which is also referred to as the help system throughout this document Command line interface CLI command syntax conventions include the following Plain text indicates items that you must type as shown For example qaucli pr nic ei angle bra...

Страница 22: ...ection include laser safety FDA notice agency certification and product safety compliance Laser Safety FDA Notice This product complies with DHHS Rules 21CFR Chapter I Subchapter J This product has been designed and manufactured according to IEC60825 1 on the safety label of laser product Class 1 Laser Product Caution Class 1 laser radiation when open Do not view directly with optical instruments ...

Страница 23: ...interference that may cause undesired operation ICES 003 Compliance Class A This Class A digital apparatus complies with Canadian ICES 003 Cet appareil numériqué de la classe A est conformé à la norme NMB 003 du Canada CE Mark 2014 30 EU 2014 35 EU EMC Directive Compliance EN55032 2012 CISPR 32 2015 Class A EN55024 2010 EN61000 3 2 Harmonic Current Emission EN61000 3 3 Voltage Fluctuation and Flic...

Страница 24: ...No 60950 1 07 2nd Edition A1 A2 2014 10 Use only with listed ITE or equivalent Complies with 21 CFR 1040 10 and 1040 11 2014 30 EU 2014 35 EU Product Name Model Converged Network Adapters and Intelligent Ethernet Adapters Certification holder QLogic Corporation Manufactured date Refer to date code listed on product Manufacturer Country of origin QLogic Corporation USA A class equipment Business pu...

Страница 25: ...ce Legal Notices xxv AH0054602 00 J 2006 95 EC low voltage directive TUV EN60950 1 2006 A11 A1 A12 A2 2nd Edition TUV IEC 60950 1 2005 2nd Edition Am1 2009 Am2 2013 CB CB Certified to IEC 60950 1 2nd Edition ...

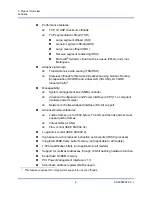
Страница 26: ...es a 10 25Gb Ethernet MAC with full duplex capability Using the operating system s teaming feature you can split your network into virtual LANs vLANs as well as group multiple network adapters together into teams to provide network load balancing and fault tolerance For more information about teaming see your operating system documentation Features The 41xxx Series Adapters provide the following f...

Страница 27: ...Configuration and Power Interface ACPI 1 1a compliant multiple power modes Network controller sideband interface NC SI support Advanced network features Jumbo frames up to 9 600 bytes The OS and the link partner must support jumbo frames Virtual LANs vLANs Flow control IEEE Std 802 3x Logical link control IEEE Std 802 2 High speed on chip reduced instruction set computer RISC processor Integrated ...

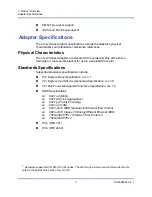
Страница 28: ...rds Specifications Supported standards specifications include PCI Express Base Specification rev 3 1 PCI Express Card Electromechanical Specification rev 3 0 PCI Bus Power Management Interface Specification rev 1 2 IEEE Specifications 802 1ad QinQ 802 1AX Link Aggregation 802 1p Priority Encoding 802 1q VLAN 802 3 2015 IEEE Standard for Ethernet flow control 802 3 2015 Clause 78 Energy Efficient E...

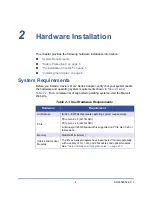
Страница 29: ...n Table 2 1 and Table 2 2 For a complete list of supported operating systems visit the Marvell Web site Table 2 1 Host Hardware Requirements Hardware Requirement Architecture IA 32 or EMT64 that meets operating system requirements PCIe PCIe Gen 2 x8 2x10G NIC PCIe Gen 3 x8 2x25G NIC Full dual port 25Gb bandwidth is supported on PCIe Gen 3 x8 or faster slots Memory 8GB RAM minimum Cables and Optica...

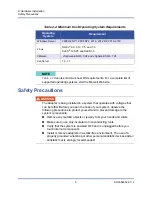
Страница 30: ... the Marvell Web site WARNING The adapter is being installed in a system that operates with voltages that can be lethal Before you open the case of your system observe the following precautions to protect yourself and to prevent damage to the system components Remove any metallic objects or jewelry from your hands and wrists Make sure to use only insulated or nonconducting tools Verify that the sy...

Страница 31: ...ut performing these tasks refer to the manuals that were supplied with the system To install the adapter 1 Review Safety Precautions on page 5 and Preinstallation Checklist on page 6 Before you install the adapter ensure that the system power is OFF the power cord is unplugged from the power outlet and that you are following proper electrical grounding procedures 2 Open the system case and select ...

Страница 32: ...ter port connectors are aligned with the slot opening and the adapter faceplate is flush against the system chassis 6 Secure the adapter with the adapter clip or screw 7 Close the system case and disconnect any personal anti static devices CAUTION Do not use excessive force when seating the card because this may damage the system or the adapter If you have difficulty seating the adapter remove it ...

Страница 33: ...ivers with or without remote direct memory access RDMA It also describes the Linux driver optional parameters default values messages statistics and public key for Secure Boot Installing the Linux Drivers Without RDMA Installing the Linux Drivers with RDMA Linux Driver Optional Parameters Linux Driver Operation Defaults Linux Driver Messages Statistics Importing a Public Key for Secure Boot The 41...

Страница 34: ...r set The qed interfaces with the qede qedr qedi and qedf drivers The Linux core module manages all PCI device resources registers host interface queues and so on The qed core module requires Linux kernel version 2 6 32 or later Testing was concentrated on the x86_64 architecture qede Linux Ethernet driver for the 41xxx Series Adapter This driver directly controls the hard ware and is responsible ...

Страница 35: ...sing the TAR File Removing the Linux Drivers There are two procedures for removing Linux drivers one for a non RDMA environment and another for an RDMA environment Choose the procedure that matches your environment To remove Linux drivers in a non RDMA environment unload and remove the drivers Follow the procedure that relates to the original installation method and the OS If the Linux drivers wer...

Страница 36: ...ame 2 Unload and remove the Linux drivers If the Linux drivers were installed using an RPM package issue the following commands modprobe r qede depmod a rpm e qlgc fastlinq kmp default version arch If the Linux drivers were installed using a TAR file issue the following commands modprobe r qede depmod a 3 Delete the qed ko qede ko and qedr ko files from the directory in which they reside For examp...

Страница 37: ...tlinq kmp default version arch If the drivers were installed using a TAR file issue the following commands for your operating system For RHEL cd lib modules version extra qlgc fastlinq rm rf qed ko qede ko qedr ko For SLES cd lib modules version updates qlgc fastlinq rm rf qed ko qede ko qedr ko Installing Linux Drivers Using the src RPM Package To install Linux drivers using the src RPM package 1...

Страница 38: ...LES use YaST to configure the Ethernet interfaces to automatically start at boot by setting a static IP address or enabling DHCP on the interface Installing Linux Drivers Using the kmp kmod RPM Package To install kmod RPM package 1 Issue the following command at a command prompt rpm ivh qlgc fastlinq version arch rpm 2 Reload the driver modprobe r qede modprobe qede Installing Linux Drivers Using ...

Страница 39: ... in an inbox OFED environment 1 Download the 41xxx Series Adapter Linux drivers from the Dell dell support com 2 Configure RoCE on the adapter as described in Configuring RoCE on the Adapter for Linux on page 143 3 Remove existing Linux drivers as described in Removing the Linux Drivers on page 10 4 Install the new Linux drivers using one of the following methods Installing Linux Drivers Using the...

Страница 40: ...htool s dev msglvl int_mode Controls interrupt mode other than MSI X gro_enable Enables or disables the hardware generic receive offload GRO feature This feature is similar to the kernel s software GRO but is only performed by the device hardware err_flags_override A bitmap for disabling or forcing the actions taken in case of a hardware error bit 31 An enable bit for this bitmask bit 0 Prevent ha...

Страница 41: ... key to load the drivers in a Secure Boot environment Before you begin ensure that your server supports Secure Boot This section provides two methods for importing and enrolling the public key To import and enroll the QLogic public key 1 Download the public key from the following Web page http ldriver qlogic com Module public key 2 To install the public key issue the following command mokutil root...

Страница 42: ...UB 2 menu press the C key 3 Issue the following commands chainloader efibootdir MokManager efi boot 4 Select Enroll key from disk 5 Navigate to the cert der file and then press ENTER 6 Follow the instructions to enroll the key Generally this includes pressing the 0 zero key and then pressing the Y key to confirm For additional information about Secure Boot refer to the following Web page https www...

Страница 43: ...g the DUP in the GUI DUP Installation Options DUP Installation Examples Running the DUP in the GUI To run the DUP in the GUI 1 Double click the icon representing the Dell Update Package file 2 In the Dell Update Package window Figure 3 1 click Install Figure 3 1 Dell Update Package Window 3 In the QLogic Super Installer InstallShield Wizard s Welcome window Figure 3 2 click Next NOTE The actual fi...

Страница 44: ...54602 00 J Figure 3 2 QLogic InstallShield Wizard Welcome Window 4 Complete the following in the wizard s License Agreement window Figure 3 3 a Read the End User Software License Agreement b To continue select I accept the terms in the license agreement c Click Next ...

Страница 45: ...License Agreement Window 5 Complete the wizard s Setup Type window Figure 3 4 as follows a Select one of the following setup types Click Complete to install all program features Click Custom to manually select the features to be installed b To continue click Next If you clicked Complete proceed directly to Step 6b ...

Страница 46: ...ted To change a feature s install setting click the icon next to it and then select one of the following options This feature will be installed on the local hard drive Marks the feature for installation without affecting any of its subfeatures This feature and all subfeatures will be installed on the local hard drive Marks the feature and all of its subfeatures for installation This feature will n...

Страница 47: ...5 InstallShield Wizard Custom Setup Window 7 In the InstallShield Wizard s Ready To Install window Figure 3 6 click Install The InstallShield Wizard installs the QLogic Adapter drivers and Management Software Installer Figure 3 6 InstallShield Wizard Ready to Install the Program Window ...

Страница 48: ...gure 3 7 InstallShield Wizard Completed Window 9 In the Dell Update Package window Figure 3 8 Update installer operation was successful indicates completion Optional To open the log file click View Installation Log The log file shows the progress of the DUP installation any previous installed versions any error messages and other information about the installation To close the Update Package windo...

Страница 49: ...ory drivers path To install or update only the driver components driveronly Advanced Use the passthrough option to send all text following passthrough directly to the QLogic installation software of the DUP This mode suppresses any provided GUIs but not necessarily those of the QLogic software passthrough Advanced To return a coded description of this DUP s supported features capabilities NOTE Thi...

Страница 50: ...n to C my path with spaces log txt DUP_file_name exe l C my path with spaces log txt Removing the Windows Drivers To remove the Windows drivers 1 In the Control Panel click Programs and then click Programs and Features 2 In the list of programs select QLogic FastLinQ Driver Installer and then click Uninstall 3 Follow the instructions to remove the drivers Managing Adapter Properties To view or cha...

Страница 51: ...3 Driver Installation Installing Windows Driver Software 26 AH0054602 00 J Figure 3 9 Setting Advanced Adapter Properties ...

Страница 52: ...rnation To have the controller remain on at all times do not select the Allow the computer to turn off the device to save power check box Figure 3 10 Figure 3 10 Power Management Options Installing VMware Driver Software This section describes the qedentv VMware ESXi driver for the 41xxx Series Adapters VMware Drivers and Driver Packages Installing VMware Drivers VMware NIC Driver Optional Paramet...

Страница 53: ...ing driver qedrntv Native RDMA Offload RoCE and RoCEv2 drivera a The certified RoCE driver is not included in this release The uncertified driver may be available as an early preview qedf Native FCoE Offload driver qedil Legacy iSCSI Offload driver Table 3 5 ESXi Driver Packages by Release ESXi Releasea a Additional ESXi drivers may be available after this user s guide has been published For more ...

Страница 54: ...ll cause problems To install the VMware driver 1 Download the VMware driver for the 41xxx Series Adapter from the VMware support page www vmware com support html 2 Power up the ESX host and then log into an account with administrator authority 3 Use the Linux scp utility to copy the driver bundle from a local system into the tmp directory on an ESX server with IP address 10 10 10 10 For example is...

Страница 55: ...ommand Be sure to specify the full vib file path esxcli software vib install v tmp qedentv 1 0 3 11 1OEM 550 0 0 1331820 x86_64 vib To install the vib file using the VUM see the knowledge base article here Updating an ESXi ESX host using VMware vCenter Update Manager 4 x and 5 x 1019545 To upgrade the existing driver bundle Issue the following command esxcli software vib update d tmp qedentv bundl...

Страница 56: ...be 1 4 or one of the following values 1 uses the default number of RX filters per queue 0 disables RX filters disable_tpa Enables 0 or disables 1 the TPA LRO feature disable_tpa 0 is the default max_vfs Specifies the number of virtual functions VFs per physical function PF max_vfs can be 0 disabled or 64 VFs on a single port enabled The 64 VF maximum support for ESXi is an OS resource allocation c...

Страница 57: ...multifunction configurations enable_vxlan_offld Enables 1 or disables 0 the VXLAN tunneled traffic checksum offload and TCP segmentation offload TSO capability The default is enable_vxlan_offld 1 You can specify multiple values delimited by commas for multiport or multifunction configurations Table 3 7 VMware Driver Parameter Defaults Parameter Default Speed Autonegotiation with all speeds adverti...

Страница 58: ...Logic VMware FCoE qedf driver included in the VMware software package supports QLogic FCoE converged network interface controllers C NICs The driver is a kernel mode driver that provides a translation layer between the VMware SCSI stack and the QLogic FCoE firmware and hardware The FCoE and DCB feature set is supported on VMware ESXi 5 0 and later Number of Queues Enabled eight RX TX queue pairs W...

Страница 59: ...orking services iSCSI configuration and management interfaces provided by VMware The iSCSI interface includes two components a network adapter and an iSCSI engine on the same interface The iSCSI engine appears on the list of storage adapters as an iSCSI adapter vmhba For services such as ARP and DHCP needed by iSCSI the iSCSI vmhba uses the services of the vmnic device created by the qedil driver ...

Страница 60: ...rmware DUP from the command line with several supported command line options Running the DUP by Double Clicking Running the DUP from a Command Line on page 37 Running the DUP Using the bin File on page 38 Linux only Running the DUP by Double Clicking To run the firmware DUP by double clicking the executable file 1 Double click the icon representing the firmware Dell Update Package file 2 The Dell ...

Страница 61: ... dialog box click Yes to continue the installation The installer indicates that it is loading the new firmware as shown in Figure 4 2 Figure 4 2 Dell Update Package Loading New Firmware When complete the installer indicates the result of the installation as shown in Figure 4 3 Figure 4 3 Dell Update Package Installation Results ...

Страница 62: ... 4 4 Dell Update Package Finish Installation Running the DUP from a Command Line Running the firmware DUP from the command line with no options specified results in the same behavior as double clicking the DUP icon Note that the actual file name of the DUP will vary To run the firmware DUP from a command line Issue the following command C Network_Firmware_2T12N_WN32_ version _X16 EXE ...

Страница 63: ...ng the bin File The following procedure is supported only on Linux OS To update the DUP using the bin file 1 Copy the Network_Firmware_NJCX1_LN_X Y Z BIN file to the system or server 2 Change the file type into an executable file as follows chmod 777 Network_Firmware_NJCX1_LN_X Y Z BIN 3 To start the update process issue the following command Network_Firmware_NJCX1_LN_X Y Z BIN 4 After the firmwar...

Страница 64: ...rsion of this Update Package is the same as the currently installed version Software application name BCM57810 10 Gigabit Ethernet rev 10 p2p2 Package version 08 07 26 Installed version 08 07 26 Continue Y N Y Y entered update was forced by user Executing update WARNING DO NOT STOP THIS PROCESS OR INSTALL OTHER DELL PRODUCTS WHILE UPDATE IS IN PROGRESS THESE ACTIONS MAY CAUSE YOUR SYSTEM TO BECOME...

Страница 65: ...following Getting Started on page 41 Displaying Firmware Image Properties on page 44 Configuring Device level Parameters on page 45 Configuring NIC Parameters on page 46 Configuring Data Center Bridging on page 49 Configuring FCoE Boot on page 51 Configuring iSCSI Boot on page 52 Configuring Partitions on page 57 NOTE The HII screen shots in this chapter are representative and may not match the sc...

Страница 66: ...or information about launching the System Setup consult the user guide for your system 2 In the System Setup window Figure 5 1 select Device Settings and then press ENTER Figure 5 1 System Setup 3 In the Device Settings window Figure 5 2 select the 41xxx Series Adapter port that you want to configure and then press ENTER Figure 5 2 System Setup Device Settings ...

Страница 67: ...el Configuration set the Partitioning Mode to NPAR to add the NIC Partitioning Configuration option to the Main Configuration Page as shown in Figure 5 4 Figure 5 4 Main Configuration Page Setting Partitioning Mode to NPAR In Figure 5 3 and Figure 5 4 the Main Configuration Page shows the following Firmware Image Properties see Displaying Firmware Image Properties on page 44 NOTE NPAR is not avail...

Страница 68: ...ion page see Configuring Partitions on page 57 In addition the Main Configuration Page presents the adapter properties listed in Table 5 1 Table 5 1 Adapter Properties Adapter Property Description Device Name Factory assigned device name Chip Type ASIC version PCI Device ID Unique vendor specific PCI device ID PCI Address PCI device address in bus device function format Blink LEDs User defined bli...

Страница 69: ...ent firmware version EFI Driver Version is the extensible firmware interface EFI driver version L2B Firmware Version is the NIC offload firmware version for boot Figure 5 5 Firmware Image Properties FCoE WWPN b Manufacturer assigned permanent device FCoE Offload WWPN world wide port name FCoE Virtual WWPN b User defined device FCoE Offload WWPN FCoE WWNN b Manufacturer assigned permanent device FC...

Страница 70: ...y to all adapter ports None default specifies that no virtualization mode is enabled NPAR sets the adapter to switch independent NIC partitioning mode SR IOV sets the adapter to SR IOV mode NPar SR IOV sets the adapter to SR IOV over NPAR mode NOTE The iSCSI physical functions PFs are listed when the iSCSI Offload feature is enabled in NPAR mode only The FCoE PFs are listed when the FCoE Offload f...

Страница 71: ...ures up to 8 partitions per adapter 5 Click Back 6 When prompted click Yes to save the changes Changes take effect after a system reset Configuring NIC Parameters NIC configuration includes setting the following parameters Link Speed NIC RDMA Mode RDMA Protocol Support Boot Mode FEC Mode Energy Efficient Ethernet Virtual LAN Mode Virtual LAN ID To configure NIC parameters 1 On the Main Configurati...

Страница 72: ...nk is established This mode is intended for use only with 25G interfaces This mode is not available on all adapters 3 For NIC RDMA Mode select either Enabled or Disabled for RDMA on the port This setting applies to all partitions of the port if in NPAR mode 4 FEC Mode is visible when 25 Gbps fixed speed mode is selected as the Link Speed in Step 2 For FEC Mode select one of the following options N...

Страница 73: ...faced adapters Select from the following EEE options Disabled disables EEE on this port Optimal Power and Performance enables EEE in optimal power and performance mode on this port Maximum Power Savings enables EEE in maximum power savings mode on this port Maximum Performance enables EEE in maximum performance mode on this port 8 The Virtual LAN Mode parameter applies to the entire port when in P...

Страница 74: ...ode to Enabled 2 In the Virtual LAN ID box enter the number to be used 3 Click Back 4 When prompted click Yes to save the changes Changes take effect after a system reset Configuring Data Center Bridging The data center bridging DCB settings comprise the DCBX protocol and the RoCE priority To configure the DCB settings 1 On the Main Configuration Page Figure 5 3 on page 42 select Data Center Bridg...

Страница 75: ...es the priority number used by lossless FCoE traffic 4 specifies the priority number used by lossless iSCSI TLV over DCB traffic 1 2 5 6 and 7 specify DCB traffic class priority numbers available for RoCE use Follow the respective OS RoCE setup instructions for using this RoCE control Figure 5 8 System Setup Data Center Bridging DCB Settings 4 Click Back 5 When prompted click Yes to save the chang...

Страница 76: ... select the following as needed FCoE General Parameters Figure 5 9 FCoE Target Configuration Figure 5 10 2 Press ENTER 3 Choose values for the FCoE General or FCoE Target Configuration parameters Figure 5 9 FCoE General Parameters NOTE The FCoE Boot Configuration Menu is only visible if FCoE Offload Mode is enabled on the second partition in NPAR mode see Figure 5 18 on page 60 It is not visible i...

Страница 77: ...n 4 Click Back 5 When prompted click Yes to save the changes Changes take effect after a system reset Configuring iSCSI Boot NOTE The iSCSI Boot Configuration Menu is only visible if iSCSI Offload Mode is enabled on the third partition in NPAR mode see Figure 5 19 on page 61 It is not visible in non NPAR mode ...

Страница 78: ...se values for the appropriate iSCSI configuration parameters iSCSI General Parameters Figure 5 11 on page 54 TCP IP Parameters Via DHCP iSCSI Parameters Via DHCP CHAP Authentication CHAP Mutual Authentication IP Version ARP Redirect DHCP Request Timeout Target Login Timeout DHCP Vendor ID iSCSI Initiator Parameters Figure 5 12 on page 55 IPv4 Address IPv4 Subnet Mask IPv4 Default Gateway IPv4 Prim...

Страница 79: ...2 00 J iSCSI Second Target Parameters Figure 5 14 on page 56 Connect IPv4 Address TCP Port Boot LUN iSCSI Name CHAP ID CHAP Secret 4 Click Back 5 When prompted click Yes to save the changes Changes take effect after a system reset Figure 5 11 iSCSI General Parameters ...

Страница 80: ...5 Adapter Preboot Configuration Configuring iSCSI Boot 55 AH0054602 00 J Figure 5 12 iSCSI Initiator Configuration Parameters Figure 5 13 iSCSI First Target Parameters ...

Страница 81: ...5 Adapter Preboot Configuration Configuring iSCSI Boot 56 AH0054602 00 J Figure 5 14 iSCSI Second Target Parameters ...

Страница 82: ...tion configuration on VMware ESXi 6 0 6 5 see Partitioning for VMware ESXi 6 0 and ESXi 6 5 To configure the maximum and minimum bandwidth allocations 1 On the Main Configuration Page select NIC Partitioning Configuration and then press ENTER 2 On the Partitions Configuration page Figure 5 15 select Global Bandwidth Allocation Figure 5 15 NIC Partitioning Configuration Global Bandwidth Allocation ...

Страница 83: ...value The total of the minimum TX bandwidth values of all partitions on a single port must equal 100 or be all zeros Setting the TX minimum bandwidth to all zeros is similar to equally dividing the available bandwidth over every active partition however the bandwidth is dynamically allocated over all actively sending partitions A zero value when one or more of the other values are set to a non zer...

Страница 84: ... Mode always enabled PCI Device ID PCI bus Address MAC Address Virtual MAC Address If NParEP is not enabled only four partitions per port are available On non offload capable adapters the FCoE Mode and iSCSI Mode options and information are not displayed Figure 5 17 Partition 1 Configuration 3 To configure the second partition select Partition 2 Configuration to open the Partition 2 Configuration ...

Страница 85: ... iSCSI Offload personality on the third partition If you enable this mode on the third partition you should disable NIC Mode Because only one offload is available per port if iSCSI Offload is enabled on the port s third partition FCoE Offload cannot be enabled on the second partition of that same NPAR mode port Not all adapters support iSCSI Mode FIP MAC Address1 Virtual FIP MAC Address 1 World Wi...

Страница 86: ...2 PCI Device ID PCI Address Figure 5 19 Partition 3 Configuration iSCSI Offload 5 To configure the remaining Ethernet partitions including the previous if not offload enabled open the page for a partition 2 or greater partition see Figure 5 20 NIC Mode Enabled or Disabled When disabled the partition is hidden such that it does not appear to the OS if fewer than the maximum quantity of partitions o...

Страница 87: ...ause the storage functions may keep the vmnicX enumeration rather than vmhbaX as shown when you issue the following command on the system esxcfg scsidevs a vmnic4 qedf link up fc 2000000e1ed6fa2a 2001000e1ed6fa2a 0000 19 00 2 QLogic Corp QLogic FastLinQ QL41xxx Series 10 25 GbE Controller FCoE vmhba0 lsi_mr3 link n a sas 51866da071fa9100 0000 18 00 0 Avago LSI PERC H330 Mini vmnic10 qedf link up f...

Страница 88: ...4 and vmnic10 are actually storage adapter ports To prevent this behavior you should enable storage functions at the same time that you configure the adapter for NPAR mode For example assuming that the adapter is in Single Function mode by default you should 1 Enable NPAR mode 2 Change Partition 2 to FCoE 3 Save and reboot ...

Страница 89: ...from SAN FCoE Boot from SAN on page 114 iSCSI Boot from SAN Cavium 41xxx Series gigabit Ethernet GbE adapters support iSCSI boot to enable network boot of operating systems to diskless systems iSCSI boot allows a Windows Linux or VMware operating system to boot from an iSCSI target machine located remotely over a standard IP network This section provides the following configuration information abo...

Страница 90: ...iSCSI BFS Support SW iSCSI BFS Support Hardware Offload iSCSI BFS Support Windows 2012a a Windows Server 2012 and 2012 R2 do not support the inbox iSCSI driver for SW or hardware offload Yes Yes No No Windows 2012 R2 a Yes Yes No No Windows 2016b b Windows Server 2016 does not support the inbox iSCSI driver for hardware offload Yes Yes Yes No Windows 2019 Yes Yes Yes Yes RHEL 6 9c c RHEL 6 9 out o...

Страница 91: ...d is supported iSCSI preboot information in this section includes Setting the BIOS Boot Mode to UEFI Enabling NPAR and the iSCSI HBA Selecting the iSCSI UEFI Boot Protocol Configuring the Storage Target Configuring iSCSI Boot Parameters Configuring BIOS Boot Mode Configuring iSCSI Boot Options Configuring the DHCP Server to Support iSCSI Boot Setting the BIOS Boot Mode to UEFI To configure the boo...

Страница 92: ...6 Boot from SAN Configuration iSCSI Boot from SAN 67 AH0054602 00 J Figure 6 1 System Setup Boot Settings ...

Страница 93: ... Enabling NPAR and the iSCSI HBA To enable NPAR and the iSCSI HBA 1 In the System Setup Device Settings select the QLogic device Figure 6 2 Refer to the OEM user guide on accessing the PCI device configuration menu Figure 6 2 System Setup Device Settings 2 Enable NPAR ...

Страница 94: ...NIC Partitioning Configuration menu setting is Enable iSCSI HBA The Boot Mode option is listed under iSCSI Configuration Figure 6 3 for the adapter and the setting is port specific Refer to the OEM user manual for direction on accessing the device level configuration menu under UEFI HII Figure 6 3 System Setup NIC Configuration NOTE Boot from SAN boot is supported only in NPAR mode and is configur...

Страница 95: ... in Step 1 4 Associate an iSCSI initiator with the storage target Record the following information iSCSI target name TCP port number iSCSI Logical Unit Number LUN Initiator iSCSI qualified name IQN CHAP authentication details 5 After configuring the iSCSI target obtain the following Target IQN Target IP address Target TCP port number Target LUN Initiator IQN CHAP ID and secret Configuring iSCSI Bo...

Страница 96: ...0 J Configuring BIOS Boot Mode To configure the boot mode 1 Restart the system 2 Access the System BIOS menu Figure 6 4 Figure 6 4 System Setup Boot Settings NOTE SAN boot is supported in UEFI environment only Make sure the system boot option is UEFI and not legacy ...

Страница 97: ...6 Boot from SAN Configuration iSCSI Boot from SAN 72 AH0054602 00 J 3 On the Main Configuration Page select NIC Configuration Figure 6 5 and then press ENTER Figure 6 5 Selecting NIC Configuration ...

Страница 98: ...options include Static iSCSI Boot Configuration Dynamic iSCSI Boot Configuration Enabling CHAP Authentication Static iSCSI Boot Configuration In a static configuration you must enter data for the following Initiator IP address Initiator IQN Target parameters obtained in Configuring the Storage Target on page 70 NOTE Use the Virtual LAN Mode and Virtual LAN ID options on this page only for PXE boot...

Страница 99: ...he iSCSI boot parameters using static configuration 1 In the Device HII Main Configuration Page select iSCSI Configuration Figure 6 7 and then press ENTER Figure 6 7 System Setup iSCSI Configuration 2 On the iSCSI Configuration page select iSCSI General Parameters Figure 6 8 and then press ENTER Figure 6 8 System Setup Selecting General Parameters ...

Страница 100: ... on page 76 provides descriptions of these parameters TCP IP Parameters via DHCP Disabled iSCSI Parameters via DHCP Disabled CHAP Authentication As required IP Version As required IPv4 or IPv6 CHAP Mutual Authentication As required DHCP Vendor ID Not applicable for static configuration HBA Boot Mode As required Virtual LAN ID Default value or as required Virtual LAN Mode As required Figure 6 9 Sys...

Страница 101: ...tor Parameters Configuration page IP Version This option is specific to IPv6 Toggles between IPv4 and IPv6 All IP settings are lost if you switch from one protocol ver sion to another CHAP Mutual Authentication Controls whether the iSCSI boot host software acquires its iSCSI target parameters using DHCP Enabled or through a static configuration Disabled The static information is entered on the iSC...

Страница 102: ...System Setup Selecting iSCSI Initiator Parameters 6 On the iSCSI Initiator Parameters page Figure 6 11 select the following parameters and then type a value for each IPv4 Address Subnet Mask IPv4 Default Gateway IPv4 Primary DNS IPv4 Secondary DNS iSCSI Name Corresponds to the iSCSI initiator name to be used by the client system CHAP ID CHAP Secret ...

Страница 103: ... then press ESC NOTE For the preceding items with asterisks note the following The label will change to IPv6 or IPv4 default based on the IP version set on the iSCSI General Parameters page Figure 6 9 on page 75 Carefully enter the IP address There is no error checking performed against the IP address to check for duplicates incorrect segment or network assignment ...

Страница 104: ...CSI First Target Parameters page set the Connect option to Enabled for the iSCSI target 10 Type values for the following parameters for the iSCSI target and then press ENTER IPv4 Address TCP Port Boot LUN iSCSI Name CHAP ID CHAP Secret NOTE For the preceding parameters with an asterisk the label will change to IPv6 or IPv4 default based on IP version set on the iSCSI General Parameters page as sho...

Страница 105: ...6 Boot from SAN Configuration iSCSI Boot from SAN 80 AH0054602 00 J Figure 6 13 System Setup iSCSI First Target Parameters 11 Return to the iSCSI Boot Configuration page and then press ESC ...

Страница 106: ...meter values as you did in Step 10 This second target is used if the first target cannot be connected to Otherwise proceed to Step 13 Figure 6 14 System Setup iSCSI Second Target Parameters 13 Press ESC once and a second time to exit 14 Click Yes to save changes or follow the OEM guidelines to save the device level configuration For example click Yes to confirm the setting change Figure 6 15 ...

Страница 107: ...t the system s IP address and target or initiator information are provided by a DHCP server see IPv4 and IPv6 configurations in Configuring the DHCP Server to Support iSCSI Boot on page 85 Any settings for the following parameters are ignored and do not need to be cleared with the exception of the initiator iSCSI name for IPv4 CHAP ID and CHAP secret for IPv6 Initiator Parameters First Target Para...

Страница 108: ...uthentication As required IP Version As required IPv4 or IPv6 CHAP Mutual Authentication As required DHCP Vendor ID As required HBA Boot Mode As required Virtual LAN ID As required Virtual LAN Mode As requireda NOTE When using a DHCP server the DNS server entries are overwritten by the values provided by the DHCP server This override occurs even if the locally provided values are valid and the DHC...

Страница 109: ...n the Initiator Parameters window type values for the following CHAP ID up to 255 characters CHAP Secret if authentication is required must be 12 to 16 characters in length 4 Press ESC to return to the iSCSI Boot Configuration page 5 On the iSCSI Boot Configuration Menu select iSCSI First Target Parameters 6 In the iSCSI First Target Parameters window type values used when configuring the iSCSI ta...

Страница 110: ...P includes several options that provide configuration information to the DHCP client For iSCSI boot Cavium QLogic adapters support the following DHCP configurations DHCP Option 17 Root Path DHCP Option 43 Vendor specific Information DHCP Option 17 Root Path Option 17 is used to pass the iSCSI target information to the iSCSI client The format of the root path as defined in IETC RFC 4173 is iscsi se...

Страница 111: ...ration options You should use DHCP Option 43 when performing dynamic iSCSI boot configuration LUN Logical unit number to use on the iSCSI target The value of the LUN must be represented in hexadecimal format A LUN with an ID of 64 must be configured as 40 within the Option 17 parameter on the DHCP server targetname Target name in either IQN or EUI format For details on both IQN and EUI formats ref...

Страница 112: ...QLGC ISAN as shown in the General Parameters of the iSCSI Boot Configuration menu The content of Option 16 should be 2 byte length DHCP Vendor ID DHCPv6 Option 17 Vendor Specific Information DHCPv6 Option 17 vendor specific information provides more configuration options to the iSCSI client In this configuration three additional sub options are provided that assign the initiator IQN to the iSCSI b...

Страница 113: ...ake the iSCSI interface on the adapter a member of that vLAN To configure vLAN for iSCSI boot 1 Go to the iSCSI Configuration Page for the port 2 Select iSCSI General Parameters Table 6 5 DHCP Option 17 Sub option Definitions Sub option Definition 201 First iSCSI target information in the standard root path format iscsi servername protocol port LUN targetname 202 Second iSCSI target information in...

Страница 114: ...ws a Windows operating system to boot from an iSCSI target machine located remotely over a standard IP network You can set the L4 iSCSI option offload path with QLogic offload iSCSI driver by opening the NIC Configuration menu and setting the Boot Protocol to UEFI iSCSI iSCSI boot from SAN for Windows information includes the following Before You Begin Selecting the Preferred iSCSI Boot Mode Confi...

Страница 115: ...nabled 2 On the NIC Configuration page set the Boot Protocol option to UEFI iSCSI HBA Configuring iSCSI General Parameters Configure the QLogic iSCSI boot software for either static or dynamic configuration For configuration options available from the General Parameters window see Table 6 2 on page 76 which lists parameters for both IPv4 and IPv6 To set the iSCSI general parameters on Windows 1 Fr...

Страница 116: ...t Mask IPv4 Default Gateway IPv4 Primary DNS IPv4 Secondary DNS Virtual LAN ID Optional You can isolate iSCSI traffic on the network in a Layer 2 vLAN to segregate it from general traffic To segregate traffic make the iSCSI interface on the adapter a member of the Layer 2 vLAN by setting this value iSCSI Name Corresponds to the iSCSI initiator name to be used by the client system CHAP ID CHAP Secr...

Страница 117: ... want to configure a second iSCSI target device select iSCSI Second Target Parameters Figure 6 14 on page 81 and enter the parameter values as you did in Step 3 This second target is used if the first target cannot be connected to Otherwise proceed to Step 5 5 In the Warning dialog box click Yes to save the changes or follow the OEM guidelines to save the device level configuration Detecting the i...

Страница 118: ...el Figure 6 18 Detecting the iSCSI LUN Using UEFI Shell Version 2 2 On the newly detected iSCSI LUN select an installation source such as using a WDS server mounting the ISO with an integrated Dell Remote Access Controller iDRAC or using a CD DVD 3 In the Windows Setup window Figure 6 19 select the drive name on which to install the driver Figure 6 19 Windows Setup Selecting Installation Destinati...

Страница 119: ...the qevbd and qeios drivers click Next to begin installation on the iSCSI LUN Then follow the on screen instructions The server will undergo a reboot multiple times as part of the installation process and then will boot up from the iSCSI boot from SAN LUN 7 If it does not automatically boot access the Boot Menu and select the specific port boot entry to boot from the iSCSI LUN Configuring iSCSI Bo...

Страница 120: ...he out of box driver 5 If required for your setup load the FastLinQ driver update disk when prompted for additional driver disks Otherwise if you have no other driver update disks to install press the C key 6 Continue with the installation You can skip the media test Click Next to continue with the installation 7 In the Configuration window select the language to use during the installation proces...

Страница 121: ... 12 SP3 installation media with the iSCSI target pre configured and connected in UEFI 2 Update the latest driver package by adding the dud 1 parameter in the installer command parameter The driver update disk is required because the necessary iSCSI drivers are not inbox 3 Complete the installation steps specified by the SLES 12 SP3 OS Known Issue in DHCP Configuration In DHCP configuration for SLE...

Страница 122: ...fload for other distributions of Linux includes the following information Booting from SAN Using a Software Initiator Migrating from Software iSCSI Installation to Offload iSCSI Linux Multipath Considerations Booting from SAN Using a Software Initiator To boot from SAN using a software initiator with Dell OEM Solutions 1 Access the Dell EMC System BIOS settings 2 Configure the initiator and target...

Страница 123: ...oftware iSCSI installation to an offload iSCSI for RHEL 6 9 or 6 10 1 Boot into the iSCSI non offload L2 boot from SAN operating system Issue the following commands to install the Open iSCSI and iscsiuio RPMs rpm ivh force qlgc open iscsi 2 0_873 111 1 x86_64 rpm rpm ivh force iscsiuio 2 11 5 2 1 rhel6u9 x86_64 rpm 2 Edit the etc init d iscsid file add the following command and then save the file ...

Страница 124: ...shkernel auto rd_NO_DM rd_LVM_LV vg_prebooteit lv_swap KEYBOARDTYPE pc KEYTABLE us rd_LVM_LV vg_prebooteit lv_root selinux 0 initrd initramfs 2 6 32 696 el6 x86_64 img 4 Build the initramfs file by issuing the following command dracut f 5 Reboot the server and then open the UEFI HII 6 In the HII disable iSCSI boot from BIOS and then enable iSCSI HBA or boot for the adapter as follows a Select the ...

Страница 125: ... follows a Locate the line that begins with INITRD_MODULES This line will look similar to the following but may contain different parameters INITRD_MODULES ata_piix ata_generic or INITRD_MODULES ahci b Edit the line by adding qedi to the end of the existing line inside the quotation marks For example INITRD_MODULES ata_piix ata_generic qedi or INITRD_MODULES ahci qedi c Save the file 4 Edit the et...

Страница 126: ... Open the NIC Configuration menu and set the Boot Protocol to UEFI iSCSI e Open the iSCSI Configuration page and configure iSCSI settings 9 Save the configuration and reboot the server The OS can now boot through the offload interface Migrating to Offload iSCSI for SLES 12 SP1 SP2 To migrate from a software iSCSI installation to an offload iSCSI for SLES 12 SP1 SP2 1 Boot into the iSCSI non offloa...

Страница 127: ...csi firmware For older distros add iscsi_firmware 7 Create a backup of the original grub cfg file The file is in the following locations Legacy boot boot grub2 grub cfg UEFI boot boot efi EFI sles grub cfg for SLES 8 Create a new grub cfg file by issuing the following command grub2 mkconfig o new file name 9 Compare the old grub cfg file with the new grub cfg file to verify your changes 10 Replace...

Страница 128: ...ultipath I O MPIO See the appropriate procedure in this section to migrate from L2 to L4 and configure MPIO for your OS Migrating and Configuring MPIO to Offloaded Interface for RHEL 6 9 6 10 Migrating and Configuring MPIO to Offloaded Interface for SLES 11 SP4 Migrating and Configuring MPIO to Offloaded Interface for SLES 12 SP1 SP2 Migrating and Configuring MPIO to Offloaded Interface for RHEL 6...

Страница 129: ...itramfs with multipath support dracut force add multipath include etc multipath 12 Reboot the server and boot into OS with multipath Migrating and Configuring MPIO to Offloaded Interface for RHEL 7 2 7 3 To migrate from L2 to L4 and configure MPIO to boot the OS over an offloaded interface for RHEL 7 2 7 3 1 Configure the iSCSI boot settings for L2 BFS on both ports of the adapter The boot will lo...

Страница 130: ...nsport bnx2i transport qedi then 9 Open the etc default grub file and then locate the following statement GRUB_CMDLINE_LINUX iscsi_firmware ip ibft Change this statement to GRUB_CMDLINE_LINUX rd iscsi firmware 10 Create a new grub cfg file by issuing the following command grub2 mkconfig o boot efi EFI redhat grub cfg 11 Build the initramfs file by issuing the following command dracut f 12 Reboot a...

Страница 131: ...I select System Configuration and select the second adapter port to be used for multipath c On the Main Configuration Page under Port Level Configuration set Boot Mode to iSCSI HW and enable iSCSI Offload d On the Main Configuration Page under iSCSI Configuration perform the necessary iSCSI configurations e Reboot the server and boot into OS 3 Set MPIO services to remain persistent on re boot as f...

Страница 132: ...CD ensure that you specify the following kernel parameters dud 1 rd iscsi ibft 3 Provide the DUD and complete the installation 4 Boot to the OS with L2 5 Update the Open iSCSI tools by issuing the following commands rpm ivh qlgc open iscsi 2 0_873 111 sles12sp1 3 x86_64 rpm force rpm ivh iscsiuio 2 11 5 5 6 sles12sp1 x86_64 rpm force 6 Edit the etc default grub file by changing the rd iscsi ibft p...

Страница 133: ...th module in initrd issue the following command dracut force add multipath include etc multipath 12 Reboot the server and enter system settings by pressing the F9 key during the POST menu 13 Change the UEFI configuration to use L4 iSCSI boot a Open System Configuration select the adapter port and then select Port Level Configuration b On the Port Level Configuration page set the Boot Mode to iSCSI...

Страница 134: ...es Adapter into a Dell 14G server For example plug a PCIE and LOM four ports or two ports into an R740 server 2 In the HII go to System Setup select Device Settings and then select a an integrated NIC port to configure Click Finish 3 On the Main Configuration Page select NIC Partitioning Configuration and then click Finish 4 On the Main Configuration Page select Firmware Image Properties view the ...

Страница 135: ...on page as follows a For Link Speed select either Auto Neg 10Gbps or 1Gbps b Ensure that the link is up c For Boot Protocol select None d For Virtual LAN Mode select Disabled 10 On the NIC Partitioning Configuration page select Partition 2 Configuration 11 Complete the Partition 2 Configuration page see Figure 6 22 as follows a For FCoE Mode select Disabled b For iSCSI Offload Mode select Disabled...

Страница 136: ...EFI iSCSI Settings a For iSCSI Device1 select Enabled b Select UEFI Boot Settings 5 On the iSCSI Device1 Settings page a For Connection 1 select Enabled b Select Connection 1 Settings 6 On the Connection 1 Settings page see Figure 6 24 a For Interface select the adapter port on which to test the iSCSI boot firmware table IBFT boot from SAN b For Protocol select either IPv4 or IPv6 c For VLAN selec...

Страница 137: ...ntegrated NIC System BIOS Connection 1 Settings for VMware 7 Complete the target details and for Authentication Type select either CHAP to set CHAP details or None the default Figure 6 25 shows an example Figure 6 25 Integrated NIC System BIOS Connection 1 Settings Target for VMware ...

Страница 138: ...map the CD or DVD 1 Create a customized ISO image using the ESXi Customizer and inject the latest bundle or VIB 2 Map the ISO to the server virtual console s virtual media 3 On the virtual optical drive load the ISO file 4 After the ISO is loaded successfully press the F11 key 5 On the Select a Disk To Install Or Upgrade window under Storage Device select the 3PARdata W disk and then press the ENT...

Страница 139: ...s a Windows Linux or VMware operating system to boot from a Fibre Channel or FCoE target machine located remotely over an FCoE supporting network You can set the FCoE option offload path with QLogic offload FCoE driver by opening the NIC Configuration menu and setting the Boot Protocol option to FCoE This section provides the following configuration information about FCoE boot from SAN FCoE Out of...

Страница 140: ...e system boot order and specify the BIOS boot protocol if required Table 6 6 FCoE Out of Box and Inbox Boot from SAN Support Out of Box Inbox OS Version Hardware Offload FCoE BFS Support Hardware Offload FCoE BFS Support Windows 2012 Yes No Windows 2012 R2 Yes No Windows 2016 Yes No Windows 2019 Yes Yes RHEL 6 10 Yes No RHEL 7 5 Yes Yes RHEL 7 6 Yes Yes SLES 15 Yes Yes vSphere ESXi 6 5 U2 Yes No v...

Страница 141: ...configuration to UEFI Configuring Adapter UEFI Boot Mode To configure the boot mode to FCOE 1 Restart the system 2 Press the OEM hot key to enter System Setup Figure 6 28 This is also known as UEFI HII Figure 6 28 System Setup Selecting Device Settings NOTE FCoE BFS is not supported in legacy BIOS mode NOTE SAN boot is supported in the UEFI environment only Make sure the system boot option is UEFI...

Страница 142: ...6 Boot from SAN Configuration FCoE Boot from SAN 117 AH0054602 00 J 3 On the Device Settings page select the QLogic adapter Figure 6 29 Figure 6 29 System Setup Device Settings Port Selection ...

Страница 143: ...System Setup NIC Configuration 5 On the NIC Configuration page select Boot Mode press ENTER and then select FCoE as a preferred boot mode NOTE FCoE is not listed as a boot option if the FCoE Mode feature is disabled at the port level If the Boot Mode preferred is FCoE make sure the FCoE Mode feature is enabled as shown in Figure 6 31 Not all adapter versions support FCoE ...

Страница 144: ... FCoE Configuration and then press ENTER 2 On the FCoE Configuration Page select FCoE General Parameters and then press ENTER 3 On the FCoE General Parameters page Figure 6 32 press the UP ARROW and DOWN ARROW keys to select a parameter and then press ENTER to select and input the following values Fabric Discovery Retry Count Default value or as required LUN Busy Retry Count Default value or as re...

Страница 145: ...ress ESC and then select FCoE Target Parameters 6 Press ENTER 7 In the FCoE General Parameters Menu enable Connect to the preferred FCoE target 8 Type values for the following parameters Figure 6 33 for the FCoE target and then press ENTER World Wide Port Name Target n Boot LUN n Where the value of n is between 1 and 8 enabling you to configure 8 FCoE targets ...

Страница 146: ...Boot Installation For Windows Server 2012R2 2016 boot from SAN installation Cavium requires the use of a slipstream DVD or ISO image with the latest Cavium QLogic drivers injected See Injecting Slipstreaming Adapter Drivers into Windows Image Files on page 123 The following procedure prepares the image for installation and booting in FCoE mode To set up Windows Server 2012R2 2016 FCoE boot 1 Remov...

Страница 147: ...visible This target is a disk connected through the FCoE boot protocol located in the remote FCoE target 9 To proceed with Windows Server 2012R2 2016 installation select Next and then follow the on screen instructions The server will undergo a reboot multiple times as part of the installation process 10 After the server boots to the OS you should run the driver installer to complete the Cavium QLo...

Страница 148: ... driver package For example type c temp d Follow the driver installer instructions to install the drivers in the specified folder In this example the Cavium QLogic driver files are installed here c temp Program File 64 QLogic Corporation QDrivers 3 Download the Windows Assessment and Deployment Kit ADK version 10 from Microsoft https developer microsoft com en us windows hardware windows assessmen...

Страница 149: ... interface and are automatically activated by the qedf driver SLES 11 The driver update disk is required because the necessary FCoE drivers are not inbox The installer parameter dud 1 is required to ensure that the installer will ask for the driver update disk Do not use the installer parameter withfcoe 1 because the software FCoE will conflict with the hardware offload if network interfaces from ...

Страница 150: ...edures for the following Linux distributions Configuring FCoE Boot from SAN for RHEL 6 10 Configuring FCoE Boot from SAN for SLES 12 SP3 and Later Using an FCoE Boot Device as a kdump Target Configuring FCoE Boot from SAN for RHEL 6 10 To install RHEL 6 10 1 Boot from the RHEL 6 10 installation media with the FCoE target already connected in UEFI 2 Press any key to install an out of box driver 3 S...

Страница 151: ...lecting the Driver Disk Image 9 Load the FastLinQ driver update disk and then click Next to continue with the installation You can skip the media test 10 At the What type of devices will your installation involve prompt select Specialized Storage Devices 11 At the Please select the drives prompt on the Basic Devices page select the FCoE LUN Figure 6 35 shows an example Figure 6 35 Selecting the Dr...

Страница 152: ...For details on how to set the kdump crashkernel size refer to your Linux distribution documentation Configuring FCoE Boot from SAN on VMware For VMware ESXi 6 5 6 7 boot from SAN installation Cavium requires that you use a customized ESXi ISO image that is built with the latest Cavium QLogic Converged Network Adapter bundle injected This section covers the following VMware FCoE boot from SAN proce...

Страница 153: ...stalling the Customized ESXi ISO 1 Load the latest Cavium QLogic FCOE boot images into the adapter NVRAM 2 Configure the FCOE target to allow a valid connection with the remote machine Ensure that the target has sufficient free disk space to hold the new OS installation 3 Configure the UEFI HII to set the FCOE boot type on the required adapter port the correct initiator and the target parameters f...

Страница 154: ...SXi ISO Figure 6 37 shows an example Figure 6 37 Select a VMware Disk to Install 7 Select the LUN on which ESXi can install and then press ENTER 8 On the next window click Next and then follow the on screen instructions 9 When installation completes reboot the server and eject the DVD 10 During the server boot press the F9 key to access the One Time Boot Menu and then select Boot media to QLogic a...

Страница 155: ...6 Boot from SAN Configuration FCoE Boot from SAN 130 AH0054602 00 J In the example shown in Figure 6 38 the first two ports indicate Cavium QLogic adapters Figure 6 38 VMware Generic USB Boot Options ...

Страница 156: ...ring RoCE on the Adapter for Linux on page 143 Configuring RoCE on the Adapter for VMware ESX on page 154 Configuring DCQCN on page 160 Supported Operating Systems and OFED Table 7 1 shows the operating system support for RoCE v1 RoCE v2 iWARP and OpenFabrics Enterprise Distribution OFED OFED is not supported on Windows or VMware ESXi NOTE Some RoCE features may not be fully enabled in the current...

Страница 157: ...ollowing command ib_send_bw version Building libqedr in inbox OFED requires installing libibverbs devel Running user space applications in inbox OFED requires installing the InfiniBand Support group by yum groupinstall InfiniBand Support that contains libibcm libibverbs and more Windows Server 2016 No N A Windows Server 2019 RoCE v1 RoCE v2 iWARP N A RHEL 6 9 RoCE v1 iWARP No RHEL 6 10 RoCE v1 iWA...

Страница 158: ...r supports both CEE and IEEE protocols This value should match the corresponding value on the DCB switch In this example select CEE or Dynamic 3 In the RoCE Priority box type a priority value This value should match the corresponding value on the DCB switch In this example type 5 Typically 0 is used for the default lossy traffic class 3 is used for the FCoE traffic class and 4 is used for lossless...

Страница 159: ...ap type queuing class roce switch config match qos group 3 4 Configure network QoS class maps as follows switch config class map type network qos class roce switch config match qos group 3 5 Configure QoS policy maps as follows switch config policy map type qos roce switch config class type qos class roce switch config set qos group 3 6 Configure queuing policy maps to assign network bandwidth In ...

Страница 160: ...dix C Dell Z9100 Switch Configuration Configuring RoCE on the Adapter for Windows Server Configuring RoCE on the adapter for Windows Server host comprises enabling RoCE on the adapter and verifying the Network Direct MTU size To configure RoCE on a Windows Server host 1 Enable RoCE on the adapter a Open the Windows Device Manager and then open the 41xxx Series Adapters NDIS Miniport Properties b O...

Страница 161: ... Enabled to allow Win dows DCB QoS service to control and monitor DCB For more information see Configuring QoS by Disabling DCBX on the Adapter on page 246 and Configuring QoS by Enabling DCBX on the Adapter on page 250 NetworkDirect Technology RoCE or RoCE v2 VLAN ID Assign any vLAN ID to the interface The value must be the same as is assigned on the switch Table 7 2 Advanced Properties for RoCE ...

Страница 162: ...DirectAcrossIPSubnets Blocked PacketCoalescingFilter Disabled 4 Connect a server message block SMB drive run RoCE traffic and verify the results To set up and connect to an SMB drive view the information available online from Microsoft https technet microsoft com en us library hh831795 v ws 11 aspx 5 By default Microsoft s SMB Direct establishes two RDMA connections per port which provides good pe...

Страница 163: ...Windows Server 138 AH0054602 00 J Viewing RDMA Counters The following procedure also applies to iWARP To view RDMA counters for RoCE 1 Launch Performance Monitor 2 Open the Add Counters dialog box Figure 7 2 shows an example Figure 7 2 Add Counters Dialog Box ...

Страница 164: ... there is congestion in the network Pause counters increment when flow control or global pause is configured and there is a congestion in the network PFC counters increment when priority flow control is configured and there is a congestion in the network Cavium FastLinQ RDMA Error Counters Increment if any error occurs in transport operations For details see Table 7 3 4 Under Instances of selected...

Страница 165: ...nters RDMAError Counter Description Applies to RoCE Applies to iWARP Troubleshooting CQ overflow A completion queue on which an RDMA work request is posted This counter specifies the quantity of instances where there was a com pletion for a work request on the send or receive queue but no space on the associated completion queue Yes Yes Indicates a software design issue causing an insufficient com...

Страница 166: ... not reference a memory region that is valid for the requested operation Yes Yes Usually indicates an issue with the host soft ware components Requestor local QP operation An internal QP consistency error was detected while processing this work request Yes Yes Requestor Remote access A protection error occurred on a remote data buffer to be read by an RDMA Read written by an RDMA Write or accessed...

Страница 167: ...rk issue is preventing messages acknowledgment Responder CQE flushed Posted work requests receive buf fers on RQ may be flushed by send ing completions with a flush status to the CQ if the QP moves to an error state for any reason and pending receive buffers exist on the RQ If a work request completed with an error status all other pending work requests for that QP are flushed Yes Yes Responder lo...

Страница 168: ... v2 Configuration for Linux Responder Local QP Operation error An internal QP consistency error was detected while processing this work request Yes Yes Indicates a software issue Responder remote invalid request The responder detected an invalid inbound message on the channel Yes Yes Indicates possible mis behavior by a remote peer Possible causes include the operation is not supported by this rec...

Страница 169: ...install perftest yum install tcl tcl devel tk zlib devel libibverbs libibverbs devel 3 Install the new Linux drivers as described in Installing the Linux Drivers with RDMA on page 14 RoCE Configuration for SLES To configure RoCE on the adapter for a SLES host OFED must be installed and configured on the SLES host To install inbox OFED for SLES 1 While installing or upgrading the operating system s...

Страница 170: ... is installed yum install rdma verify that the RDMA service has started On RHEL or CentOS Use the service rdma status command to start service If RDMA has not started issue the following command service rdma start If RDMA does not start issue either of the following alternative commands etc init d rdma start or systemctl start rdma service 3 Verify that the RoCE devices were detected by examining ...

Страница 171: ...nd 0 fw_ver 8 3 9 0 node_guid 020e 1eff fe50 c7c0 sys_image_guid 020e 1eff fe50 c7c0 vendor_id 0x1077 vendor_part_id 5684 hw_ver 0x0 phys_port_cnt 1 port 1 state PORT_ACTIVE 1 max_mtu 4096 5 active_mtu 1024 3 sm_lid 0 port_lid 0 port_lmc 0x00 link_layer Ethernet 7 Verify the L2 and RoCE connectivity between all servers one server acts as a server another acts as a client Verify the L2 connection u...

Страница 172: ...ers in 0 02 seconds 15 56 usec iter To display RoCE statistics issue the following commands where X is the device number mount t debugfs nodev sys kernel debug cat sys kernel debug qedr qedrX stats vLAN Interfaces and GID Index Values If you are using vLAN interfaces on both the server and the client you must also configure the same vLAN ID on the switch If you are running traffic through a switch...

Страница 173: ...o command and compare it with the sys or class parameters For example ibv_devinfo d qedr0 v grep GID GID 0 fe80 0000 0000 0000 020e 1eff fec4 1b20 GID 1 fe80 0000 0000 0000 020e 1eff fec4 1b20 GID 2 0000 0000 0000 0000 0000 ffff 1e01 010a GID 3 0000 0000 0000 0000 0000 ffff 1e01 010a GID 4 3ffe ffff 0000 0f21 0000 0000 0000 0004 NOTE The default GID value is zero 0 for back to back or pause settin...

Страница 174: ... cat sys class infiniband qedr0 ports 1 gids 1 fe80 0000 0000 0000 020e 1eff fec4 1b20 Option 2 Use the scripts from the FastLinQ source package fastlinq 8 x x x add ons roce show_gids sh DEV PORT INDEX GID IPv4 VER DEV qedr0 1 0 fe80 0000 0000 0000 020e 1eff fec4 1b20 v1 p4p1 qedr0 1 1 fe80 0000 0000 0000 020e 1eff fec4 1b20 v2 p4p1 qedr0 1 2 0000 0000 0000 0000 0000 ffff 1e01 010a 30 1 1 10 v1 p...

Страница 175: ...ID Index Server ib_send_bw d qedr0 F x 1 Client ib_send_bw d qedr0 F x 1 192 168 100 3 Verifying RoCE v2 Through Different Subnets NOTE You must specify the GID index values for RoCE v1 or RoCE v2 based server or switch configuration Pause PFC Use the GID index for the link local IPv6 address IPv4 address or IPv6 address To use vLAN tagged frames for RoCE traffic you must specify GID index values ...

Страница 176: ... via 192 168 100 1 dev p4p1 100 Client Configuration sbin ip link add link p4p1 name p4p1 101 type vlan id 101 ifconfig p4p1 101 192 168 101 3 24 up ip route add 192 168 100 0 24 via 192 168 101 1 dev p4p1 101 2 Set the switch settings using the following procedure Use any flow control method Pause DCBX CEE or DCBX IEEE and enable IP routing for RoCE v2 See Preparing the Ethernet Switch on page 13...

Страница 177: ...7 RoCE Configuration Configuring RoCE on the Adapter for Linux 152 AH0054602 00 J Server Switch Settings Figure 7 4 Switch Settings Server Client Switch Settings Figure 7 5 Switch Settings Client ...

Страница 178: ...ing scripts from the FastLinQ source package show_rdma_cm_roce_ver sh qedr0 is configured to IB RoCE v1 qedr1 is configured to IB RoCE v1 config_rdma_cm_roce_ver sh v2 configured rdma_cm for qedr0 to RoCE v2 configured rdma_cm for qedr1 to RoCE v2 Server Settings Figure 7 6 Configuring RDMA_CM Applications Server Client Settings Figure 7 7 Configuring RDMA_CM Applications Client ...

Страница 179: ...and For example esxcfg nics l Name PCI Driver Link Speed Duplex MAC Address MTU Description Vmnic0 0000 01 00 2 qedentv Up 25000Mbps Full a4 5d 36 2b 6c 92 1500 QLogic Corp QLogic FastLinQ QL41xxx 1 10 25 GbE Ethernet Adapter Vmnic1 0000 01 00 3 qedentv Up 25000Mbps Full a4 5d 36 2b 6c 93 1500 QLogic Corp QLogic FastLinQ QL41xxx 1 10 25 GbE Ethernet Adapter 4 To view a list of the RDMA devices iss...

Страница 180: ...ace on this port group and configure the IP issue the following command esxcfg vmknic a i IP address n subnet mask roce port group name For example esxcfg vmknic a i 192 168 10 20 n 255 255 255 0 roce_pg 9 To configure the vLAN ID issue the following command esxcfg vswitch v VLAN ID p roce_pg To run RoCE traffic with a vLAN ID configure the vLAN ID on the corresponding VMkernel port group Configur...

Страница 181: ...ce stats get d vmrdma0 Packets received 0 Packets sent 0 Bytes received 0 Bytes sent 0 Error packets received 0 Error packets sent 0 Error length packets received 0 Unicast packets received 0 Multicast packets received 0 Unicast bytes received 0 Multicast bytes received 0 Unicast packets sent 0 Multicast packets sent 0 Unicast bytes sent 0 Multicast bytes sent 0 Queue pairs allocated 0 Queue pairs...

Страница 182: ...elect version 6 5 0 d Under New Distributed Switch click Edit settings and then configure the following Number of uplinks Select an appropriate value Network I O Control Select Disabled Default port group Select the Create a default port group check box Port group name Type a name for the port group Figure 7 8 shows an example Figure 7 8 Configuring a New Distributed Switch 2 Configure a distribut...

Страница 183: ...ge shows the key pair value and its summary Click Edit d On the Edit Advanced System Settings page filter on PVRDMA to narrow all the settings to just Net PVRDMAVmknic e Set the Net PVRDMAVmknic value to vmknic for example vmk1 Figure 7 9 shows an example Figure 7 9 Assigning a vmknic for PVRDMA 4 Set the firewall rule for the PVRDMA a Right click a host and then click Settings b On the Settings p...

Страница 184: ...a Install the following supported guest OS RHEL 7 5 and 7 6 b Install OFED 3 18 c Compile and install the PVRDMA guest driver and library d Add a new PVRDMA network adapter to the VM as follows Edit the VM settings Add a new network adapter Select the newly added DVS port group as Network Select PVRDMA as the adapter type e After the VM is booted ensure that the PVRDMA guest driver is loaded ...

Страница 185: ...figuration ToS type of service is a single byte in the IPv4 header field ToS comprises two ECN least significant bits LSB and six Differentiated Services Code Point DSCP most significant bits MSB For IPv6 traffic class is the equivalent of the IPv4 ToS ECN explicit congestion notification is a mechanism where a switch adds to outgoing traffic an indication that congestion is imminent CNP congestio...

Страница 186: ... PFC is a mechanism for achieving it across distinct L2 networks However PFC is deficient in the following regards When activated PFC completely halts the traffic of the specified priority on the port as opposed to reducing transmission rate All traffic of the specified priority is affected even if there is a subset of specific connections that are causing the congestion PFC is a single hop mechan...

Страница 187: ...d after setting the value For example to set the vLAN priority number to 5 for subsequently created QPs issue the following command debugfs sh n eth0 t rdma_glob_vlan_pri 5 Setting ECN on RDMA Traffic Use the rdma_glob_ecn node to enable ECN for a specified RoCE priority For example to enable ECN on RoCE traffic using priority 5 issue the following command debugfs sh n eth0 t rdma_glob_ecn 1 This ...

Страница 188: ...Values dcqcn_cnp_send_timeout Minimal difference of send time between CNPs Units are in microseconds Values range between 50 500000 dcqcn_cnp_dscp DSCP value to be used on CNPs Values range between 0 63 dcqcn_cnp_vlan_priority vLAN priority to be used on CNPs Values range between 0 7 FCoE Offload uses 3 and iSCSI Offload TLV generally uses 4 Cavium rec ommends that you specify a number from 1 2 or...

Страница 189: ...lass priorities to better demonstrate DCQCN in operation debugfs sh n ens6f0 t dscp_pfc_enable 1 debugfs sh n ens6f0 t dscp_pfc_set 20 5 debugfs sh n ens6f0 t dscp_pfc_set 22 6 static DCB configurations 0x10 is static mode Mark priorities 5 and 6 as subject to pfc debugfs sh n ens6f0 t dcbx_set_mode 0x10 debugfs sh n ens6f0 t dcbx_set_pfc 5 1 debugfs sh n ens6f0 t dcbx_set_pfc 6 1 set roce global ...

Страница 190: ...n ens6f0 d phy_mac_stat P 0 grep Class Based Flow Control Limitations DCQCN has the following limitations DCQCN mode currently supports only up to 64 QPs Cavium adapters can determine vLAN priority for PFC purposes from vLAN priority or from DSCP bits in the ToS field However in the presence of both vLAN takes precedence ...

Страница 191: ...oot adapter iWARP configuration using the HII For more information about preboot adapter configuration see Chapter 5 Adapter Preboot Configuration To configure iWARP through HII in Default mode 1 Access the server BIOS System Setup and then click Device Settings 2 On the Device Settings page select a port for the 25G 41xxx Series Adapter 3 On the Main Configuration Page for the selected adapter cl...

Страница 192: ...x on page 171 Configuring iWARP on Windows This section provides procedures for enabling iWARP verifying RDMA and verifying iWARP traffic on Windows For a list of OSs that support iWARP see Table 7 1 on page 131 To enable iWARP on the Windows host and verify RDMA 1 Enable iWARP on the Windows host a Open the Windows Device Manager and then open the 41xxx Series Adapter NDIS Miniport Properties b O...

Страница 193: ...ll Command Get NetAdapterRdma 3 Using Windows PowerShell verify that NetworkDirect is enabled The Get NetOffloadGlobalSetting command output Figure 8 2 shows NetworkDirect as Enabled Figure 8 2 Windows PowerShell Command Get NetOffloadGlobalSetting To verify iWARP traffic 1 Map SMB drives and run iWARP traffic 2 Launch Performance Monitor Perfmon 3 In the Add Counters dialog box click RDMA Activit...

Страница 194: ...8 iWARP Configuration Configuring iWARP on Windows 169 AH0054602 00 J Figure 8 3 shows an example Figure 8 3 Perfmon Add Counters ...

Страница 195: ... 10 Share1 Microsoft Windows Network The command completed successfully b Issue the netstat xan command as follows where Share1 is mapped as an SMB share C Users Administrator netstat xan Active NetworkDirect Connections Listeners ShareEndpoints Mode IfIndex Type Local Address Foreign Address PID Kernel 56 Connection 192 168 11 20 16159 192 168 11 10 445 0 Kernel 56 Connection 192 168 11 20 15903 ...

Страница 196: ...e 131 iWARP configuration on a Linux system includes the following Installing the Driver Configuring iWARP and RoCE Detecting the Device Supported iWARP Applications Running Perftest for iWARP Configuring NFS RDMA iWARP RDMA Core Support on SLES 12 SP3 and OFED 4 8x Installing the Driver Install the RDMA drivers as shown in Chapter 3 Driver Installation Configuring iWARP and RoCE To enable iWARP a...

Страница 197: ...4 00 0 3 3 Load the RDMA driver by issuing the following command modprobe v qedr The following example shows the command entries to change the RDMA protocol to iWARP on multiple NPAR interfaces modprobe qed rdma_protocol_map 04 00 1 3 04 00 3 3 04 00 5 3 04 00 7 3 04 01 1 3 04 01 3 3 04 01 5 3 04 01 7 3 modprobe v qedr ibv_devinfo grep iWARP transport iWARP 1 transport iWARP 1 transport iWARP 1 tr...

Страница 198: ... 0x1077 vendor_part_id 5718 hw_ver 0x0 phys_port_cnt 1 port 1 state PORT_ACTIVE 4 max_mtu 4096 5 active_mtu 1024 3 sm_lid 0 port_lid 0 port_lmc 0x00 link_layer Ethernet Supported iWARP Applications Linux supported RDMA applications for iWARP include the following ibv_devinfo ib_devices ib_send_bw lat ib_write_bw lat ib_read_bw lat ib_atomic_bw lat For iWARP all applications must use the RDMA commu...

Страница 199: ...rt in this example root localhost ib_send_bw d qedr1 F R 192 168 11 3 Send BW Test Dual port OFF Device qedr1 Number of qps 1 Transport type IW Connection type RC Using SRQ OFF TX depth 128 CQ Moderation 100 Mtu 1024 B Link type Ethernet GID index 0 Max inline data 0 B rdma_cm QPs ON Data ex method rdma_cm local address LID 0000 QPN 0x0192 PSN 0xcde932 GID 00 14 30 196 192 110 00 00 00 00 00 00 00...

Страница 200: ... different file system identification FSID for each directory that you export 3 Load the svcrdma module as follows modprobe svcrdma 4 Load the service as follows For SLES enable and start the NFS server alias systemctl enable start status nfsserver For RHEL enable and start the NFS server and services systemctl enable start status nfs 5 Include the default RDMA port 20049 into this file as follows...

Страница 201: ...t the file system is mounted by issuing the mount command Ensure that the RDMA port and file system versions are correct mount grep rdma iWARP RDMA Core Support on SLES 12 SP3 and OFED 4 8x The user space library libqedr is part of the RDMA Core However the out of box libqedr does not support SLES 12 SP3 or OFED 4 8x Therefore these OS versions require a patch to support iWARP RDMA Core To apply t...

Страница 202: ... rping ucmatose umad_compile_test cmtime ibv_asyncwatch ibv_rc_pingpong ibv_ud_pingpong mckey rdma ndd rdma_xserver rstream udaddy umad_reg2 ibacm ibv_devices ibv_srq_pingpong ibv_xsrq_pingpong rcopy rdma_server riostream srp_daemon udpong umad_register2 Run applications from the current RDMA Core master location For example rping c v C 5 a 192 168 21 3 ping data rdma ping 0 ABCDEFGHIJKLMNOPQRSTUV...

Страница 203: ...dma ping 0 ABCDEFGHIJKLMNOPQRSTUVWXYZ _ abcdefghijklmnopqr ping data rdma ping 1 BCDEFGHIJKLMNOPQRSTUVWXYZ _ abcdefghijklmnopqrs ping data rdma ping 2 CDEFGHIJKLMNOPQRSTUVWXYZ _ abcdefghijklmnopqrst ping data rdma ping 3 DEFGHIJKLMNOPQRSTUVWXYZ _ abcdefghijklmnopqrstu ping data rdma ping 4 EFGHIJKLMNOPQRSTUVWXYZ _ abcdefghijklmnopqrstuv client DISCONNECT EVENT ...

Страница 204: ...n page 186 Configuring iSER on ESXi 6 7 on page 187 Before You Begin As you prepare to configure iSER consider the following iSER is supported only in inbox OFED for the following operating systems RHEL 7 5 and 7 6 SLES 12 SP3 and 15 VMware ESXi 6 7 U1 After logging into the targets or while running I O traffic unloading the Linux RoCE qedr driver may crash the system While running I O performing ...

Страница 205: ..._isert 5 Verify that all RDMA and iSER modules are loaded on the initiator and target devices by issuing the lsmod grep qed and lsmod grep iser commands 6 Verify that there are separate hca_id instances by issuing the ibv_devinfo command as shown in Step 6 on page 146 7 Check the RDMA connection on the initiator device and the target device a On the initiator device issue the following command rpi...

Страница 206: ...the same for any iSCSI target except that you issue the command enable_iser Boolean true on the applicable portals The portal instances are identified as iser in Figure 9 2 Figure 9 2 iSER Portal Instances 9 Install Linux iSCSI Initiator Utilities using the yum install iscsi initiator utils commands a To discover the iSER target issue the iscsiadm command For example iscsiadm m discovery t st p 19...

Страница 207: ...er c To connect to or log in to the iSER target issue the iscsiadm command For example iscsiadm m node l p 192 168 100 99 3260 T iqn 2015 06 test target1 d Confirm that the Iface Transport is iser in the target connection as shown in Figure 9 3 Issue the iscsiadm command for example iscsiadm m session P2 Figure 9 3 Iface Transport Confirmed e To check for a new iSCSI device as shown in Figure 9 4 ...

Страница 208: ...python configobj 4 7 2 18 10 noarch rpm python PrettyTable 0 7 2 8 5 noarch rpm python configshell 1 5 1 44 noarch rpm python pyparsing 2 0 1 4 10 noarch rpm python netifaces 0 8 6 55 x86_64 rpm python rtslib 2 2 6 6 noarch rpm python urwid 1 1 1 6 144 x86_64 rpm targetcli 2 1 3 8 x86_64 rpm 2 Before starting the targetcli load all RoCE device drivers and iSER modules as follows modprobe qed modpr...

Страница 209: ...sion 2 1 fb41 Copyright 2011 2013 by Datera Inc and others For help on commands type help 2 Issue the following commands backstores ramdisk create Ramdisk1 1 1g nullio true iscsi create iqn 2017 04 com org iserport1 target1 iscsi iqn 2017 04 com org iserport1 target1 tpg1 luns create backstores ramdisk Ramdisk1 1 iscsi iqn 2017 04 com org iserport1 target1 tpg1 portals create 192 168 21 4 ip_port ...

Страница 210: ...iadm m node o update T iqn 2017 04 com org iserport1 target1 n iface transport_name v iser 3 Log into the target using port 3261 iscsiadm m node l p 192 168 21 4 3261 T iqn 2017 04 com org iserport1 target1 Logging in to iface iser target iqn 2017 04 com org iserport1 target1 portal 192 168 21 4 3261 multiple Login to iface iser target iqn 2017 04 com org iserport1 target1 portal 192 168 21 4 3261...

Страница 211: ... CPUFREQ continue echo n performance CPUFREQ done Verify that all CPU cores are set to maximum performance mode by issuing the following command cat sys devices system cpu cpu cpufreq scaling_governor Configuring Kernel sysctl Settings Set the kernel sysctl settings as follows sysctl w net ipv4 tcp_mem 4194304 4194304 4194304 sysctl w net ipv4 tcp_wmem 4096 65536 4194304 sysctl w net ipv4 tcp_rmem...

Страница 212: ...cho 0 sys block sdd queue add_random echo 1 sys block sdd queue rq_affinity Configuring iSER on ESXi 6 7 This section provides information for configuring iSER for VMware ESXi 6 7 Before You Begin Before you configure iSER for ESXi 6 7 ensure that the following is complete The CNA package with NIC and RoCE drivers is installed on the ESXi 6 7 system and the devices are listed To view RDMA devices ...

Страница 213: ...ame PCI Driver Link Speed Duplex MAC Address MTU Description vmnic0 0000 01 00 0 ntg3 Up 1000Mbps Full e0 db 55 0c 5f 94 1500 Broadcom Corporation NetXtreme BCM5720 Gigabit Ethernet vmnic1 0000 01 00 1 ntg3 Down 0Mbps Half e0 db 55 0c 5f 95 1500 Broadcom Corporation NetXtreme BCM5720 Gigabit Ethernet vmnic2 0000 02 00 0 ntg3 Down 0Mbps Half e0 db 55 0c 5f 96 1500 Broadcom Corporation NetXtreme BCM...

Страница 214: ...rsion TCP Protocol Supported false Bidirectional Transfers Supported false Maximum Cdb Length 64 Can Be NIC true Is NIC true Is Initiator true Is Target false Using TCP Offload Engine true Using ISCSI Offload Engine true 4 Add the target to the iSER initiator as follows esxcli iscsi adapter target list esxcli iscsi adapter discovery sendtarget add A vmhba65 a 192 168 10 11 esxcli iscsi adapter tar...

Страница 215: ...supported naa 6001405e81ae36b771c418b89c85dae0 Device Type Direct Access Size 512 MB Display Name LIO ORG iSCSI Disk naa 6001405e81ae36b771c418b89c85dae0 Multipath Plugin NMP Console Device vmfs devices disks naa 6001405e81ae36b771c418b89c85dae0 Devfs Path vmfs devices disks naa 6001405e81ae36b771c418b89c85dae0 Vendor LIO ORG Model ram1 Revis 4 0 SCSI Level 5 Is Pseudo false Status degraded Is RDM...

Страница 216: ...ows Server iSCSI offload is a technology that offloads iSCSI protocol processing overhead from host processors to the iSCSI HBA iSCSI offload increases network performance and throughput while helping to optimize server processor use This section covers how to configure the Windows iSCSI offload feature for the Cavium 41xxx Series Adapters With the proper iSCSI offload licensing you can configure ...

Страница 217: ...r an automatic service start Confirm the selection for the applet to launch Configuring Microsoft Initiator to Use Cavium s iSCSI Offload After the IP address is configured for the iSCSI adapter you must use Microsoft Initiator to configure and add a connection to the iSCSI target using the Cavium QLogic iSCSI adapter For more details on Microsoft Initiator see the Microsoft user guide To configur...

Страница 218: ...00 J Figure 10 1 iSCSI Initiator Properties Configuration Page c In the iSCSI Initiator Name dialog box type the new initiator IQN name and then click OK Figure 10 2 Figure 10 2 iSCSI Initiator Node Name Change 3 On the iSCSI Initiator Properties click the Discovery tab ...

Страница 219: ...J 4 On the Discovery page Figure 10 3 under Target portals click Discover Portal Figure 10 3 iSCSI Initiator Discover Target Portal 5 In the Discover Target Portal dialog box Figure 10 4 a In the IP address or DNS name box type the IP address of the target b Click Advanced ...

Страница 220: ...0054602 00 J Figure 10 4 Target Portal IP Address 6 In the Advanced Settings dialog box Figure 10 5 complete the following under Connect using a For Local adapter select the QLogic name or model Adapter b For Initiator IP select the adapter IP address c Click OK ...

Страница 221: ...10 iSCSI Configuration iSCSI Offload in Windows Server 196 AH0054602 00 J Figure 10 5 Selecting the Initiator IP Address 7 On the iSCSI Initiator Properties Discovery page click OK ...

Страница 222: ...10 iSCSI Configuration iSCSI Offload in Windows Server 197 AH0054602 00 J 8 Click the Targets tab and then on the Targets page Figure 10 6 click Connect Figure 10 6 Connecting to the iSCSI Target ...

Страница 223: ...sole GUI Question What tools should I use to create the connection to the target Answer Use Microsoft iSCSI Software Initiator version 2 08 or later NOTE Some limitations of the teaming functionality include Teaming does not support iSCSI adapters Teaming does not support NDIS adapters that are in the boot path Teaming supports NDIS adapters that are not in the iSCSI boot path but only for the SLB...

Страница 224: ... booting in either the offload or non offload path To set up Windows Server 2012 R2 2016 2019 iSCSI boot 1 Remove any local hard drives on the system to be booted remote system 2 Prepare the Windows OS installation media by following the slipstreaming steps in Injecting Slipstreaming Adapter Drivers into Windows Image Files on page 123 3 Load the latest Cavium QLogic iSCSI boot images into the NVR...

Страница 225: ...nal parts of the Linux kernel for specific functionality qed ko is the Linux eCore kernel module used for common Cavium FastLinQ 41xxx hardware initialization routines scsi_transport_iscsi ko is the Linux iSCSI transport library used for upcall and downcall for session management libiscsi ko is the Linux iSCSI library function needed for protocol data unit PDU and task processing as well as sessio...

Страница 226: ...le for exporting boot information Configuring qedi ko The qedi driver automatically binds to the exposed iSCSI functions of the CNA and the target discovery and binding is done through the Open iSCSI tools This functionality and operation is similar to that of the bnx2i driver To load the qedi ko kernel module issue the following commands modprobe qed modprobe libiscsi modprobe uio modprobe iscsi_...

Страница 227: ... 6c 192 168 25 91 empty iqn 1994 05 com redhat 534ca9b6adf 4 To ensure that the iscsiuio service is running issue the following command systemctl status iscsiuio service iscsiuio service iSCSI UserSpace I O driver Loaded loaded usr lib systemd system iscsiuio service disabled vendor preset disabled Active active running since Fri 2017 01 27 16 33 58 IST 6 days ago Docs man iscsiuio 8 Process 3745 ...

Страница 228: ... 1e c4 e1 6c target iqn 2003 04 com sanblaze virtualun virtualun target 05000007 portal 192 168 25 100 3260 successful 7 To verify that the iSCSI session was created issue the following command iscsiadm m session qedi 297 192 168 25 100 3260 1 iqn 2003 04 com sanblaze virtualun virtualun target 05000007 non flash 8 To check for iSCSI devices issue the iscsiadm command iscsiadm m session P3 Attache...

Страница 229: ...nel library needed to conduct FCoE forwarder FCF solicitation and FCoE initialization protocol FIP fabric login FLOGI libfc ko is the Linux FC kernel library needed for several functions including Name server login and registration rport session management scsi_transport_fc ko is the Linux FC SCSI transport library used for remote port and SCSI target management These modules must be loaded before...

Страница 230: ... top of the net_device qedf is not dependent on network drivers such as bnx2x and cnic qedf will automatically initiate FCoE discovery on link up because it is not dependent on fipvlan or fcoemon for FCoE interface creation Configuring qedf ko No explicit configuration is required for qedf ko The driver automatically binds to the exposed FCoE functions of the CNA and begins discovery This function...

Страница 231: ...d 806912 1 qedf scsi_mod 262144 14 sg hpsa qedf scsi_dh_alua scsi_dh_rdac dm_multipath scsi_transport_fc scsi_transport_sas libfc scsi_transport_iscsi scsi_dh_emc libata sd_mod sr_mod 2 Check dmesg to verify that the FCoE devices were detected properly In this example the two detected FCoE CNA devices are SCSI host numbers 4 and 5 dmesg grep qedf 235 321185 0000 00 00 0 qedf_init 3728 QLogic FCoE ...

Страница 232: ...L TYPE VENDOR MODEL REV TRAN sdb 5 0 0 0 disk SANBlaze VLUN P2T1L0 V7 3 fc sdc 5 0 0 1 disk SANBlaze VLUN P2T1L1 V7 3 fc sdd 5 0 0 2 disk SANBlaze VLUN P2T1L2 V7 3 fc sde 5 0 0 3 disk SANBlaze VLUN P2T1L3 V7 3 fc sdf 5 0 0 4 disk SANBlaze VLUN P2T1L4 V7 3 fc sdg 5 0 0 5 disk SANBlaze VLUN P2T1L5 V7 3 fc sdh 5 0 0 6 disk SANBlaze VLUN P2T1L6 V7 3 fc sdi 5 0 0 7 disk SANBlaze VLUN P2T1L7 V7 3 fc sdj...

Страница 233: ...s chapter provides instructions for Configuring SR IOV on Windows Configuring SR IOV on Linux on page 215 Configuring SR IOV on VMware on page 221 Configuring SR IOV on Windows To configure SR IOV on Windows 1 Access the server BIOS System Setup and then click System BIOS Settings 2 On the System BIOS Settings page click Integrated Devices 3 On the Integrated Devices page Figure 12 1 a Set the SR ...

Страница 234: ...ation 5 On the Main Configuration Page Device Level Configuration Figure 12 2 a Set the Virtualization Mode to SR IOV or NPAR SR IOV if you are using NPAR mode b Click Back Figure 12 2 System Setup for SR IOV Device Level Configuration 6 On the Main Configuration Page click Finish 7 In the Warning Saving Changes message box click Yes to save the configuration 8 In the Success Saving Changes messag...

Страница 235: ...der Property select SR IOV and then set the value to Enabled d Click OK Figure 12 3 Adapter Properties Advanced Enabling SR IOV 10 To create a Virtual Machine Switch vSwitch with SR IOV Figure 12 4 on page 211 a Launch the Hyper V Manager b Select Virtual Switch Manager c In the Name box type a name for the virtual switch d Under Connection type select External network e Select the Enable single r...

Страница 236: ...witch Manager Enabling SR IOV f The Apply Networking Changes message box advises you that Pending changes may disrupt network connectivity To save your changes and continue click Yes NOTE Be sure to enable SR IOV when you create the vSwitch This option is unavailable after the vSwitch is created ...

Страница 237: ...rtualFunctionsInUse 1 12 To create a virtual machine VM and export the virtual function VF in the VM a Create a virtual machine b Add the VMNetworkadapter to the virtual machine c Assign a virtual switch to the VMNetworkadapter d In the Settings for VM VM_Name dialog box Figure 12 5 Hardware Acceleration page under Single root I O virtualization select the Enable SR IOV check box and then click OK...

Страница 238: ...Cavium QLogic drivers for the adapters detected in the VM Use the latest drivers available from your vendor for your host OS do not use inbox drivers NOTE Be sure to use the same driver package on both the VM and the host system For example use the same qeVBD and qeND driver version on the Windows VM and in the Windows Hyper V host ...

Страница 239: ...pter is listed in the VM Figure 12 6 shows an example Figure 12 6 Device Manager VM with QLogic Adapter 14 To view the SR IOV VF details issue the following Windows PowerShell command PS C Users Administrator Get NetadapterSriovVf Figure 12 7 shows example output Figure 12 7 Windows PowerShell Command Get NetadapterSriovVf ...

Страница 240: ...age click Integrated Devices 3 On the System Integrated Devices page see Figure 12 1 on page 209 a Set the SR IOV Global Enable option to Enabled b Click Back 4 On the System BIOS Settings page click Processor Settings 5 On the Processor Settings Figure 12 8 page a Set the Virtualization Technology option to Enabled b Click Back Figure 12 8 System Setup Processor Settings for SR IOV 6 On the Syste...

Страница 241: ...Back Figure 12 9 System Setup for SR IOV Integrated Devices 9 On the Main Configuration Page click Finish save your settings and then reboot the system 10 To enable and verify virtualization a Open the grub conf file and configure the iommu parameter as shown in Figure 12 10 For details see Enabling IOMMU for SR IOV in UEFI based Linux OS Installations on page 220 For Intel based systems add intel...

Страница 242: ...I iommu A successful input output memory management unit IOMMU command output should show for example Intel IOMMU enabled d To view VF details number of VFs and total VFs issue the following command find sys grep I sriov 11 For a specific port enable a quantity of VFs a Issue the following command to enable for example 8 VFs on PCI instance 04 00 0 bus 4 device 0 function 0 root ah rh68 echo 8 sys...

Страница 243: ... different on the PFs 8070 in this example versus the VFs 8090 in this example Figure 12 11 Command Output for sriov_numvfs 12 To view a list of all PF and VF interfaces issue the following command ip link show grep i vf b2 Figure 12 12 shows example output Figure 12 12 Command Output for ip link show Command 13 Assign and verify MAC addresses a To assign a MAC address to the VF issue the followin...

Страница 244: ...ress 14 Power off the VM and attach the VF Some OSs support hot plugging of VFs to the VM a In the Virtual Machine dialog box Figure 12 13 click Add Hardware Figure 12 13 RHEL68 Virtual Machine b In the left pane of the Add New Virtual Hardware dialog box Figure 12 14 click PCI Host Device c In the right pane select a host device d Click Finish ...

Страница 245: ...eeded add more VFs in the VM Enabling IOMMU for SR IOV in UEFI based Linux OS Installations Follow the appropriate procedure for your Linux OS To enable IOMMU for SR IOV on Red Hat 6 x In the boot efi EFI redhat grub conf file locate the kernel line and then add the intel_iommu on boot parameter To enable IOMMU for SR IOV on Red Hat 7 x 1 In the etc default grub file locate GRUB_CMDLINE_LINUX and ...

Страница 246: ...the SR IOV Global Enable option to Enabled b Click Back 4 In the System Setup window click Device Settings 5 On the Device Settings page select a port for the 25G 41xxx Series Adapter 6 On the Device Level Configuration page see Figure 12 2 on page 209 a Set the Virtualization Mode to SR IOV b Click Back 7 On the Main Configuration Page click Finish 8 Save the configuration settings and reboot the...

Страница 247: ...QLogic FastLinQ QL41xxx Series 10 25 GbE Controller SR IOV VF PF_0 5 0_VF_3 0000 05 03 7 Network controller QLogic Corp QLogic FastLinQ QL41xxx Series 10 25 GbE Controller SR IOV VF PF_0 5 0_VF_15 0000 05 0e 0 Network controller QLogic Corp QLogic FastLinQ QL41xxx Series 10 25 GbE Controller SR IOV VF PF_0 5 1_VF_0 0000 05 0e 1 Network controller QLogic Corp QLogic FastLinQ QL41xxx Series 10 25 Gb...

Страница 248: ...the VM 14 Complete the Edit Settings dialog box Figure 12 15 as follows a In the New Device box select Network and then click Add b For Adapter Type select SR IOV Passthrough c For Physical Function select the Cavium QLogic VF d To save your configuration changes and close this dialog box click OK ...

Страница 249: ...H0054602 00 J Figure 12 15 VMware Host Edit Settings 15 To validate the VFs per port issue the esxcli command as follows root localhost esxcli network sriovnic vf list n vmnic6 VF ID Active PCI Address Owner World ID 0 true 005 02 0 60591 1 true 005 02 1 60591 ...

Страница 250: ...2 false 005 03 4 13 false 005 03 5 14 false 005 03 6 15 false 005 03 7 16 Install the Cavium QLogic drivers for the adapters detected in the VM Use the latest drivers available from your vendor for your host OS do not use inbox drivers The same driver version must be installed on the host and the VM 17 Power on the VM and then issue the ifconfig a command to verify that the added network interface...

Страница 251: ...ptions described in this chapter apply to Ethernet based RDMA protocols including RoCE and iWARP The development of NVMe oF with RDMA is defined by a technical sub group of the NVMe organization This chapter demonstrates how to configure NVMe oF for a simple network The example network comprises the following Two servers an initiator and a target The target server is equipped with a PCIe SSD drive...

Страница 252: ...VMe oF Network The NVMe oF configuration process covers the following procedures Installing Device Drivers on Both Servers Configuring the Target Server Configuring the Initiator Server Preconditioning the Target Server Testing the NVMe oF Devices Optimizing Performance 41xxx Series Adapter 41xxx Series Adapter ...

Страница 253: ...aries by issuing the following commands yum groupinstall Infiniband Support yum install tcl devel libibverbs devel libnl devel glib2 devel libudev devel lsscsi perftest yum install gcc make git ctags ncurses ncurses devel openssl openssl devel elfutils libelf devel c To ensure that NVMe OFED support is in the selected OS kernel issue the following command make menuconfig d Under Device Drivers ens...

Страница 254: ... command finishes before executing the next command To configure the target service 1 Load target modules Issue the following commands after each server reboot modprobe qedr modprobe nvmet modprobe nvmet rdma lsmod grep nvme confirm that the modules are loaded 2 Create the target subsystem NVMe Qualified Name NQN with the name indicated by nvme subsystem name Use the NVMe oF specifications for exa...

Страница 255: ...vice path using the lsblk command This system has two NVMe devices nvme0n1 and nvme1n1 echo 1 namespaces 1 enable Enables the namespace mkdir sys kernel config nvmet ports 1 cd sys kernel config nvmet ports 1 Creates NVMe port 1 echo 1 1 1 1 addr_traddr Sets the same IP address For example 1 1 1 1 is the IP address for the target port of the 41xxx Series Adapter echo rdma addr_trtype Sets the tran...

Страница 256: ...ecuting the next command To configure the initiator server 1 Load the NVMe modules Issue these commands after each server reboot modprobe qedr modprobe nvme rdma 2 Download compile and install the nvme cli initiator utility Issue these commands at the first configuration you do not need to issue these commands after each reboot git clone https github com linux nvme nvme cli git cd nvme cli make ma...

Страница 257: ...r NVMe target servers that are tested out of the box show a higher than expected performance Before running a benchmark the target server needs to be prefilled or preconditioned To precondition the target server 1 Secure erase the target server with vendor specific tools similar to formatting This test example uses an Intel NVMe SSD device which requires the Intel Data Center Tool that is availabl...

Страница 258: ... oF device Issue the following command fio filename dev nvme0n1 direct 1 time_based rw randread refill_buffers norandommap randrepeat 0 ioengine libaio bs 4k iodepth 1 numjobs 1 runtime 60 group_reporting name temp out FIO reports two latency types submission and completion Submission latency slat measures application to kernel latency Completion latency clat measures end to end kernel latency The...

Страница 259: ...d for reads only randwrite for writes only or randrw for reads and writes Optimizing Performance To optimize performance on both initiator and target servers 1 Configure the following system BIOS settings Power Profiles Max Performance or equivalent ALL C States Disabled Hyperthreading Disabled 2 Configure the Linux kernel parameters by editing the grub file etc default grub a Add parameters to en...

Страница 260: ...fin sh The following script sets the IRQ affinity bin bash RSS affinity setup script input the device name ethX OFFSET 0 0 1 0 1 2 0 1 2 3 FACTOR 1 2 3 4 OFFSET 0 FACTOR 1 LASTCPU cat proc cpuinfo grep processor tail n1 cut d f2 MAXCPUID echo 2 LASTCPU p dc OFFSET echo 2 OFFSET p dc FACTOR echo 2 FACTOR p dc CPUID 1 for eth in do NUM grep eth proc interrupts wc l NUM_FP NUM INT grep m 1 eth proc i...

Страница 261: ...r for CPUFREQ in sys devices system cpu cpu cpufreq scaling_governor do f CPUFREQ continue echo n performance CPUFREQ done cat sys devices system cpu cpu0 cpufreq scaling_governor To configure the network or memory settings sysctl w net ipv4 tcp_mem 16777216 16777216 16777216 sysctl w net ipv4 tcp_wmem 4096 65536 16777216 sysctl w net ipv4 tcp_rmem 4096 87380 16777216 sysctl w net core wmem_max 16...

Страница 262: ... Configuration with RDMA Optimizing Performance 237 AH0054602 00 J echo 0 sys block nvme0n1 queue add_random echo 2 sys block nvme0n1 queue nomerges NOTE The following commands apply only to the initiator server ...

Страница 263: ...ws Server 2016 Hyper V with Network Direct Kernel Provider Interface NDKPI Mode 2 host virtual network adapters host virtual NICs support RDMA RoCE configuration procedures in this section include Creating a Hyper V Virtual Switch with an RDMA NIC Adding a vLAN ID to Host Virtual NIC Verifying If RoCE is Enabled Adding Host Virtual NICs Virtual Ports Mapping the SMB Drive and Running RoCE Traffic ...

Страница 264: ...nterfaces set the value of the NetworkDirect Functionality parameter to Enabled 2 Launch Hyper V Manager 3 Click Virtual Switch Manager see Figure 14 1 Figure 14 1 Enabling RDMA in Host Virtual NIC 4 Create a virtual switch 5 Select the Allow management operating system to share this network adapter check box In Windows Server 2016 a new parameter Network Direct RDMA is added in the Host virtual N...

Страница 265: ... V Virtual Ethernet Adapter Properties 4 To enable RDMA issue the following Windows PowerShell command PS C Users Administrator Enable NetAdapterRdma vEthernet New Virtual Switch PS C Users Administrator Adding a vLAN ID to Host Virtual NIC To add a vLAN ID to a host virtual NIC 1 To find the host virtual NIC name issue the following Windows PowerShell command PS C Users Administrator Get VMNetwor...

Страница 266: ... To verify if the RoCE is enabled Issue the following Windows PowerShell command Get NetAdapterRdma Command output lists the RDMA supported adapters as shown in Figure 14 4 Figure 14 4 Windows PowerShell Command Get NetAdapterRdma NOTE Note the following about adding a vLAN ID to a host virtual NIC A vLAN ID must be assigned to a host virtual NIC The same vLAN ID must be assigned to ports on the s...

Страница 267: ...hown in To enable RDMA in a host virtual NIC on page 239 3 To assign a vLAN ID to the virtual port issue the following command Set VMNetworkAdapterVlan VMNetworkAdapterName SMB VlanId 5 Access ManagementOS Mapping the SMB Drive and Running RoCE Traffic To map the SMB drive and run the RoCE traffic 1 Launch the Performance Monitor Perfmon 2 Complete the Add Counters dialog box Figure 14 5 as follow...

Страница 268: ...016 Configuring RoCE Interfaces with Hyper V 243 AH0054602 00 J Figure 14 5 Add Counters Dialog Box If the RoCE traffic is running counters appear as shown in Figure 14 6 Figure 14 6 Performance Monitor Shows RoCE Traffic ...

Страница 269: ...d on a team SET member network adapters must all be installed in the same physical Hyper V host RoCE over SET procedures included in this section Creating a Hyper V Virtual Switch with SET and RDMA Virtual NICs Enabling RDMA on SET Assigning a vLAN ID on SET Running RDMA Traffic on SET Creating a Hyper V Virtual Switch with SET and RDMA Virtual NICs To create a Hyper V virtual switch with SET and ...

Страница 270: ...n VMNetworkAdapterName SET VlanId 5 Access ManagementOS Running RDMA Traffic on SET For information about running RDMA traffic on SET go to https technet microsoft com en us library mt403349 aspx Configuring QoS for RoCE The two methods of configuring quality of service QoS include Configuring QoS by Disabling DCBX on the Adapter Configuring QoS by Enabling DCBX on the Adapter NOTE Note the follow...

Страница 271: ...CBX 1 Disable DCBX on the adapter 2 Using HII set the RoCE Priority to 0 3 To install the DCB role in the host issue the following Windows PowerShell command PS C Users Administrators Install WindowsFeature Data Center Bridging 4 To set the DCBX Willing mode to False issue the following Windows PowerShell command PS C Users Administrators set NetQosDcbxSetting Willing 0 5 Enable QoS in the minipor...

Страница 272: ...ble QoS 6 Assign the vLAN ID to the interface as follows a Open the miniport properties and then click the Advanced tab b On the adapter properties Advanced page Figure 14 10 under Property select VLAN ID and then set the value c Click OK NOTE The preceding step is required for priority flow control PFC ...

Страница 273: ...QoSFlowControl Priority 5 8 To disable priority flow control on any other priority issue the following commands PS C Users Administrator Disable NetQosFlowControl 0 1 2 3 4 6 7 PS C Users Administrator Get NetQosFlowControl Priority Enabled PolicySet IfIndex IfAlias 0 False Global 1 False Global 2 False Global 3 False Global 4 False Global NOTE If configuring RoCE over Hyper V do not assign a vLAN...

Страница 274: ...ActiveStore PS C Users Administrator Get NetQosPolicy PolicyStore activestore Name tcp Owner PowerShell WMI NetworkProfile All Precedence 127 JobObject IPProtocol TCP PriorityValue 0 Name smb Owner PowerShell WMI NetworkProfile All Precedence 127 JobObject NetDirectPort 445 PriorityValue 5 10 To configure ETS for all traffic classes defined in the previous step issue the following commands PS C Us...

Страница 275: ...rafficClasses TC TSA Bandwidth Priorities 0 ETS 20 1 4 6 7 1 ETS 50 5 2 ETS 30 0 OperationalFlowControl Priority 5 Enabled OperationalClassifications Protocol Port Type Priority Default 0 NetDirect 445 5 12 Create a startup script to make the settings persistent across the system reboots 13 Run RDMA traffic and verify as described in RoCE Configuration on page 131 Configuring QoS by Enabling DCBX ...

Страница 276: ...ers Administrators set NetQosDcbxSetting Willing 1 5 Enable QoS in the miniport properties as follows a On the adapter properties Advanced page Figure 14 11 under Property select Quality of Service and then set the value to Enabled b Click OK NOTE If the switch does not have a way of designating the RoCE traffic you may need to set the RoCE Priority to the number used by the switch Arista switches...

Страница 277: ... Advanced Properties Enabling QoS 6 Assign the vLAN ID to the interface required for PFC as follows a Open the miniport properties and then click the Advanced tab b On the adapter properties Advanced page Figure 14 12 under Property select VLAN ID and then set the value c Click OK ...

Страница 278: ...l command PS C Users Administrators Get NetAdapterQoS Name Ethernet 5 Enabled True Capabilities Hardware Current MacSecBypass NotSupported NotSupported DcbxSupport CEE CEE NumTCs Max ETS PFC 4 4 4 4 4 4 OperationalTrafficClasses TC TSA Bandwidth Priorities 0 ETS 5 0 4 6 7 1 ETS 95 5 OperationalFlowControl Priority 5 Enabled OperationalClassifications Protocol Port Type Priority ...

Страница 279: ... VMMQ on a Management NIC Monitoring Traffic Statistics Enabling VMMQ on the Adapter To enable VMMQ on the adapter 1 Open the miniport properties and then click the Advanced tab 2 On the adapter properties Advanced page Figure 14 13 under Property select Virtual Switch RSS and then set the value to Enabled 3 Click OK NOTE The preceding example is taken when the adapter port is connected to an Aris...

Страница 280: ...tch with or Without SR IOV To create a virtual machine switch with or without SR IOV 1 Launch the Hyper V Manager 2 Select Virtual Switch Manager see Figure 14 14 3 In the Name box type a name for the virtual switch 4 Under Connection type a Click External network b Select the Allow management operating system to share this network adapter check box ...

Страница 281: ...Virtual Switch Manager 5 Click OK Enabling VMMQ on the Virtual Machine Switch To enable VMMQ on the virtual machine switch Issue the following Windows PowerShell command PS C Users Administrators Set VMSwitch name q1 defaultqueuevmmqenabled true defaultqueuevmmqqueuepairs 4 ...

Страница 282: ...l command PS C Users Administrator Get VMSwitch Name ql fl Figure 14 15 shows example output Figure 14 15 Windows PowerShell Command Get VMSwitch Creating a VM and Enabling VMMQ on VMNetworkadapters in the VM To create a virtual machine VM and enable VMMQ on VMNetworksadapters in the VM 1 Create a VM 2 Add the VMNetworkadapter to the VM 3 Assign a virtual switch to the VMNetworkadapter ...

Страница 283: ...NIC issue the following command PS C Users Administrator Set VMNetworkAdapter ManagementOS vmmqEnabled false A VMMQ will also be available for the multicast open shortest path first MOSPF Monitoring Traffic Statistics To monitor virtual function traffic in a virtual machine issue the following Windows PowerShell command PS C Users Administrator Use get netadapterstatistics fl Configuring VXLAN VXL...

Страница 284: ... Offload Figure 14 16 Advanced Properties Enabling VXLAN 3 Set the Value to Enabled 4 Click OK Deploying a Software Defined Network To take advantage of VXLAN encapsulation task offload on virtual machines you must deploy a Software Defined Networking SDN stack that utilizes a Microsoft Network Controller For more details refer to the following Microsoft TechNet link on Software Defined Networking...

Страница 285: ... storage systems with local storage For more information refer to the following Microsoft TechNet link https technet microsoft com en us windows server docs storage storage spaces storage spaces direct windows server 2016 Configuring the Hardware Figure 14 17 shows an example of hardware configuration Figure 14 17 Example Hardware Configuration NOTE The disks used in this example are 4 400G NVMe a...

Страница 286: ...Windows Server roles Hyper V 3 Install the following features Failover Cluster Data center bridging DCB 4 Connect the nodes to a domain and add domain accounts Configuring the Network To deploy Storage Spaces Direct the Hyper V switch must be deployed with RDMA enabled host virtual NICs To configure the network on each server 1 Configure the physical network switch as follows a Connect all adapter...

Страница 287: ...s and to then enable SET issue the following command New VMSwitch Name SETswitch NetAdapterName port1 port2 port3 port4 EnableEmbeddedTeaming true c To add host virtual NICs to the virtual switch issue the following commands Add VMNetworkAdapter SwitchName SETswitch Name SMB_1 managementOS Add VMNetworkAdapter SwitchName SETswitch Name SMB_2 managementOS NOTE Network Quality of Service is used to ...

Страница 288: ...e NetAdapter vEthernet SMB_1 Disable NetAdapter vEthernet SMB_2 Enable NetAdapter vEthernet SMB_2 g To enable RDMA on the host virtual NIC adapters issue the following command Enable NetAdapterRdma SMB1 SMB2 h To verify RDMA capabilities issue the following command Get SmbClientNetworkInterface where RdmaCapable EQ true Configuring Storage Spaces Direct Configuring Storage Spaces Direct in Windows...

Страница 289: ...hem before enabling Storage Spaces Direct Otherwise they will not be included in the Storage Spaces Direct storage pool Step 3 Configuring a Cluster Witness You should configure a witness for the cluster so that this four node system can withstand two nodes failing or being offline With these systems you can configure file share witness or cloud witness For more information go to https blogs msdn ...

Страница 290: ...eOEM Confirm false _ Set Disk isreadonly true _ Set Disk isoffline true Get Disk Number ne null IsBoot ne true IsSystem ne true PartitionStyle eq RAW Group NoElement Property FriendlyName Sort Property PsComputerName Count Step 5 Enabling Storage Spaces Direct After creating the cluster issue the Enable ClusterStorageSpacesDirect Windows PowerShell cmdlet The cmdlet places the storage system into ...

Страница 291: ... the storage pool New Volume StoragePoolFriendlyName S2D FriendlyName VirtualDiskName FileSystem CSVFS_ReFS StorageTierfriendlyNames Capacity Performance StorageTierSizes Size of capacity tier in size units example 800GB Size of Performance tier in size units example 80GB CimSession ClusterName Step 7 Creating or Deploying Virtual Machines You can provision the virtual machines onto the nodes of t...

Страница 292: ...ases the time between the CPU load measurement and the indirection table update This feature prevents slowdown during high traffic situations RSSv2 can dynamically spread receive queues over multiple processors much more responsively than RSSv1 For more information visit the following Web page https docs microsoft com en us windows hardware drivers network receive side scaling version 2 rssv2 RSSv...

Страница 293: ...s In addition Microsoft changed the default behavior of the Virtual NICs option to have VMMQ enabled with the 16 queue pairs This behavior change impacts the quantity of available resources For example suppose the NIC supports 32 VMQs and 64 queue pairs In Windows Server 2016 when you add 32 virtual NICs VNICs they will have VMQ acceleration However in Windows Server 2019 you will get 4 VNICs with...

Страница 294: ...F Non Default VPort VMQ VMMQ SR IOV Non Default VPort VF 1 The default value of the Max Queue Pairs L2 per VPort parameter is set to Auto which is one of the following Max Queue Pairs for Default vPort 8 Max Queue Pairs for Non Default vPort 4 If you select a value less than 8 then Max Queue Pairs for Default vPort 8 Max Queue Pairs for Non Default vPort value If you select a value greater than 8 ...

Страница 295: ...ization resources in Windows 2019 for Dell 41xxx Series Adapters Table 15 1 Windows 2019 Virtualization Resources for Dell 41xxx Series Adapters Two port NIC only Single Function Non CNA Quantity Maximum VMQs 102 Maximum VFs 96 Maximum QPs 112 Four port NIC only Single Function Non CNA Quantity Maximum VMQs 47 Maximum VFs 48 Maximum QPs 48 ...

Страница 296: ...ltQueueVmmqQueuePairs number Table 15 2 Windows 2019 VMQ and VMMQ Accelerations Two port NIC only Single Function Non CNA Default Value Other Possible Values Maximum Queue Pairs L2 per VPort a a Max Queue Pairs L2 VPort is configurable parameter of NIC advanced properties Auto 1 2 4 8 16 Maximum VMQs 26 103 52 26 13 6 Default VPort Queue Pairs 8 8 8 8 8 16 PF Non default VPort Queue Pairs 4 1 2 4 ...

Страница 297: ...et VMNetworkAdapter VMName vm name IovWeight 100 IovQueuePairsRequested number To apply multiple quantities of queue pairs to any vPort The quantity of queue pairs must be less than or equal to the total number of CPU cores on the system The quantity of queue pairs must be less than or equal to the value of Max Queue Pairs L2 Per VPort For more information see Max Queue Pairs L2 Per VPort NOTE The...

Страница 298: ...ur system Inspect all cables and connections Verify that the cable connections at the network adapter and the switch are attached properly Verify the adapter installation by reviewing Installing the Adapter on page 6 Ensure that the adapter is properly seated in the slot Check for specific hardware problems such as obvious damage to board components or the PCI edge connector Verify the configurati...

Страница 299: ... drivers are loaded for your Windows Linux or VMware system Verifying Drivers in Windows See the Device Manager to view vital information about the adapter link status and network connectivity Verifying Drivers in Linux To verify that the qed ko driver is loaded properly issue the following command lsmod grep i module name If the driver is loaded the output of this command shows the size of the dr...

Страница 300: ... Driver qede x x x x Verifying Drivers in VMware To verify that the VMware ESXi drivers are loaded issue the following command esxcli software vib list Testing Network Connectivity This section provides procedures for testing network connectivity in Windows and Linux environments Testing Network Connectivity for Windows Test network connectivity using the ping command To determine if the network c...

Страница 301: ...r the ethtool command ethtool s ethX speed SSSS Microsoft Virtualization with Hyper V Microsoft Virtualization is a hypervisor virtualization system for Windows Server 2012 R2 For more information on Hyper V go to https technet microsoft com en us library Dn282278 aspx Linux specific Issues Problem Errors appear when compiling driver source code Solution Some installations of Linux distributions d...

Страница 302: ... is due to the termination of the hostd daemon which affects connectivity with the VI client Solution Contact VMware technical support Collecting Debug Data Use the commands in Table 16 1 to collect debug data Table 16 1 Collecting Debug Data Commands Debug Data Description demesg T Kernel logs ethtool d Register dump sys_info sh System information available in the driver bundle ...

Страница 303: ...ors for the state of the adapter port link and activity Table A 1 Adapter Port Link and Activity LEDs Port LED LED Appearance Network State Link LED Off No link cable disconnected Continuously illuminated Link Activity LED Off No port activity Blinking Port activity ...

Страница 304: ...ge 284 Supported Specifications The 41xxx Series Adapters support a variety of cables and optical modules that comply with SFF8024 Specific form factor compliance is as follows SFPs SFF8472 for memory map SFF8419 or SFF8431 low speed signals and power Optical modules electrical input output active copper cables ACC and active optical cables AOC 10G SFF8431 limiting interface 25G IEEE 802 3by Annex...

Страница 305: ...de 1539W SFP 10G to SFP 10G 1 26 V239T SFP 10G to SFP 10G 3 26 48V40 SFP 10G to SFP 10G 5 26 Cisco H606N SFP 10G to SFP 10G 1 26 K591N SFP 10G to SFP 10G 3 26 G849N SFP 10G to SFP 10G 5 26 Dell V250M SFP 10G to SFP 10G 1 26 53HVN SFP 10G to SFP 10G 3 26 358VV SFP 10G to SFP 10G 5 26 407 BBBK SFP 10G to SFP 10G 1 30 407 BBBI SFP 10G to SFP 10G 3 26 407 BBBP SFP 10G to SFP 10G 5 26 25G DAC Amphenol ...

Страница 306: ...470 AAVO QSFP 40G to 4xSFP 10G 1 26 470 AAXG QSFP 40G to 4xSFP 10G 3 26 470 AAXH QSFP 40G to 4xSFP 10G 5 26 100G DAC Splitter 4 25G Amphenol NDAQGJ 0001 QSFP28 100G to 4xSFP28 25G 1 26 NDAQGF 0002 QSFP28 100G to 4xSFP28 25G 2 30 NDAQGF 0003 QSFP28 100G to 4xSFP28 25G 3 30 NDAQGJ 0005 QSFP28 100G to 4xSFP28 25G 5 26 Dell 026FN3 Rev A00 QSFP28 100G to 4XSFP28 25G 1 26 0YFNDD Rev A00 QSFP28 100G to 4...

Страница 307: ...N SFP SR 10G LR N A Finisar FTLX8571D3BCL QL SFP SR N A N A FTLX1471D3BCL QL SFP LR N A N A 25G Optical Transceiver Dell P7D7R SFP28 Optical Transceiver SR 25G SR N A Finisar FTLF8536P4BCL SFP28 Optical Transceiver SR N A N A FTLF8538P4BCL SFP28 Optical Transceiver SR no FEC N A N A 10 25G Dual Rate Transceiver Dell M14MK SFP28 N A N A Table B 1 Tested Cables and Optical Modules Continued Speed Fo...

Страница 308: ...03 SFP AOC 2 N A P9GND SFP AOC 3 N A T1KCN SFP AOC 5 N A 1DXKP SFP AOC 7 N A MT7R2 SFP AOC 10 N A K0T7R SFP AOC 15 N A W5G04 SFP AOC 20 N A 25G AOC Dell X5DH4 SFP28 AOC 20 N A InnoLight TF PY003 N00 SFP28 AOC 3 N A TF PY020 N00 SFP28 AOC 20 N A a Cable length is indicated in meters b DAC is direct attach cable c AOC is active optical cable Table B 1 Tested Cables and Optical Modules Continued Spee...

Страница 309: ...list is based on switches that are available at the time of product release and is subject to change over time as new switches enter the market or are discontinued Table B 2 Switches Tested for Interoperability Manufacturer Ethernet Switch Model Arista 7060X 7160 Cisco Nexus 3132 Nexus 3232C Nexus 5548 Nexus 5596T Nexus 6000 Dell EMC S6100 Z9100 HPE FlexFabric 5950 Mellanox SN2410 SN2700 ...

Страница 310: ...tion and the switch 2 Open a command line session and then log in to the switch as follows Login admin Password admin 3 Enable configuration of the switch port Dell enable Password xxxxxx Dell config 4 Identify the module and port to be configured The following example uses module 1 port 5 Dell conf stack unit 1 port 5 portmode Set portmode for a module Dell conf stack unit 1 port 5 portmode dual ...

Страница 311: ...dentify the switch port interface module 1 port 5 interface 1 and confirm the auto negotiation status Dell conf interface tw 1 5 1 Dell conf if tf 1 5 1 intf type cr4 autoneg Enable autoneg b Disable auto negotiation Dell conf if tf 1 5 1 no intf type cr4 autoneg c Verify that auto negotiation is disabled Dell conf if tf 1 5 1 do show run interface tw 1 5 1 interface twentyFiveGigE 1 5 1 no ip add...

Страница 312: ...n another PF is disallowed by those management tools Because storage personality is disabled by default only the personality that has been configured using HII or Cavium QLogic management tools is written in NVRAM configuration When this limitation is removed users can configure additional PFs on the same port for storage in NPAR Mode Concurrent RoCE and iWARP Is Not Supported on the Same Port RoC...

Страница 313: ...apter board Advanced Configuration and Power Interface See ACPI bandwidth A measure of the volume of data that can be transmitted at a specific transmission rate A 1Gbps or 2Gbps Fibre Channel port can transmit or receive at nominal rates of 1 or 2Gbps depending on the device to which it is connected This corre sponds to actual bandwidth values of 106MB and 212MB respectively BAR Base address regi...

Страница 314: ...nec tivity DCB enables 802 1 bridges to be used for the deployment of a converged network where all applications can be run over a single physical infrastructure DCBX Data center bridging exchange A protocol used by DCB devices to exchange config uration information with directly connected peers The protocol may also be used for misconfiguration detection and for configu ration of the peer device ...

Страница 315: ...ween computers typically at speeds of 10 and 100 million bits per second Mbps ETS Enhanced transmission selection A standard that specifies the enhancement of transmission selection to support the allocation of bandwidth among traffic classes When the offered load in a traffic class does not use its allocated bandwidth enhanced transmission selection allows other traffic classes to use the availab...

Страница 316: ...y related to electricity Internet Protocol See IP Internet small computer system interface See iSCSI Internet wide area RDMA protocol See iWARP IP Internet protocol A method by which data is sent from one computer to another over the Internet IP specifies the format of packets also called datagrams and the addressing scheme IQN iSCSI qualified name iSCSI node name based on the initiator manufactur...

Страница 317: ...ssage into smaller data packets frames that can be sent over the wire up to 1 500 bytes for standard Ethernet frames and up to 9 000 bytes for jumbo Ethernet frames The segmentation process frees up the server CPU from having to segment large TCP messages into smaller packets that will fit inside the supported frame size maximum transmission unit See MTU message signaled interrupts See MSI MSI X M...

Страница 318: ... peripheral compo nent interconnect PCI and PCI extended PCI X desktop and server slots QoS Quality of service Refers to the methods used to prevent bottlenecks and ensure business continuity when transmitting data over virtual ports by setting priorities and allocating bandwidth quality of service See QoS PF Physical function RDMA Remote direct memory access The ability for one node to write dire...

Страница 319: ...SI session Initiators request data from targets Targets are typically disk drives tape drives or other media devices Typically a SCSI peripheral device is the target but an adapter may in some cases be a target A target can contain many LUNs A target is a device that responds to a requested by an initiator the host system Peripherals are targets but for some commands for example a SCSI COPY comman...

Страница 320: ...ing and messaging virtual interface See VI virtual logical area network See vLAN virtual machine See VM virtual port See vPort vLAN Virtual logical area network LAN A group of hosts with a common set of require ments that communicate as if they were attached to the same wire regardless of their physical location Although a vLAN has the same attributes as a physical LAN it allows for end stations t...

Страница 321: ...tents and or patent applications This document is provided for informational purposes only and may contain errors Marvell reserves the right without notice to make changes to this document or in product design or specifications Marvell disclaims any warranty of any kind expressed or implied and does not guarantee that any results or performance described in the document will be achieved by you All...

Отзывы: