background image

5

CATLER RECOMMENDS SAFETY FIRST

CATLER RECOMMENDS SAFETY FIRST

At Catler we are very safety conscious. We design and manufacture consumer products with 
the safety of you, our valued customer, foremost in mind. In addition we ask that you exercise 
a degree of care when using any electrical appliance and adhere to the following precautions.

IMPORTANT SAFEGUARDS FOR YOUR ESPRESSO MACHINE 
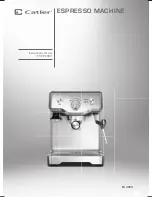
ES 4050

•  Carefully read all instructions 

before operating and save for 
future reference.

•  Remove any packaging 

material and promotional 
labels or stickers before using 
the espresso machine for the 
fi rst time. 

•  To eliminate a choking 

hazard for young children, 
remove and safely discard the 
protective cover fi tted to the 
power plug of this appliance.

•  Do not place the espresso 

machine near the edge of 
a bench or table during 
operation. Ensure the surface 
is level, clean and free of water 
and other substances.

•  Do not place the espresso 

machine on or near a hot gas 
or electric burner, or where it 
could touch a heated oven.

•  Do not use the espresso 

machine on a metal surface, 
e.g. sink drain board.

•  Always ensure the espresso 

machine is properly assembled 
before connecting to power 
outlet and operating.

• WARNING: 

The espresso 

machine is not intended to 
be operated by means of an 
external timer or separate 
remote control system.

•  Use only the accessories 

provided with the espresso 
machine.

•  Use only cold tap water in 

the water tank. Do not use 
any other liquid. We do not 
recommend the use of highly 
fi ltered, de-mineralised or 
distilled water as this may 
aff ect the taste of the coff ee 
and how the espresso machine 
is designed to function.

•  Never use the espresso 

machine without water in the 
water tank.

•  Ensure the fi lter holder is fi rmly 

inserted and secured into the 
brewing head before using the 
machine.

Содержание ES 4050

Страница 1: ...1 OPERATING YOUR CONTROL GRIP SB 4010 1 1 OPERATING YOUR CONTROL GRIP SB 4010 Instructions for use ESPRESSO ESPRESSO MACHINE ES 4050 ...

Страница 2: ...2 OPERATING YOUR CONTROL GRIP SB 4010 ESPRESSO MACHINE ...

Страница 3: ...TENT CONTENT 4 Congratulations 5 Catler recommends safety first 9 Know your espresso machine ES 4050 10 Operating your espresso machine ES 4050 14 Coffee making tips 18 Care Cleaning 21 Trouble shooting guide ...

Страница 4: ...4 CONGRATULATIONS 4 Congratulations on the purchase of your new espresso machine ES 4050 ...

Страница 5: ...h or table during operation Ensure the surface is level clean and free of water and other substances Do not place the espresso machine on or near a hot gas or electric burner or where it could touch a heated oven Do not use the espresso machine on a metal surface e g sink drain board Always ensure the espresso machine is properly assembled before connecting to power outlet and operating WARNING Th...

Страница 6: ... book Any procedure not listed in this instruction booklet should be performed at an authorised Service Centre Keep away from hot gas or electric burner or where it could touch a heated oven Use caution when using the de scale feature as hot steam may be released Before de scaling ensure drip tray is inserted Read the instructions further in this book IMPORTANT SAFEGUARDS FOR ALL ELECTRICAL APPLIA...

Страница 7: ... service center for examination and or repair Any maintenance other than cleaning should be performed at an authorized service center Do not use this appliance for anything other than its intended use Do not use in moving vehicles or boats Do not use outdoors The installation of a residual current device safety switch is recommended to provide additional safety protection when using electrical app...

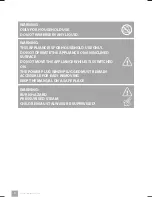
Страница 8: ...PLIANCE IS FOR HOUSEHOLD USE ONLY DO NOT OPERATE THE APPLIANCE ON AN INCLINED SURFACE DO NOT MOVE THE APPLIANCE WHILE IT IS SWITCHED ON THE POWER PLUG WHEN PLUGGED MUST REMAIN ACCESSIBLE FOR EASY REMOVING KEEP THE MANUAL ON A SAFE PLACE WARNING BURN HAZARD PRESSURISED STEAM CHILDREN MUST ALWAYS BE SUPERVISED ...

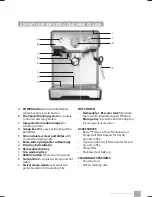
Страница 9: ... Drip tray full indicator H Removable drip tray I Cup warming tray J SELECT button for steam or hot water K Control Dial for espresso steam and hot water L Swivel steam wand easily adjusts to perfect position for texturing milk NOT SHOWN Removable 1 8L water tank filled from the top with integrated water filtration Storage tray located behind the drip tray for storage of accessories ACCESSORIES Ra...

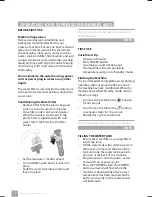
Страница 10: ...to lock into place Slide the water tank into position and lock into place Do not clean any of the part or accessories in the dishwasher NOTE FIRST USE Initial Start Up Fill tank with water Press POWER button A pumping sound will be heard The machine will reach operating temperature and go into Standby mode Flushing the Machine It is recommended to complete a water flushing operation without ground...

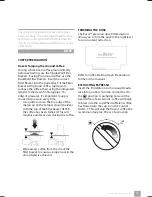
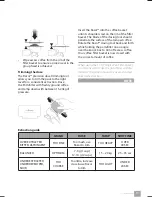
Страница 11: ...onsistent pressure every time As a guide to dose the top edge of the metal cap on the tamper should be level with the top of the filter basket AFTER the coffee has been tamped This will minimise under or over dosing the coffee Wipe excess coffee from the rim of the filter basket to ensure a proper seal in the group head is achieved TRIMMING THE DOSE The Razor precision dose trimming tool allows yo...

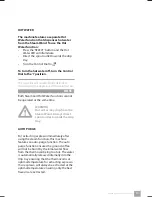
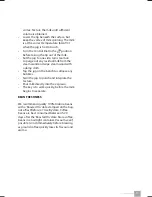
Страница 12: ...XTURING MILK Espresso machine Catler ES 4050 is equipped with a commercial style steam wand Before inserting the steam wand into the milk it is recommended to purge the steam wand Turn the Control Dial to The Steam LED will illuminate It may take a few moments before the steam appears Pause the steam by returning the dial back to the I position This will avoid the milk splashing out of the jug The...

Страница 13: ...oth Steam and Hot Water functions cannot be operated at the same time WARNING Hot water may drip from the Steam Wand Always direct spout outlet towards the drip tray AUTO PURGE For extracting espresso immediately after using the steam function this machine features an auto purge function The auto purge function ensures the ground coffee will not be burnt by the initial water flow from the thermoco...

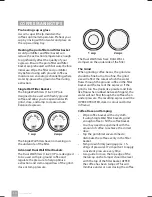
Страница 14: ...essure to help optimise extraction and crema regardless of the grind dose or tamp pressure 1 cup 2 cups The Dual Wall filters have DUAL WALL stamped on the underside of the filter The Grind When grinding coffee beans the grind size should be fine but not too fine The grind size will affect the rate at which the water flows through the ground coffee in the filter basket and the taste of the espress...

Страница 15: ...urface of the tamped coffee Rotate the Razor dosing tool back and forth while holding the portafilter on an angle over the knock box to trim off excess coffee Your coffee filter basket is now dosed with the correct amount of coffee When using the 1 CUP Single Wall Filter basket you may need to make the grind finer and also decrease the grind amount to ensure a correct dose and extraction NOTE Extr...

Страница 16: ...lance between sweetness acidity and bitterness The flavour of your coffee will depend on many factors such as the type of coffee beans degree of roast freshness coarseness or fineness of the grind and dose of ground coffee Experimenting by adjusting these factors just one at a time can help to achieve the taste of your preference TEXTURING MILK There are two phases to texturing milk The first is s...

Страница 17: ... and wipe steam wand with a damp cloth Tap the jug on the bench to collapse any bubbles Swirl the jug to polish and integrate the texture Pour milk directly into the espresso The key is to work quickly before the milk begins to separate BEAN FRESHNESS We recommend quality 100 Arabica beans with a Roasted On date stamped on the bag not a Best Before or Use By date Coffee beans are best consumed bet...

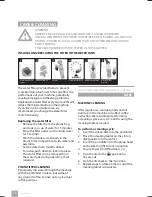
Страница 18: ...o right to lock in position 4 Ensure Power On Off button is on 5 Turn the dial to the position for 20 seconds 6 Turn the dial back to the I position 7 Repeat steps 5 6 three times or until the cleaning tablet is dissolved The water filter provided helps to prevent scale build up which over time can affect the performance of your machine potentially causing blockages and heating problems Replacing ...

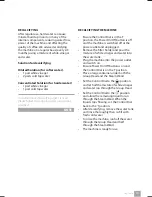
Страница 19: ...wer On Off button is off and the machine is switched off at the power outlet and unplugged Remove the filter holder and pour the mixture of white vinegar and water into the water tank Plug the machine into the power outlet and switch on Ensure Power On Off button is on and the Control Dial is on the I position Place a large container under both the Group Head and the Steam Wand Set the Control Dia...

Страница 20: ...ith a soft dry cloth Do not use abrasive cleansers pads or cloths which can scratch the surface CLEANING THE DRIP TRAY The drip tray should be removed emptied and cleaned at regular intervals Wash the drip tray with warm soapy water using a non abrasive washing liquid rinse and dry thoroughly The drip tray base and cover are dishwasher safe CLEANING THE STORAGE TRAY The storage tray can be removed...

Страница 21: ... Control Dial not in position Turn the Control Dial to the position Coffee grind is too fine Ensure you use a suitable espresso grind Refer to The Grind part Too much coffee in the filter basket Refer to Coffee Dose and Tamping part Coffee tamped too firmly Refer to Coffee Dose and Tamping part The filter is blocked Use a pin to clear the holes Please refer to Cleaning Filter part Coffee runs out ...

Страница 22: ...lian pump No action required as this is the normal operation of the machine Coffee runs out around the edge of the portafilter Portafilter is not inserted into the group head properly Insert portafilter into the group head and align with LOCK on the group head collar until resistance is felt Refer to Inserting The Portafilter part There are coffee grounds around the filter basket rim Clean any exc...

Страница 23: ...ank is not securely in place Refer to Filling The Water Tank part No steam is generated Machine is not turned on Ensure the machine is plugged in switched on at the power outlet and the POWER button is pressed Water tank is empty Refer to Filling the Water Tank part Control Dial not in position Turn the Control Dial to the position Use the SELECT button to toggle to Steam Ensure the Steam LED is i...

Страница 24: ...and using the spanner in the middle of the cleaning tool Refer to Cleaning the Steam Wand part Milk is not smooth after texturing Not enough steam Steam wand may be blocked Refer to Cleaning the Steam Wand part Milk is not cold enough Use cold fresh milk refer to Texturing Milk part Machine is not working The safety thermal cut out may have activated due to the pump overheating Turn the machine of...

Страница 25: ... and human health which could be caused as a result of improper liquidation of waste Please ask your local authorities or the nearest waste collection centre for further details The improper disposal of this type of waste may fall subject to national regulations for fines For business entities in the European Union If you wish to dispose of an electrical or electronic device request the necessary ...

Страница 26: ...NOTES ...

Страница 27: ...NOTES ...

Страница 28: ... A T L E R E U ESPRESSO MACHINE Due to continued product im provement the products illus trated photographed in this bro chure may vary slightly from the actual product CUSTOMER SERVICE I N F O C A T L E R E U ...

Отзывы: