79
Using BEST SHOT
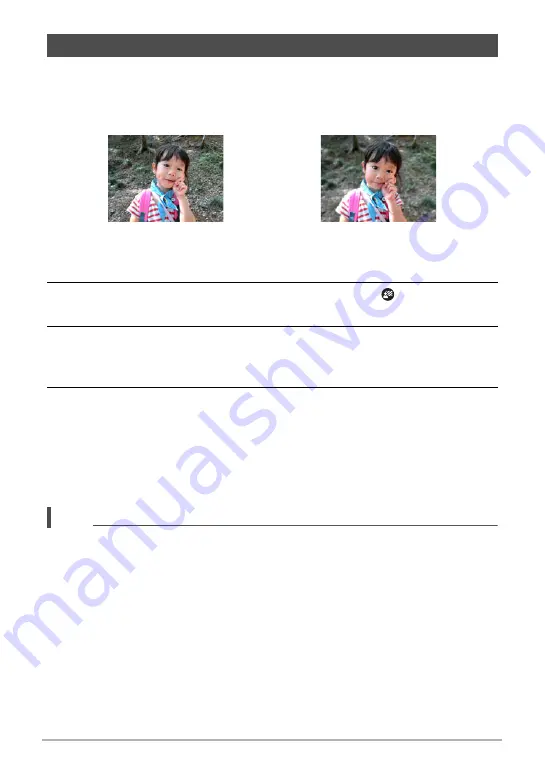
This function analyzes a burst of consecutive images and then blurs the background
behind the main subject. This creates an effect that really makes the subject stand
out, just like photographs taken with a single-lens reflex camera. The blur effect can
be set to one of three levels.
1.
In the BEST SHOT Mode, select “Blurred Background” (page 74).
2.
Press [SET] and then use [
8
] and [
2
] to select the
(Blur Effect)
Control Panel option.
3.
Use [
4
] and [
6
] to select the Image Blur level you want, and then press
[SET].
• The Image Blur level can be set to Level 1, Level 2, or Level 3.
4.
Press the shutter button to shoot.
• Get as close as possible to the subject. Also, the background should be as far
away as possible from the subject. The required distances depend on the
zoom factor being used.
NOTE
• With this function, the flash setting automatically becomes
?
(Flash Off).
• Shooting with this function automatically sets Anti Shake to “Standard” (page 101),
but large movement of the camera or subject make it impossible to achieve the
desired shot.
• If the camera determines that it is unable to blur the background of an image for
some reason, it will display the message “Blurring failed. Normal background
recorded.”. Note, however, that the image will be saved, even if background
blurring is not possible.
Shooting with a Blurred Background (Blurred Background)
Shot with “Program Auto”.
Shot with “Blurred Background”.
Example : When zoom is set to full wide (W), the distance between the camera
and subject should be 30cm, while the distance between the subject
and background should be at least 1 meter.


