126
Other Playback Functions (PLAY MENU)
3.
Press [
2
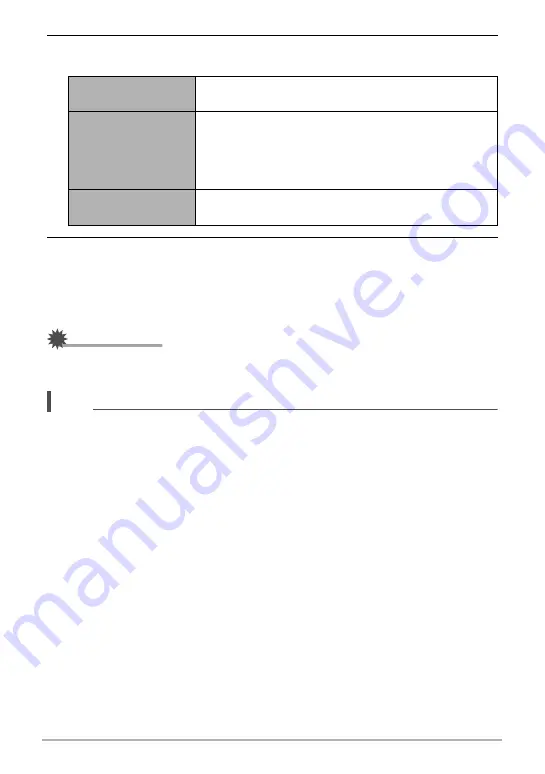
] to display the editing menu and specify one or two cut
points.
4.
Use [
8
] and [
2
] to select “Yes” and then press [SET].
The selected cut operation will take considerable time to complete. Don’t try to
perform any camera operation until the “Busy... Please wait...” message
disappears from the monitor screen. Note that a cut operation can take a long
time if the movie being edited is long.
IMPORTANT!
• When you edit a movie, only the result is saved. The original movie is not retained.
An editing operation cannot be undone.
NOTE
• A movie that is shorter than five seconds cannot be edited.
• Editing of movies recorded with a different type of camera is not supported.
• You will not be able to edit a movie if the amount of remaining memory capacity is
less than the size of the movie file you want to edit. If there is not enough memory
available, delete files you no longer need to free up more.
• Splitting of a movie into two movies and splicing of two different movies into a
single movie are not supported.
• You also can start a movie editing operation while the movie you want to edit is
playing back. When playback reaches a frame where you want a cut point to be,
press [SET] to pause playback. Next, press [
2
] to display the menu of editing
options. Perform editing using the same procedures as described above.
Previous Cut
While the frame you want the cut to be up to is
displayed, press [
2
].
Intermediate Cut
1
While the frame you want the first (From) cut to be is
displayed, press [
2
].
2
Select another frame.
3
While the frame you want the second (To) cut to be
is displayed, press [
2
].
Next Cut
While the frame you want the cut to be from is
displayed, press [
2
].


