background image

Page 3 of 19 

INTRODUCTION 

 
Thank you for purchasing the Cart-Tek GRi-1500Li golf trolley. 

Please 

read this manual carefully before use.


After unpacking, please keep the carton and all internal sections in safe 
storage. In the unlikely possibility that you need to return the whole 
unit due to a defective component, you will need to repack the unit in 
the original manner to ensure safe and secure transit.  
Remove all components from carton and check that the following are 
included in the package: 


Main trolley frame 


Transmitter 


Drive wheels 


Anti-tip wheel 


Lithium Battery in a Nylon Battery Bag 


Battery charger 


Accessories 


User Manual 


Contents of this manual cover assembling the trolley, operating 
instructions, maintenance, and troubleshooting.  Please note that our 
design and manufacturing policy is aimed at continuous improvement, 
this can result in changes without notice to the specifications contained 
on our websites and in this manual.  We know you are eager to get on 
the course, but 

PLEASE READ

 the entire manual before starting. 


QUICK TIP 

 After unpacking the caddy and while reading this manual, place 
the battery on charger while you assemble the unit.   Plug battery 
into charger and charger into power source. The battery may be 
delivered with a charge but should be placed on the charger 
before using for the first time to ensure full charge of battery. 


Содержание GRI-1500Li

Страница 1: ...address We do everything possible to assure that your trolley is in perfect working order upon arrival Should you have any questions about the performance of your trolley please contact us at USA Carttek com or 541 633 4308 Canada JPSMGolf com or toll free 1 855 839 1600 For current version of this manual check http www carttek com golf cart resources cart tek manuals ...

Страница 2: ...ANT CARE INFORMATION 7 BATTERY MAINTENANCE 8 POWERING YOUR GRI 1500LI 9 PUTTING YOUR TROLLEY INTO MANUAL MODE 9 REMOTE TRANSMITTER 10 REMOTE CONTROL MODE 11 PROGRAMMING YOUR CADDY 12 TROUBLESHOOTING GUIDE 15 IMPORTANT CUSTOMER CARE INFORMATION 18 FOR WARRANTY SPARE PARTS AND ACCESSORIES 19 ...

Страница 3: ...on Battery Bag Battery charger Accessories User Manual Contents of this manual cover assembling the trolley operating instructions maintenance and troubleshooting Please note that our design and manufacturing policy is aimed at continuous improvement this can result in changes without notice to the specifications contained on our websites and in this manual We know you are eager to get on the cour...

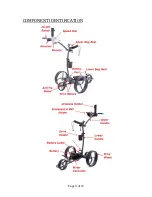
Страница 4: ...Page 4 of 19 COMPONENT IDENTIFICATION ...

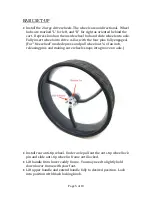
Страница 5: ...the four pins fully engaged For free wheel mode depress and pull wheel out of an inch releasing pins and making sure wheels snaps into groove on axle Install rear anti tip wheel Under axle pull out the anti tip wheel lock pin and slide anti tip wheel in frame until locked Lift handle from lower caddy frame You may need to lightly hold down lower frame with your foot Lift upper handle and extend ha...

Страница 6: ...nto caddy Balance weight of golf bag equally side to side Secure golf bag with bungees Securing your golf bag on the cart locks the cart in the open position It is important that both top and bottom bag straps are tight and your bag is firmly secured in the bag rests Insert three AAA batteries into the remote control Turn on the remote control by depressing the left right arrows blue buttons Remot...

Страница 7: ...ode to guide the caddy Avoid steering the caddy with the remote if the front wheel is off the ground Using the remote in this situation can lead to gearbox damage 5 If you are having issues keeping the front wheel down on the ground consider adding a water bottle of sand inside a low pouch in your golf bag to increase the weight over the front wheel Equally distribute the weight use the center pou...

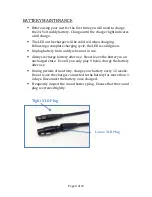
Страница 8: ...solid green Unplug battery from caddy when not in use Always recharge battery after use Never leave the battery in an uncharged state Even if you only play 9 holes charge the battery after use During periods of inactivity charge your battery every 12 weeks Do not leave the charger connected to the battery for more than 1 2 days Disconnect the battery once charged Frequently inspect the round batte...

Страница 9: ... TROLLEY INTO MANUAL MODE Turn speed dial back to zero counter clockwise Press the On Off button twice Blue light will single flash in manual mode standby state or double flash in manual mode operating state Rotate speed dial clockwise to increase the speed of caddy Rotate speed dial counter clockwise to decrease the speed of the caddy In manual mode there are three ways to stop your caddy ü Turn ...

Страница 10: ... turn blue buttons until remote LED flashes blue three times The remote is now ready for use To turn the remote OFF Press and hold Park button until remote LED flashes red 3 times If the remote has no button presses in 30 minutes it automatically turns off to conserve battery life ...

Страница 11: ...line turn caddy across the hill hit the Stop button and then hit the Park button to activate the electronic parking brake The range of the transmitter is 50 100 yards depending on environmental conditions The caddy cart will stop when it is outside of the remote transmitters range We recommend you operate your caddy within 10 20 yards for best control and visibility For your protection the caddy h...

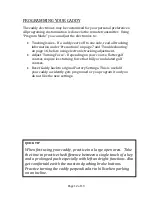
Страница 12: ...ning Force Depending on your course flatter golf courses require less turning force that hilly or undulated golf courses Reset Caddy back to original Factory Settings This is useful if your caddy accidently gets programed or you program it and you do not like the new settings QUICK TIP When first using your caddy practice in a large open area Take the time to practice the difference between a sing...

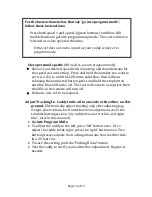
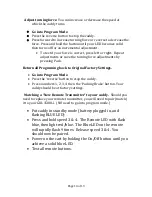
Страница 13: ...tions for front wheel axle adjustment are in the troubleshooting section my caddy does not track in a straight line later in this manual Go into Program Mode To adjust the caddy to the left press left button once Or to adjust the caddy to the right press the right button once Two button presses adjusts the tracking about one foot to either side in a 25 foot run To save the setting push the Parking...

Страница 14: ...l Factory Settings Go into Program Mode Press the reverse button to stop the caddy Press numbers 1 2 3 4 then the Parking Brake button Your caddy should be at factory settings Matching a New Remote Transmitter to your caddy Should you need to replace your remote transmitter you will need to pair match it to your GRI 1500Li NO need to go into program mode Put caddy in standby mode battery plugged i...

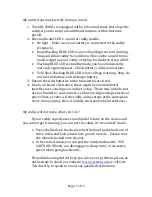
Страница 15: ...ff then powering the caddy back on Test remote again 3 Ensure that the remote has a flashing Blue LED when pressing a function button If not replace batteries in remote 4 Pair remote transmitter to caddy cart receiver Follow the directions in the manual Matching a New Remote Transmitter to your Cart Page 14 My caddy Battery Charger isn t switching over from Red to Green 1 Verify charger has green ...

Страница 16: ...ck how your caddy tracks without a bag Use this as a guide for testing with the bag If your caddy is going off track more than 3 feet within 20 yards the easiest first thing to do is to check the weight distribution of your bag How is it sitting on the caddy is it sitting evenly with the weight evenly distributed between left and right sides If the weight distribution does not solve your issue you...

Страница 17: ...o on board electronics there might be environmental interferences causing your caddy to stop These may include but are not limited to microwaves cell towers high voltage electrical power lines et cetera If the caddy always stops at the same place every time you play then it is likely environmental interference My caddy will not move what can I do If your caddy experiences some kind of failure on t...

Страница 18: ...l 5 On steep inclines if the front wheel does come off the ground use manual mode to guide the cart Do not steer the cart with the remote if the front wheel is off the ground Using the remote in this situation can lead to gearbox failure 6 If you are having issues keeping the front wheel down on the ground consider adding a water bottle full of sand inside a low pouch in your golf bag to increase ...

Страница 19: ...SE Logsden St Bend OR 97702 Email Sales CartTek com Website http www CartTek com 1 541 633 4308 or toll free 1 866 356 2278 For trolleys purchased in Canada JPSMGolf 1064 Salk Road Units 15 16 Pickering Ontario L1W 4B5 Email Support JPSMGolf com Website http JPSMGolf com 1 905 839 1600 or toll free 1 855 839 1600 ...

Отзывы: