background image

Step 2 


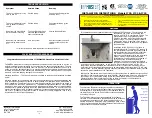
Once you have extended the gate slightly, it is now time to

attach one of the plastic legs. Use the supplied connector 

bolts and the allen key to do this. Place the leg on the bottom 

corner of one side of the main panel. Insert a connector bolt 

through the hole on the side of the foot, and into the threaded 

insert on the end of the main panel. Use the supplied allen key 

to tighten the bolt. 

Next, insert another connector bolt into the hole on the 

bottom of the plastic leg, into the threaded insert on the 

bottom of the main panel. Use the supplied allen key to 

tighten the bolt. 

NOTE: The connector bolts should be snug but be sure to not 
              overtighten them!

(4)

insert  

bolt here

insert 

bolt

here

main panel

Содержание 2046

Страница 1: ...ings 27 to 47 2870 Fits openings 27 to 47 Owner s Manual READ ALL INSTRUCTIONS BEFORE ASSEMBLY AND USE OF GATE KEEP INSTRUCTIONS FOR FUTURE USE Carlson Pet Products Inc 14305 Southcross Drive Suite 10...

Страница 2: ...to make sure gate is tight and secure This product will not necessarily prevent all accidents Proper supervision is required at all times To prevent serious injury or death securely install the gate a...

Страница 3: ...Check to make sure that you have the parts shown in picture 2 Plastic Foot x2 Adjustable Spindle Rod x4 Hex Head Connector Bolts x4 Allen Key x1 Main Panels...

Страница 4: ...he gate in If you plan to use the gate in freestanding mode contiune with the assembly instructions below If you plan to use the gate as a pressure mounted gate turn to page 6 for further instructions...

Страница 5: ...ough the hole on the side of the foot and into the threaded insert on the end of the main panel Use the supplied allen key to tighten the bolt Next insert another connector bolt into the hole on the b...

Страница 6: ...cked adjust the gate to the size opening you will be placing it in Make sure you have the hinged locking mechanisms in the lock position once you have it adjusted ATTENTION To securely lock the gate i...

Страница 7: ...osed position Turn the spindle wheels on each spindle rod so they create even pressure on the frame of the opening The gate should be tightly pressured into the opening so that it cannot be pulled dow...

Страница 8: ...the hardware and mountings are tightened Do not use abrasive cleaners or bleach Clean gate by sponging with warm water and mild detergent Immediately wipe down gate with a dry towel after cleaning CA...

Отзывы: