


1000DF00333 Issue 6
14/38
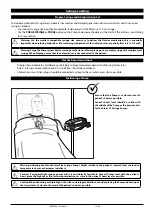
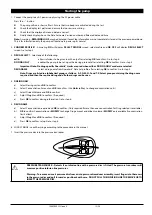
3. Insert the syringe ensuring that the barrel flange is located in the slots on the syringe
flange clamp.
w
To ensure the syringe is loaded correctly, place the barrel flange in the space
between the syringe clamp and the syringe flange clamp. This is correct if the
syringe remains in position before the syringe clamp is closed.
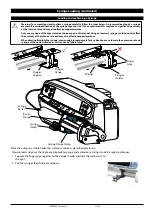
4. Lift the syringe clamp until it locks against the syringe barrel.
5. Squeeze the finger grips on the plunger holder and slide the mechanism to the left
until it reaches the plunger end.
6. Release the finger grips. Ensure that the plunger grippers are securing the plunger in
place and the finger grip returns to its original position.
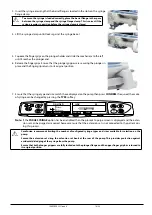
7. Ensure that the syringe type and size match those displayed on the pump then press
CONFIRM
. If required, the make
of syringe can be changed by pressing the
TYPE
softkey.
CONFIRM
TYPE
IVAC
50
ON HOLD
Note:
If the
PURGE SYRINGE
option has been enabled then the prompt to purge screen is displayed and the exten-
sion set can be purged as required, however ensure that the extension set is not connected to the patient dur-
ing this process.
w
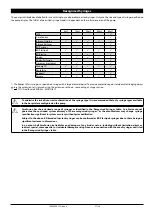
CareFusion recommends limiting
the number of configured syringe types and sizes available for selection on the
pump.
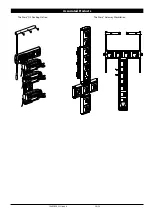
Secure the extension set using the extension set hook at the rear of the pump. This provides protection against
accidental dislodging of the syringe from the pump.
Ensure that both plunger grippers are fully locked onto the plunger flange and the upper finger grip has returned to
its original position.


