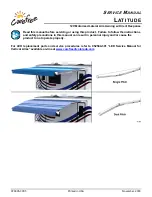


L
ATITUDE
Service
Manual
Carefree of Colorado
2
070005-301r5
C
ANOPY
R
EPLACEMENT
1. Extend the awning completely.
2. Firmly tie the elbows of the spring arms together. Use a
minimum 1/2" rope - do not use bungee cords. When
tying the rope, use a non-slip knot such as a square knot
or equivalent.
CAUTION
Failure to secure the arms will
allow the spring arms to extend possibly causing
personal injury and damage to the awning.
3. Over extend the awning to align the fabric slot with the
cutout on the idler side. This will cause slack in the fabric.
4. Disconnect
Power.
CAUTION
When the power is on, the direct
response system is active. Movement during this
procedure can cause the awning to attempt to close
unexpectedly.
5. At the roller tube:
5.1. Remove the fabric retaining screws and plastic
washers (quantity of 2 ea).
5.2. On the motor side, remove the split grommet from
the roller tube. Carefully pull the wires and
connectors out of the tube and disconnect.
6. At the awning rail, cut the LED harness close to the
canopy. Clamp the harness going into the vehicle to
prevent it from falling in the wall.
7. For canopies with QuicKonnect:
7.1. Remove the fabric retaining screws from the
QuicKonnect (a & b).
7.2. Remove one retaining screw from the awning rail (c).
7.3. Slide the QuicKonnect from the awning rail and
canopy.
7.4. Slide the canopy out of the roller tube.
7.5. Slide the new canopy into the roller tube and center.
7.6. At the reinforcements in the canopy, secure the fabric
to the roller tube with the retaining screws and
wahsers removed previously.
7.7. Slip the fabric funnel onto the QuicKonnect.
7.8. While holding the fabric, simultaneously slide the
QuicKonnect into the awning rail and over the canopy.
7.9. Remove the funnel from the QuicKonnect.
7.10. Place one (1) #6 x 3/8" screw (c) through the awning rail outside the end of the QuicKonnect (not
through the QuicKonnect).
8. For canopies without QuicKonnect:
8.1. Remove the fabric retaining screws from the awning rail.
8.2. Slide the canopy out of the roller tube and awning rail.
8.3. Slide the new canopy into the roller tube and awning rail and center in the roller tube.
Spring Arms
Firmly Tie Elbows Together
Retaining Screw
and Washer
Retaining Screw
and Washer
Align Fabric Slot with
Cutout on Idler Head
Grommet
LED Harness
Canopy
Harness
FL016
#6 x 3/8"
Screw (x4)
(a)
(c)
(b)
QuicKonnect
Fabric
Awning Rail
Funnel
QuicKonnect
Fabric
Awning Rail


