background image


Note: Zero point calibration can be triggered manually and should always be 
performed before use! 


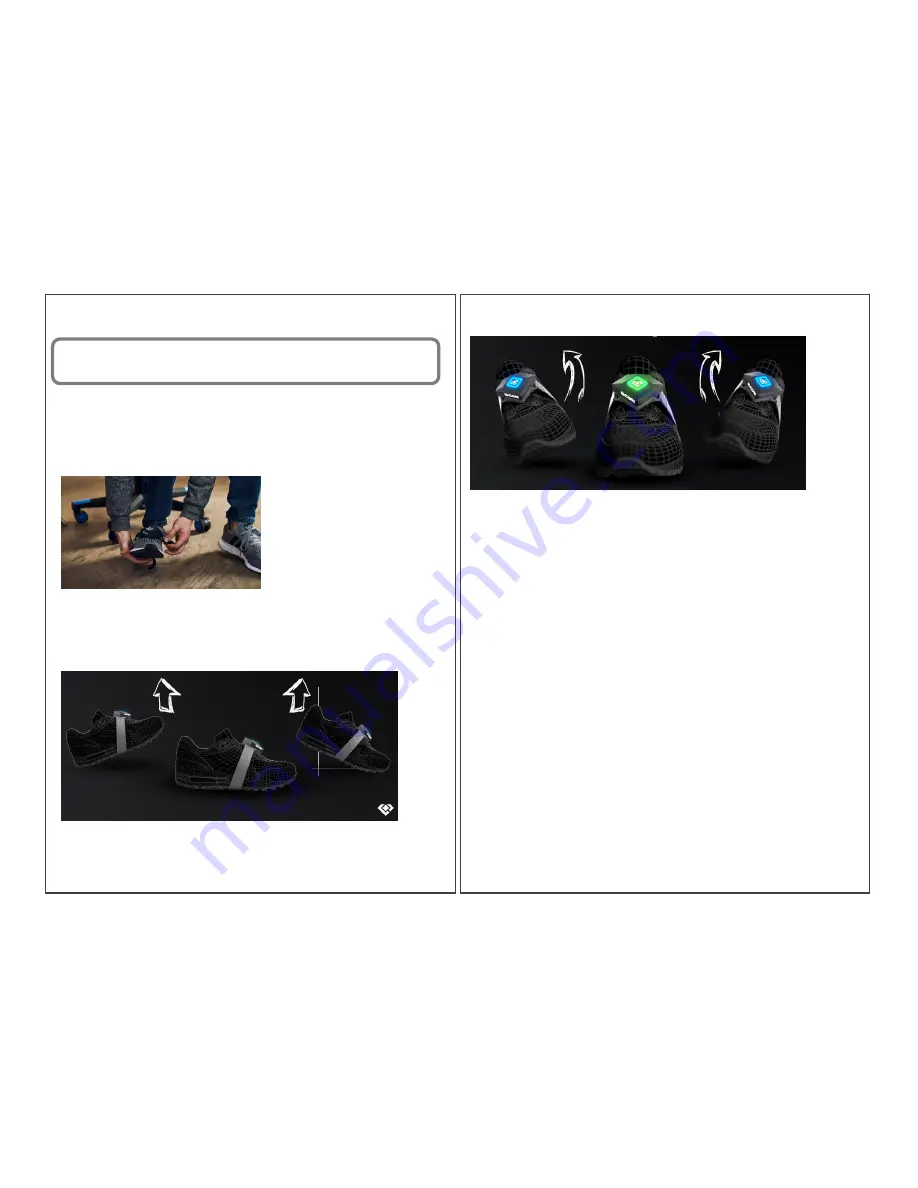
5.6 Fastening to shoe or foot 

To fix the Bcon - Gaming Wearable to the shoe or foot, place the strap of the 
holder around the shoe or foot and insert the device. 


5.7 Motion detection 

The Bcon - Gaming Wearable detects movements on two axes. 


Pitch: Lift toe or heel.


Roll: Tilt to the left or right. 

After  performing  an  input  by  moving  along  an  axis,  return  to  the  starting 
position to allow re-entry.  

Input  by  switching  from  motion  along  one  axis  to  the  other  axis  is  not 
possible  and  is  actively  prevented  by  the  system  to  prevent  input  errors 
during use.   


5.8 Configuration (v1.0.5 and above) 

The configuration of the Bcon - Gaming Wearable is made possible by the 
corresponding configuration software. 

It can be downloaded from the website: www.bcon.zone 

Or requested by e-mail: [email protected] 

To install the configuration software, execute the Bcon-control.exe file. The 
software unpacks all necessary folders automatically. 

Open the  configuration software by double-clicking on the  application file 
Bcon-control. The main window opens. 

13 

14 

Содержание Bcon Gaming Wearable Series 1

Страница 1: ...mulator rechargeable battery 4 2 2 Bluetooth HID Human Interface Device 4 2 3 Magnetism 5 2 4 Field of application 5 3 Modifications 5 4 Scope of delivery 6 5 Commissioning 7 5 1 Charging 7 5 2 Color coding 8 5 3 Switching on 9 5 4 Pairing 10 5 5 Calibration 12 5 6 Fastening to shoe or foot 13 5 7 Motion detection 13 5 8 Configuration v1 0 5 and above 14 5 9 Transferring the Configuration 19 5 10 ...

Страница 2: ...ore important to observe the following Charge the device only under supervision Place the device on a fireproof surface for charging Avoid strong physical force on the device Do not puncture the device under any circumstances Do not open the housing of the device Do not remove the battery from the device Do not use the battery to operate other devices Keep the device away from fire and other sourc...

Страница 3: ...at you can remove the device from your body at any time Keep the device away from small children The strap may cause strangulation Only use the device at room temperature Keep the appliance away from moisture and water 3 Modifications All modifications to the Bcon Gaming Wearable are excluded Modifications to individual components such as holder device firmware configuration software or exchange p...

Страница 4: ...g cable into the Micro USB socket of the device If you use a charging cable without a power supply plug it into the Micro USB socket of the device and connect it via USB to an alternative power source such as the PC There is no optical signal during charging The battery level of the device can be read out via the configuration software The device must be connected to the corresponding PC via Bluet...

Страница 5: ... its initial position After about three minutes without using the device it automatically switches to sleep mode Move it to exit sleep mode 5 4 Pairing To connect the Bcon Gaming Wearable to the PC a Bluetooth interface on the PC is required If your PC does not have Bluetooth functionality we recommend retrofitting your PC with a Bluetooth dongle More information can be found at www bcon zone The ...

Страница 6: ...ce is switched on again this connection is automatically re established To pair with another device the current connection must first be deleted by briefly shaking the device while switching it on signet flashing blue 5 5 Calibration After successful pairing the Bcon Gaming Wearable calibrates itself automatically The signet changes to violet for a short time With this zero point calibration the d...

Страница 7: ...osition to allow re entry Input by switching from motion along one axis to the other axis is not possible and is actively prevented by the system to prevent input errors during use 5 8 Configuration v1 0 5 and above The configuration of the Bcon Gaming Wearable is made possible by the corresponding configuration software It can be downloaded from the website www bcon zone Or requested by e mail co...

Страница 8: ...o the left 3 or tilt to the right 4 By clicking the gray boxes key commands can be assigned via a menu and corresponding inclination angles can be defined In the above example the M key is pressed at an inclination angle of 5 on pitch axis 1 lift toes Up to a tilt angle of 15 the M key remains pressed If the tilt angle falls below 5 or exceeds 15 the key is released 15 16 ...

Страница 9: ...defined areas allows the keys to be pressed simultaneously A tight sequence creates a key sequence The configurations can be saved and named via a menu Detailed instructions and ready made configurations can be found on the website www bcon zone The Pause key can be defined via the Pause menu 17 18 ...

Страница 10: ...ards Note The device calibrates itself when leaving the pause mode Alternatively the defined pause key can also be held down The device remains in pause mode until the pause key is released 5 9 Transferring the configuration After you have defined and optionally saved your preferred configuration left click the button Upload Configuration The signet of the device changes to white During the upload...

Страница 11: ...e device is appropriate for the configuration of the application 6 Compatibility You can use the Bcon Gaming Wearable alongside other input devices such as mouse and keyboard if your PC allows parallel use of several keyboards including at least one Bluetooth keyboard The Bcon Gaming Wearable keyboard input is compatible with all applications that can process keyboard commands The configuration so...

Страница 12: ...guration software The latest version is available on the website www bcon zone Contamination of the Micro USB socket can be removed with gentle air pressure Avoid using sharp objects for cleaning Avoid excessive use of the slider where possible and do not push it toward the inside of the housing Avoid excessive force on the Micro USB socket of the device For example to remove the charging cable do...

Отзывы: