


In whole image view:
When no cropping frame is displayed, the entire Preview area will be scanned. When a cropping
frame is displayed, the portion within the cropping frame will be scanned.
Note
• To enlarge/reduce the scanned image, enter values into
(Width) and
(Height) in
Output Settings
or specify a value (by 1 %) for
%
. Although the maximum value available for
%
depends on the
Output Resolution
, it can be specified for up to 19200 dpi (the maximum
available output resolution).
Paper Size (L, A4, etc.) & Monitor Size (1024 x 768 pixels, etc.)
(Width),
(Height), and scale cannot be specified. The preview image will be cropped
according to the selected output size and resolution. The portion within the cropping frame will be
scanned at the size of the selected paper/monitor size. You can drag the cropping frame to
enlarge, reduce, or move it while maintaining the aspect ratio.
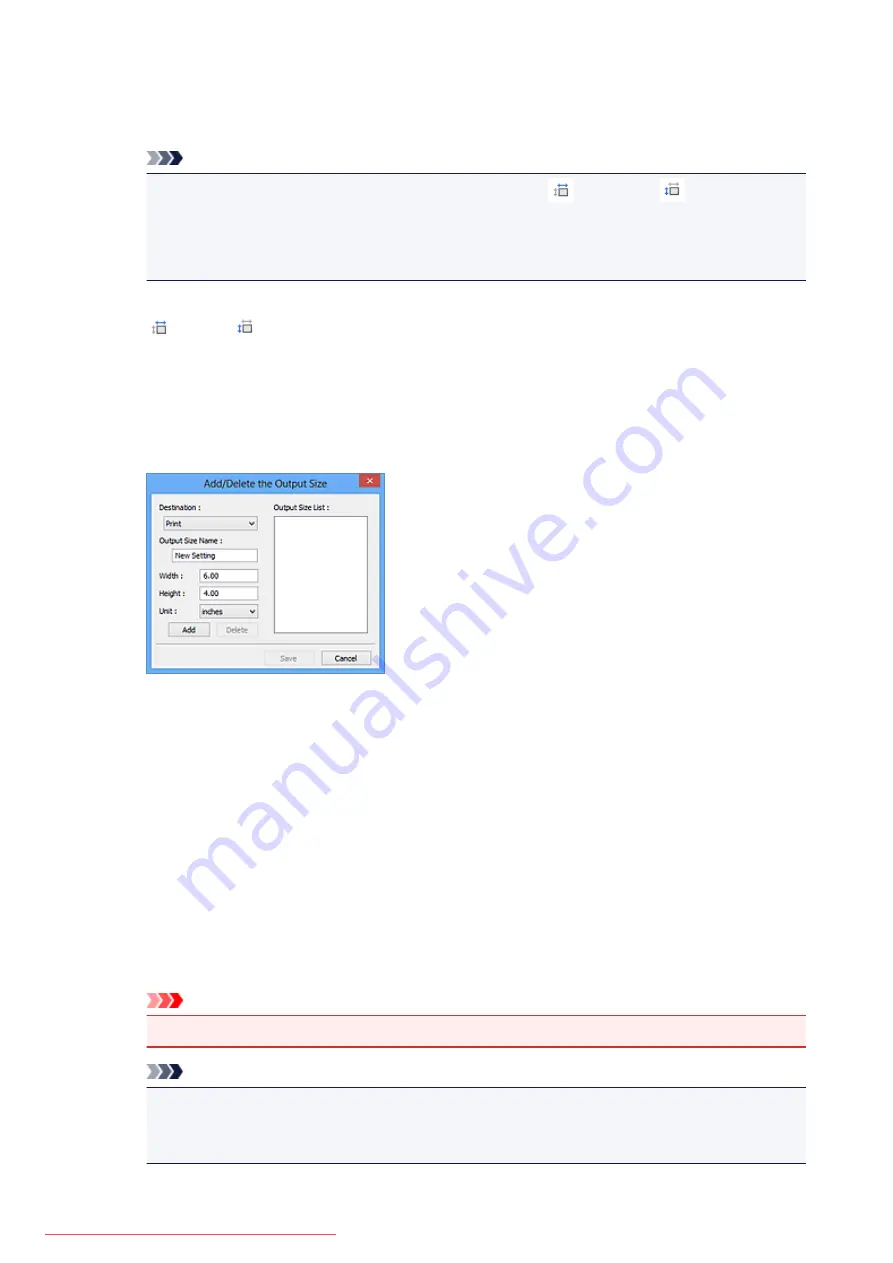
Add/Delete...
Opens the
Add/Delete the Output Size
dialog box, in which you can specify custom output sizes.
In the
Add/Delete the Output Size
dialog box, you can specify multiple output sizes and save
them at one time. Saved items will be registered to the
Output Size
list and can be selected, along
with the predefined items.
Adding:
Select
or
Image display
for
Destination
, then enter
Output Size Name
,
Width
, and
Height
,
then click
Add
. For
Unit
, you can select
inches
or
mm
when
Destination
is
but you can only
select
pixels
when
Destination
is
Image display
. The name of the added size appears in
Output
Size List
. Click
Save
to save the items listed in
Output Size List
.
Deleting:
Select the output size you want to delete in
Output Size List
, then click
Delete
. Click
Save
to save
the items listed in
Output Size List
.
Important
• You cannot delete predefined output sizes such as
A4
and
1024 x 768 pixels
.
Note
• Save up to 10 items for each destination.
• An error message appears when you enter a value outside the setting range. Enter a value
within the range displayed in the message.
654
Содержание MG5600 series
Страница 88: ...88 Downloaded from ManualsPrinter com Manuals...
Страница 122: ...Safety Guide Safety Precautions Regulatory and Safety Information 122 Downloaded from ManualsPrinter com Manuals...
Страница 129: ...Main Components Front View Rear View Inside View Operation Panel 129 Downloaded from ManualsPrinter com Manuals...
Страница 131: ...10 platen glass Load an original here 131 Downloaded from ManualsPrinter com Manuals...
Страница 144: ...Loading Paper Originals Loading Paper Loading Originals 144 Downloaded from ManualsPrinter com Manuals...
Страница 172: ...Replacing an Ink Tank Replacing an Ink Tank Checking the Ink Status 172 Downloaded from ManualsPrinter com Manuals...
Страница 235: ...Language selection Changes the language for messages and menus on the LCD 235 Downloaded from ManualsPrinter com Manuals...
Страница 293: ...5 Delete Deletes the selected IP address from the list 293 Downloaded from ManualsPrinter com Manuals...
Страница 324: ...Checking the Ink Status with the Ink Lamps 324 Downloaded from ManualsPrinter com Manuals...
Страница 358: ...Note Selecting Scaled changes the printable area of the document 358 Downloaded from ManualsPrinter com Manuals...
Страница 369: ...Related Topic Changing the Printer Operation Mode 369 Downloaded from ManualsPrinter com Manuals...
Страница 398: ...Adjusting Brightness Adjusting Intensity Adjusting Contrast 398 Downloaded from ManualsPrinter com Manuals...
Страница 485: ...9 Press the Color button The machine starts printing 485 Downloaded from ManualsPrinter com Manuals...
Страница 599: ...Related Topic Scanning Items Larger than the Platen Image Stitch 599 Downloaded from ManualsPrinter com Manuals...
Страница 620: ...620 Downloaded from ManualsPrinter com Manuals...
Страница 643: ...Related Topic Scanning in Basic Mode 643 Downloaded from ManualsPrinter com Manuals...
Страница 696: ...When scanning is completed the scanned image appears in the application 696 Downloaded from ManualsPrinter com Manuals...
Страница 849: ...1660 Cause The ink tank is not installed Action Install the ink tank 849 Downloaded from ManualsPrinter com Manuals...
Страница 877: ...5B00 Cause Printer error has occurred Action Contact the service center 877 Downloaded from ManualsPrinter com Manuals...
Страница 878: ...5B01 Cause Printer error has occurred Action Contact the service center 878 Downloaded from ManualsPrinter com Manuals...
Страница 879: ...5B12 Cause Printer error has occurred Action Contact the service center 879 Downloaded from ManualsPrinter com Manuals...
Страница 880: ...5B13 Cause Printer error has occurred Action Contact the service center 880 Downloaded from ManualsPrinter com Manuals...
Страница 881: ...5B14 Cause Printer error has occurred Action Contact the service center 881 Downloaded from ManualsPrinter com Manuals...
Страница 882: ...5B15 Cause Printer error has occurred Action Contact the service center 882 Downloaded from ManualsPrinter com Manuals...