VB Administr
ation
T
ools
4
View Restriction Tool
3
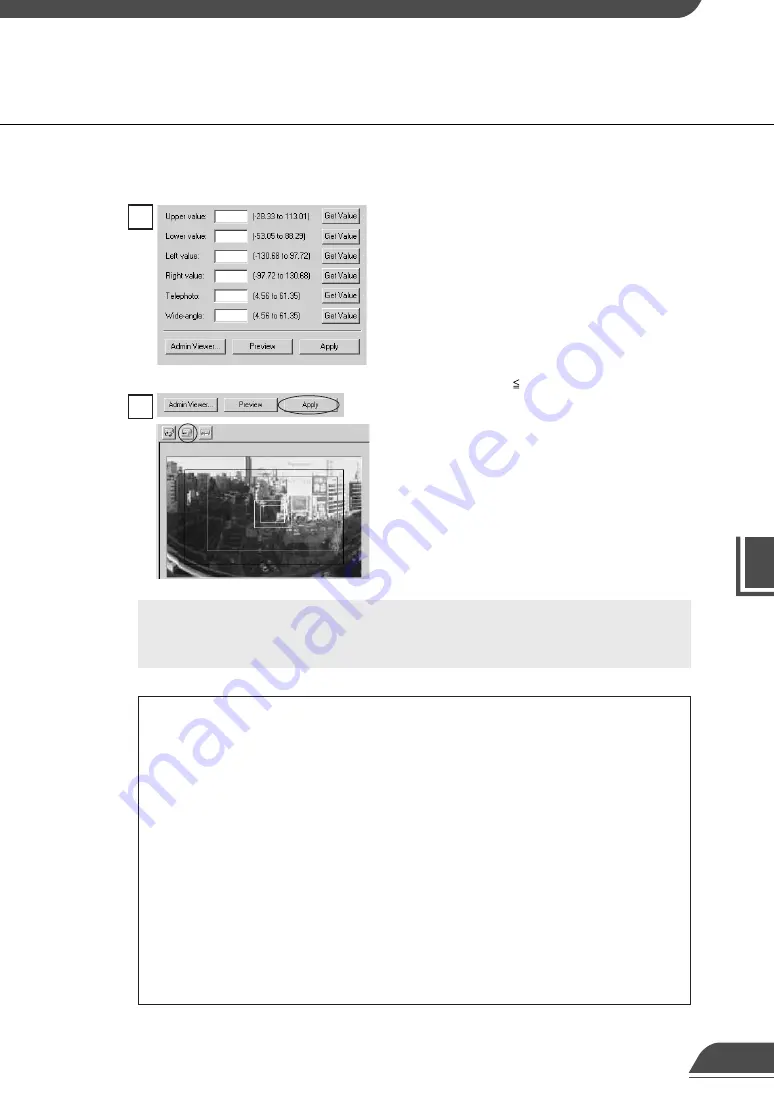
Click the Apply button. Check the Status List to be
sure the values were sent correctly. Then when the
Save Settings button is clicked, the values will be
saved to the VB150.
2
Use Admin Viewer to move the camera angle to the
position you want to set with the Upper, Lower, Left,
Right, Telephoto, and Wide-angle values, then click
the Get Value button for each. The values retrieved
using the Get Value buttons can be checked in the
View Restriction Value Input boxes, or with the View
Restriction Preview frame.
Set these values so that Upper > Lower, Left <
Right, and Telephoto Wide-angle
76
e
Tip
●
Since the previews using the Panorama Preview may be slightly different
from the actual picture, after the view restrictions have been set, please
check to be sure the viewer is correctly reflecting the view restrictions in
the actual picture. In this event, since Admin Viewer normally operates the
camera irrespective of the view restriction settings, please choose [View
Restriction] - [ON] from the Privilege menu (
→
P.96).
●
When you want to clear the view restriction settings, clear the “Apply the
view restriction” check box, click the Apply and then Save Settings button
save to the change the VB150.
●
Even the “Apply the view restriction” is selected, view restriction is not
applied when an input box is left blank. In this case, the maximum value is
applied.
●
For details on view restriction settings, see p.43.
c
Note
When a view restriction is set, areas outside the restrictions may be captured
momentarily if the camera is controlled close to the restriction limits.
Содержание VB150
Страница 14: ...13 ...
Страница 26: ...25 ...
Страница 102: ...101 ...
Страница 103: ...Appendix ...


