


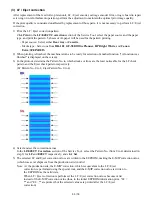


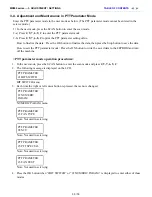


<#1 BIT SWITCH>
1. In the #1 BIT SWITCH menu, the following screen is displayed:
2. Each time the up or down cursor button (or the OK button) is pressed, the SW# changes from 01 to 20.
Be cautious not to select the SW numbers which are not used in servicing.
The SW numbers used in servicing: SW# 01, 02, 03, 04, 05, 06, 07, 10, 11, 13
The SW numbers not used in servicing (as of December 2007): SW# 08, 09, 12, 14 to 20
3. Each SW# has 8-bit information. Using the left or right cursor buttons, move the cursor to the bit to be
changed, and enter the setting value (1 or 0).
Bit7 -> 00000000 <- Bit0
4. Press the OK button to finalize the setting value. For the definition and description of each bit of each SW#,
refer to the "
G3 Facsimile Service Data Service Handbook
."
English: QY8-13BC-010
Japanese: QY8-12B6-020
5. Press the Stop button to save the setting value.
6. Press the ON button.
<#2 NUMERIC PARAM.>
1. In the #2 NUMERIC PARAM. menu, the following screen is displayed:
2. Each time the up or down cursor button (or the OK button) is pressed, the SW# changes from 01 to 60.
Be cautious not to select the SW numbers which are not used in servicing.
The SW numbers used in servicing: SW# 01, 02, 04 to 09, 16 to 24, 26, 27, 30, 31, 41, 42
The SW numbers not used in servicing (as of December 2007): SW# 03, 10 to 15, 25, 28, 29, 32 to 40, 43 to
60
3. Enter a desired setting value, using the right or left cursor button or numeric buttons.
(Specifiable values vary depending on the item.)
4. Press the OK button to finalize the selected setting value. For the definition and description of each bit of the
SW#, refer to the "
G3 Facsimile Service Data Service Handbook
."
English: QY8-13BC-010
Japanese: QY8-12B6-020
5. Press the Stop button to save the setting value.
6. Press the ON button.
PTT PRAMETER
#1 BIT SWITCH
SW#01 00000000
PTT PRAMETER
#2 NUMERIC
PARAM
01: 00000
60 / 76
Содержание PIXMA MX882 Series
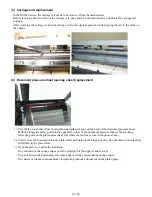
Страница 32: ...8 Remove the main case no screws 28 76...
Страница 35: ...4 Remove the LCD ass y no screws 31 76...
Страница 42: ...6 ASF unit removal 1 Remove 1 screw from the left plate and 2 screws from the right plate 38 76...
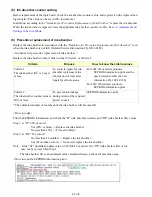
Страница 55: ...2 Service Tool functions Service Tool screen Version 2 000 51 76...
Страница 56: ...52 76...
Страница 67: ...63 76...
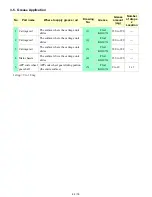
Страница 74: ...4 2 Integrated Inspection Pattern Print Print sample...
Страница 75: ...4 3 Ink Absorber Counter Value Print Print sample 4 VERIFICATION AFTER REPAIR...
Страница 78: ......


