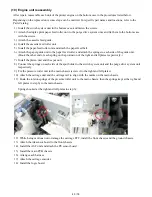


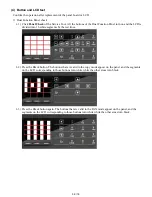


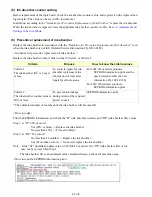


3-4. Adjustment and Maintenance in PTT Parameter Mode
Enter the PTT parameter mode in the user mode as below. (The PTT parameter mode cannot be entered in the
service mode.)
1) In the user mode, press the SCAN button to enter the scan mode.
2-a) Press
#, 9, 7, 6, 9, #
to enter the PTT parameter mode.
2-b) Press
#, 9, 7, 6, 8, #
to print the PTT parameter setting value.
How to finalize the data: Press the OK button to finalize the data, then press the Stop button to save the data.
How to exit the PTT parameter mode: Press the ON button to write the saved data to the EEPROM and turn
off the machine.
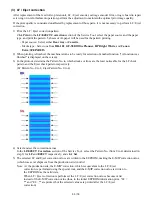
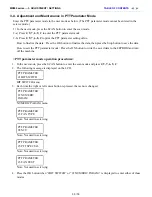
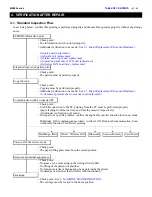
<PTT parameter mode operation procedures>
1. In the user mode, press the SCAN button to enter the scan mode and press
#, 9, 7, 6, 9, #
.
2. The following message is displayed on the LCD.
BIT SWITCH menu
3. Each time the right or left cursor button is pressed, the menu is changed.
NUMERIC PARAM. menu
Note: Not used in servicing.
Note: Not used in servicing.
Note: Not used in servicing.
Note: Not used in servicing.
4. Press the OK button when “#BIT SWITCH” or “#2 NUMERIC PARAM.” is displayed to enter either of those
modes.
MX880 series --- 3. ADJUSTMENT / SETTINGS
TABLE OF CONTENTS
PTT PRAMETER
#1 BIT SWITCH
PTT PRAMETER
#2 NUMERIC
PARAM.
PTT PRAMETER
#3 FAX TYPE
PTT PRAMETER
#4 NCU
PTT PRAMETER
#5 PTT SPECIAL
PTT PRAMETER
#6 FAX TEST
59 / 76
Содержание PIXMA MX882 Series
Страница 32: ...8 Remove the main case no screws 28 76...
Страница 35: ...4 Remove the LCD ass y no screws 31 76...
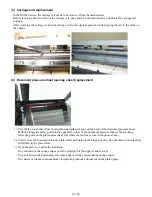
Страница 42: ...6 ASF unit removal 1 Remove 1 screw from the left plate and 2 screws from the right plate 38 76...
Страница 55: ...2 Service Tool functions Service Tool screen Version 2 000 51 76...
Страница 56: ...52 76...
Страница 67: ...63 76...
Страница 74: ...4 2 Integrated Inspection Pattern Print Print sample...
Страница 75: ...4 3 Ink Absorber Counter Value Print Print sample 4 VERIFICATION AFTER REPAIR...
Страница 78: ......


