


1
2
3
A
B
C
D
E
F
4
G
H
I
J
12 Try Using the Machine
T
ry
C
op
yi
ng
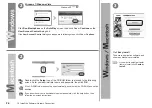
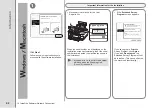
Load A4 or Letter-
sized plain paper into
the Cassette (A).
1. Open the Paper
Output Tray (B).
2. Open the Output
Tray Extension (C).
3. Open the Document
Cover (D).
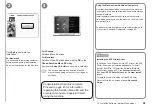
This section describes
how to perform a
standard copy.
For details,
refer to "5 Load
Paper" on page
15.
•
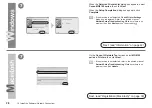
Place the document face-down and
align it with the Alignment Mark (E).
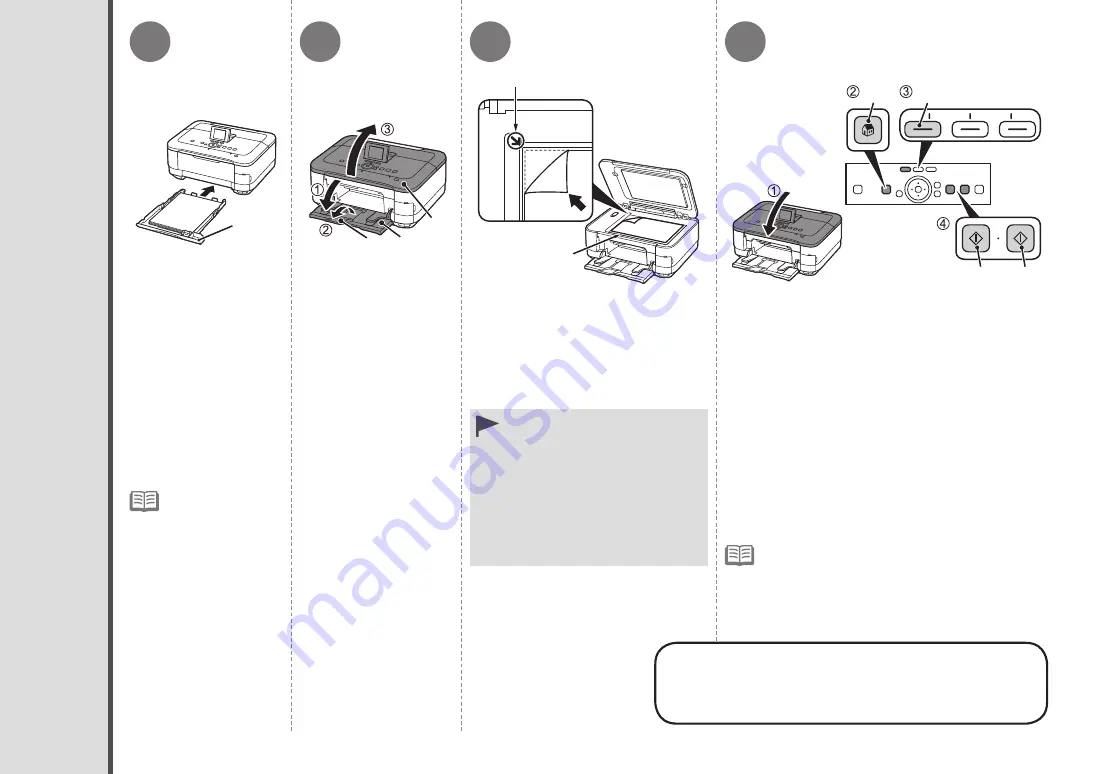
1. Close the Document Cover.
2. Touch the
HOME
button (G) to display
Copy
on the
HOME
screen.
3. Touch the left
FUNCTION
button (H).
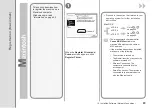
4. Touch the
Black
button (I) or the
Color
button
(J).
Copying will start. Do not open the Document Cover
until copying is complete. Remove the document after
printing.
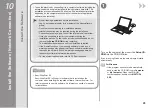
For the procedure to copy on paper other
than plain paper, refer to "Copying" in the
on-screen manual:
Advanced Guide
.
Do not place objects weighing
4.4 lb / 2.0 kg or more on
the Platen Glass (F), or do
not apply pressure to the
document by pressing on it
with a force exceeding 4.4
lb / 2.0 kg. The scanner may
malfunction or the glass may
break.
•
If
Copy
is not displayed on the
HOME
screen, use the
{
or
}
button to display
Copy
.
When the machine is ready for copying, the
Black
button and
Color
button light up.
•
•
If printing starts while
the Paper Output
Tray is closed, it will
automatically open.


