


4
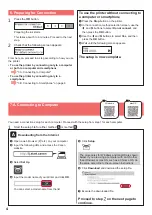
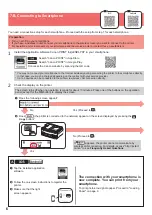
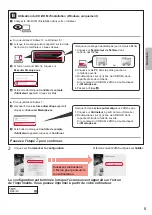
7-A. Connexion à un ordinateur
macOS
Windows
Vous devez configurer une connexion pour chaque ordinateur. Effectuez la configuration à partir de l'étape
1
pour chaque ordinateur.
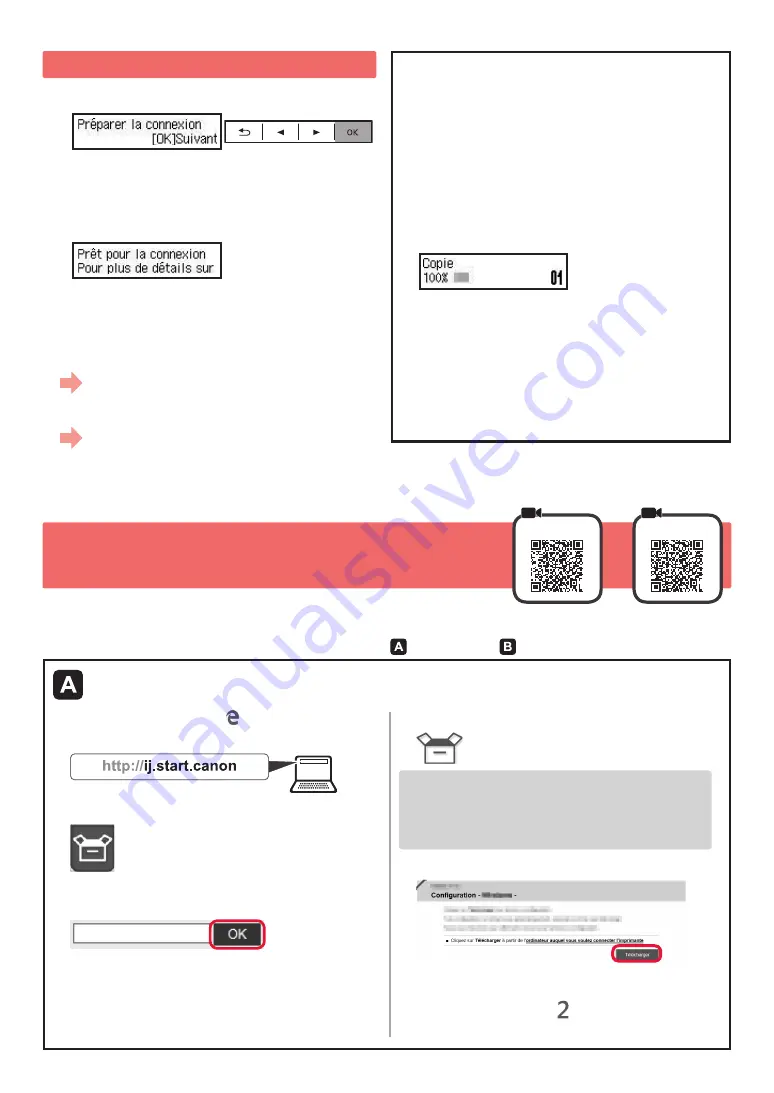
1
Démarrez le fichier de configuration pour la méthode ou la méthode
.
Téléchargement depuis Internet
a
Ouvrez un navigateur Web ( , etc.) sur votre ordinateur.
b
Entrez l'URL suivante et accédez au site Web Canon
.
c
Sélectionnez
Configuration
.
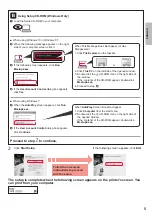
d
Entrez le nom de modèle de votre imprimante et
cliquez sur
OK
.
Vous pouvez sélectionner un nom de modèle à partir
de la liste.
e
Cliquez sur
Configuration
.
Les procédures pour Windows et macOS sont présentées
ci-dessous. Si vous utilisez un ordinateur équipé d'un
système d'exploitation autre que Windows ou macOS,
par exemple Chrome OS, procédez à la configuration en
fonction des instructions qui s'affichent à l'écran.
f
C
liquez sur
Télécharger
et téléchargez le fichier de configuration.
g
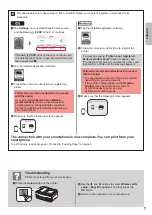
Exécutez le fichier téléchargé.
Passez avec l'étape à la page suivante
pour continuer.
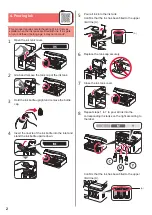
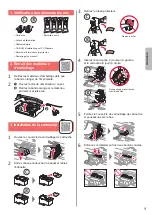
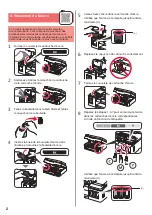
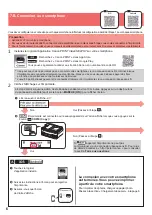
6. Préparation de la connexion
1
Appuyez sur le bouton
OK
.
La préparation de l'encre commence.
Cette opération nécessite environ
5
à 6 minutes.
Passez à l'étape suivante.
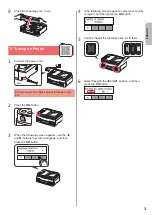
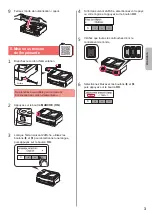
2
Assurez-vous que l'écran suivant s'affiche.
Poursuivez avec l'étape correspondant à la manière dont
vous utilisez l'imprimante.
• Pour utiliser l'imprimante en la connectant
uniquement à un ordinateur, ou à la fois
à un ordinateur et à un smartphone
«
7-A. Connexion à un ordinateur »
• Pour utiliser l'imprimante en la connectant
uniquement à un smartphone
«
7-B. Connexion à un smartphone », à la page 6
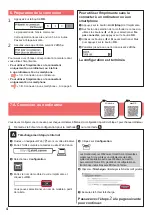
Pour utiliser l'imprimante sans la
connecter à un ordinateur ou à un
smartphone
a
Appuyez sur le bouton
Arrêt (Stop)
de l'imprimante.
b
Sur l'écran de sélection de la méthode de connexion,
utilisez les boutons
[
et
]
pour sélectionner
Ne
pas connecter
, puis appuyez sur le bouton
OK
.
c
Utilisez les boutons
[
et
]
pour sélectionner
Oui
,
puis appuyez sur le bouton
OK
.
d
Patientez jusqu'à ce que l'écran suivant s'affiche.
La configuration est terminée.
Содержание PIXMA G4610 Series
Страница 19: ...RMC Regulatory Model Code K10472...


