background image

Videoteca sobre procedimientos

How-To Video Library

RMC (Regulatory Model Code): K10454

Содержание PIXMA G400 Series

Страница 1: ...Guía de inicio Getting Started ...

Страница 2: ...tinta puede salpicar al verterla en los depósitos de tinta para llenarlos Si la tinta mancha la ropa o los objetos puede que no se vaya Installing the Printer page1 Connecting with Computer and Smartphone Tablet page5 This product requires careful handling of ink Ink may splatter when the ink tanks are filled with ink If ink gets on your clothes or belongings it may not come off ...

Страница 3: ...es Android iOS 1 Remove the packing materials such as tape from outside the printer 2 a Remove the orange tape b Open the scanning unit cover b a 3 Remove the orange tape and the protective material and discard them Installing the Cartridge You can watch the procedure on a movie by scanning the QR codes Android iOS 1 a Grab the knob on the cartridge locking cover b Open the cartridge locking cover...

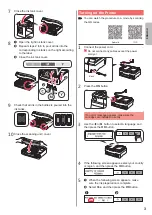
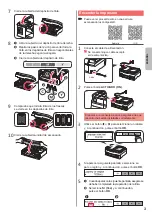
Страница 4: ...anning the QR codes Android iOS 1 Open the left ink tank cover 2 Grab and remove the tank cap of the ink tank and then place it on the upper tank cap holder 3 a Take the BK black ink bottle out of its package b Hold the ink bottle upright and remove the bottle cap b a 4 Insert the nozzle of the ink bottle into the inlet and stand the ink bottle upside down 5 Pour all ink into the ink tank 6 Close ...

Страница 5: ...n watch the procedure on a movie by scanning the QR codes Android iOS 1 Connect the power cord Do not connect any cables except the power cord yet Back 2 Press the ON button If an error message appears make sure the cartridges are installed correctly 3 Use the or button to select a language and then press the OK button 4 If the following screen appears select your country or region and then press ...

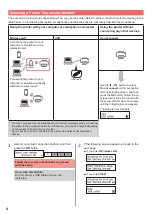
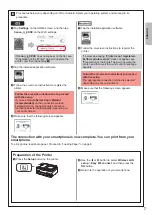
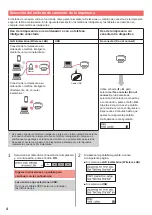
Страница 6: ...t Do not connect on the connection method selecting screen and then press the OK button Follow the on screen instructions to proceed with the setup Wait for about 6 minutes until the following screen appears The setup is now complete You may not connect your smartphone to the Internet wirelessly during connecting the printer to the smartphone directly In that case you may be charged depending on t...

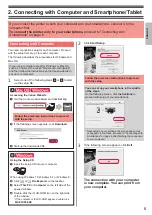
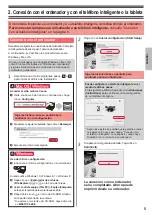
Страница 7: ...Explorer on the taskbar c Select This PC or Computer on the left side of the opened window d Double click the CD ROM icon on the right side of the window If the contents of the CD ROM appear double click MSETUP4 EXE 2 Click Start Setup Follow the on screen instructions to proceed with the setup You can set up your smartphone in the middle of the steps On the following screen click Instructions to ...

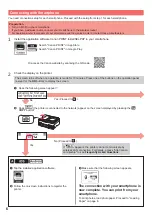
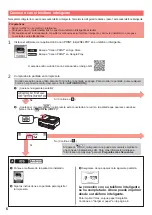
Страница 8: ...inter The screen turns off when no operation is made for 10 minutes Press one of the buttons on the operation panel except for the ON button to display the screen If appears the printer can not communicate by wireless LAN connection For details access http canon com ijsetup to see Frequently Asked Questions No Proceed to Yes a Tap the installed application software b Follow the on screen instructi...

Страница 9: ...e sure that the following screen appears a Tap the installed application software b Follow the on screen instructions to register the printer If a message saying Printer is not registered Perform printer setup does not appear see Preparation of the Printer below to operate the printer and then wait for a while until a message appears Follow the on screen instructions to proceed with the setup The ...

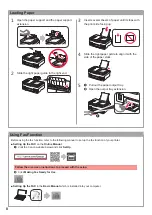
Страница 10: ... Pull out the paper output tray b Open the output tray extension a b Loading Paper Using Fax Function Before using the fax function refer to the following manual to set up the fax function of your printer Setting Up the FAX on the Online Manual a Visit the Canon website below and click Set Up Follow the on screen instructions to proceed with the setup b Click Making Fax Ready for Use Setting Up th...

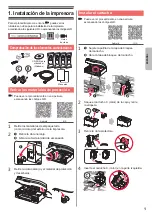
Страница 11: ...o los códigos QR Android iOS 1 Retire los materiales de empaquetado como la cinta del exterior de la impresora 2 a Retire la cinta naranja b Abra la cubierta unidad de escaneado b a 3 Retire la cinta naranja y el material de protección y deséchelos Instalar el cartucho Puede ver el procedimiento en una película escaneando los códigos QR Android iOS 1 a Sujete la patilla de la tapa de bloqueo del c...

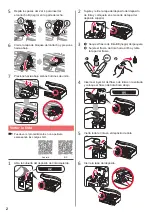
Страница 12: ... QR Android iOS 1 Abra la cubierta del depósito de tinta izquierda 2 Sujete y retire la tapa del depósito del depósito de tinta y colóquela en el soporte de tapa del depósito superior 3 a Saque el frasco de tinta BK negro del paquete b Sujete el frasco de tinta hacia arriba y retire la tapa del frasco b a 4 Inserte el inyector del frasco de tinta en la entrada y coloque el frasco de tinta boca aba...

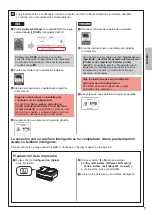
Страница 13: ...ede ver el procedimiento en una película escaneando los códigos QR Android iOS 1 Conecte el cable de alimentación No conecte ningún cable excepto el de alimentación Atrás 2 Pulse el botón ACTIVADO ON Si aparece un mensaje de error asegúrese de que los cartuchos están instalados correctamente 3 Utilice el botón o para seleccionar un idioma y a continuación pulse el botón OK 4 Si aparece la siguient...

Страница 14: ...ct en la pantalla de selección del método de conexión y a continuación pulse el botón OK Siga las instrucciones en pantalla para continuar con la configuración Espere unos 6 minutos hasta que aparezca la siguiente pantalla Ha finalizado la configuración No puede conectar su teléfono inteligente a Internet de forma inalámbrica durante la conexión directa de la impresora con su teléfono inteligente ...

Страница 15: ...uipo This PC o Equipo Computer en la parte izquierda de la ventana que se abra d Haga doble clic en el icono de CD ROM situado en la parte derecha de la ventana Si aparece el contenido del CD ROM haga doble clic en MSETUP4 EXE 2 Haga clic en Iniciar configuración Start Setup Siga las instrucciones en pantalla para continuar con la configuración Puede configurar su teléfono inteligente en el medio ...

Страница 16: ... la impresora Cuando el equipo no se utiliza durante 10 minutos la pantalla se apaga Para mostrar la pantalla pulse cualquier botón en el panel de control excepto el botón ACTIVADO ON Si aparece la impresora no puede comunicarse mediante una conexión inalámbrica LAN Para más información diríjase a http canon com ijsetup para ver Preguntas más frecuentes No Continúe a Sí a Puntee el software de la ...

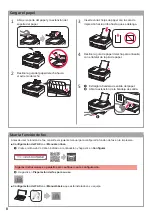
Страница 17: ...untee el software de la aplicación instalado b Siga las instrucciones en pantalla para registrar la impresora Si no aparece un mensaje que dice Impresora no registrada Realizar preparación de impresora Printer is not registered Perform printer setup consulte la sección Preparación de la impresora a continuación para hacer funcionar la impresora y espere un momento hasta que aparezca un mensaje Sig...

Страница 18: ... salida del papel b Abra la extensión de la bandeja de salida a b Cargar el papel Usar la función de fax Antes de usar la función de fax consulte el siguiente manual para configurar la función de fax en la impresora Configuración del FAX en el Manual en línea a Visite el sitio web de Canon indicado a continuación y haga clic en Configurar Siga las instrucciones en pantalla para continuar con la co...

Страница 19: ...Videoteca sobre procedimientos How To Video Library RMC Regulatory Model Code K10454 ...

Страница 20: ... CANON INC 2016 XXXXXXXX Acceda al sitio web Leer el Manual en línea Preguntas más frecuentes Visit the Website Read Online Manual Frequently Asked Questions PRINTED IN XXXXXXXX QT6 1604 V01 ...

Отзывы: