


6-3
Clearing Paper Jams
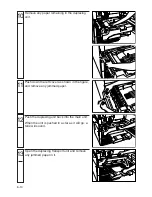
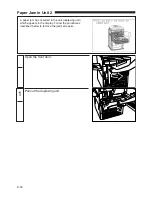
1 Inspect all areas which appeared in the touch panel
display, and remove any jammed paper. See the
appropriate pages for instructions on how to find
and remove jammed paper.
■
Jammed Copy Paper
●
Paper Jam in Unit 1 (Fixing Unit)...see p. 6-9
●
Paper Jam in Unit 2 (Duplexing Unit)...see p. 6-16
●
Paper Jam in Unit 3 (Duplexing Transport Unit)...see
p. 6-19
●
Paper Jam in the Stack Bypass Area...see p. 6-21
●
Paper Jam Behind the Right Door...see p. 6-22
●
Paper Jam in Drawer 1, 2...see p. 6-27
●
Paper Jam in Drawer 3, 4...see p. 6-30
●
Paper Jam in the Side Paper Deck (option)...see
p. 6-31
■
Jammed Originals in the RDF...see p. 6-4
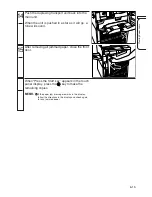
NOTICE:
●
If jammed paper tears while removing it, be
sure to remove any remaining pieces from
inside the copier.
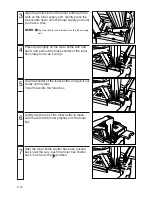
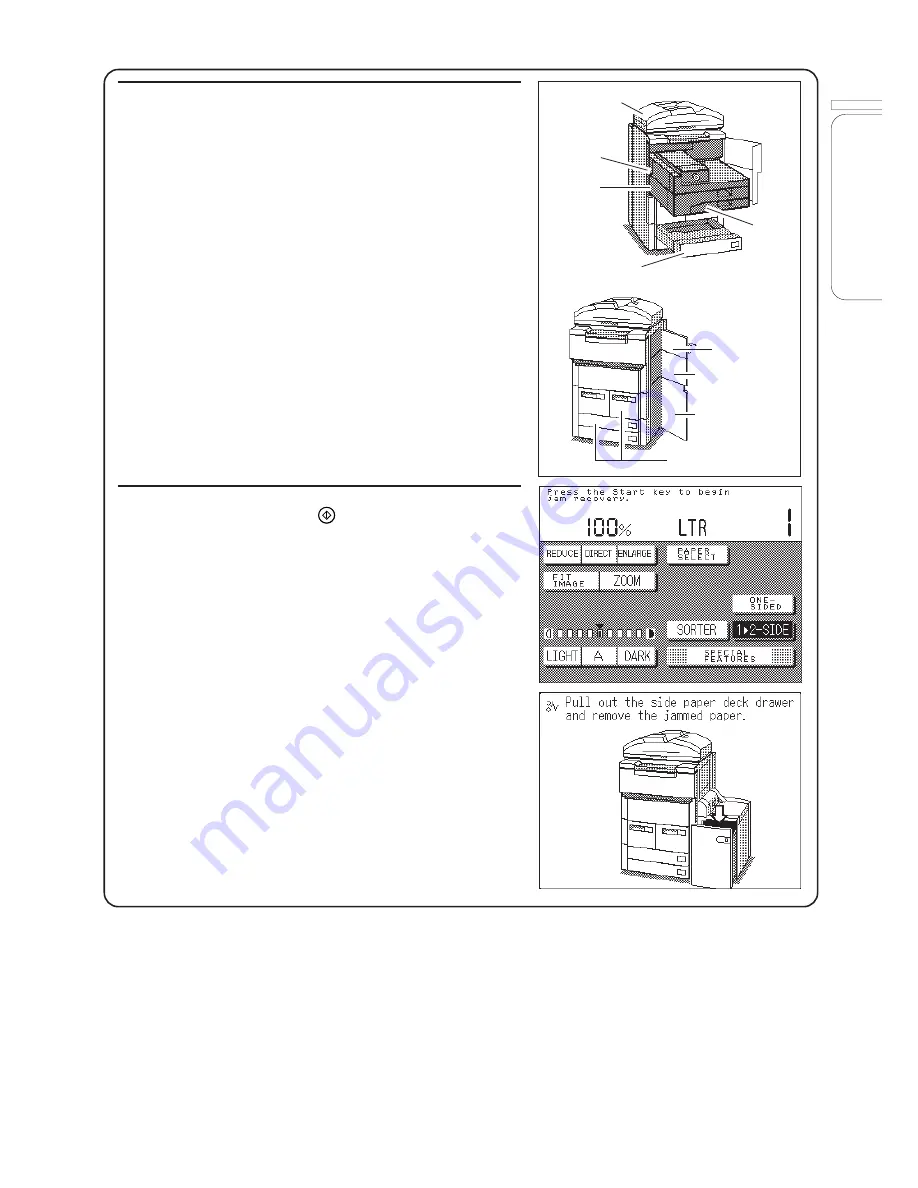
2 When the message to the right appears in the touch
panel display, press the
Start
key to make the
remaining copies.
MEMO:
●
If the paper jam message remains in the display,
follow the directions in the display and check
again for any jammed paper.
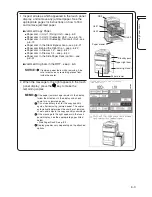
●
It is not necessary to enter the copy quantity
again after removing jammed paper. The copier
automatically determines the number of jammed
sheets, and adjusts the copy quantity accordingly.
●
If the message to the right appears in the touch
panel display, see the appropriate pages listed
below.
• Side Paper Deck: See p. 8-2.
●
Display graphics vary depending on the attached
options.
Upper right door
Lower right door
Paper drawer
Paper drawer
Unit 3
RDF
Unit 2
Unit 1
Stack bypass


