Overview
Entering Service Mode
For information on how to enter service mode, contact the Support Dept. of the sales company.
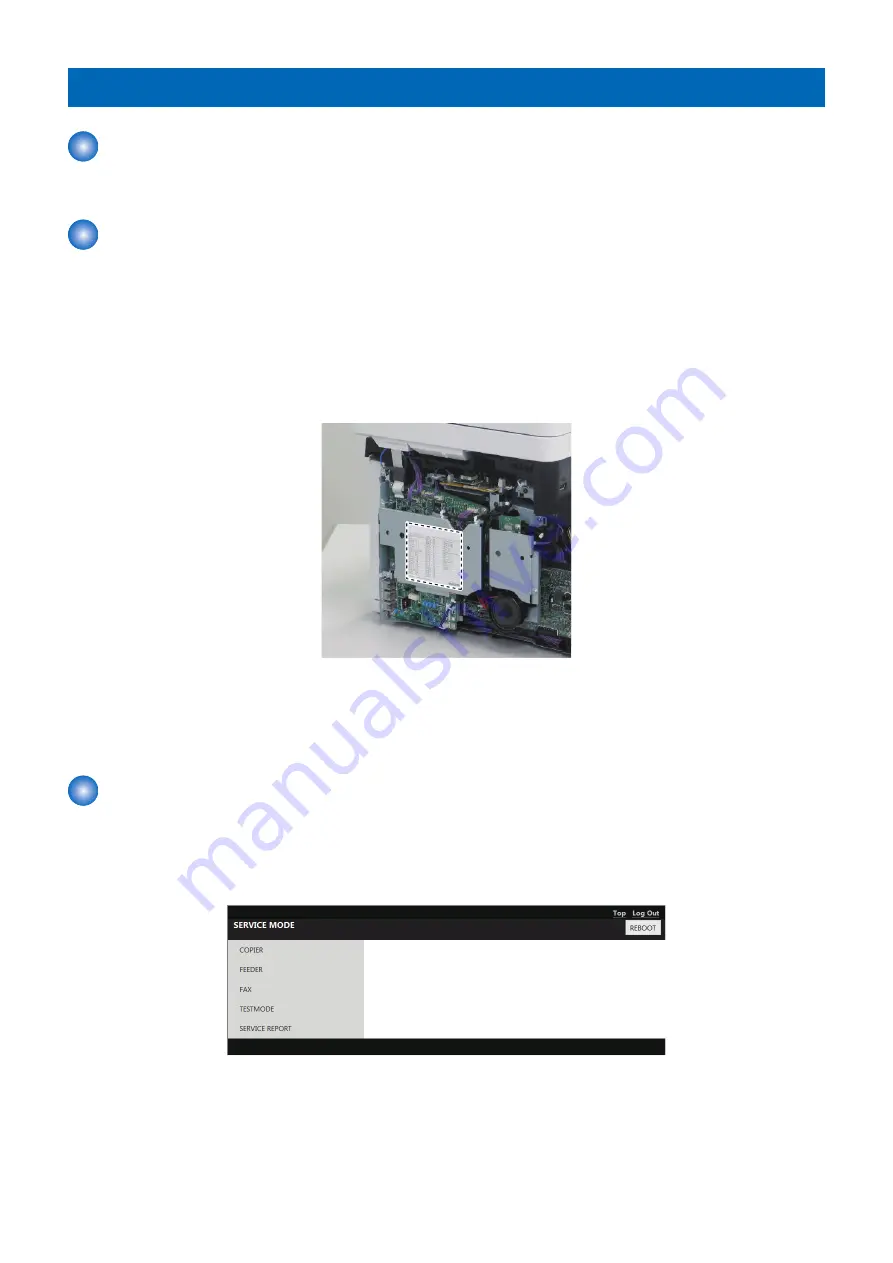
Service Label
In factory setting, adjustments are made for each machine, and adjustment values are written in the service label.
In the case of the following, adjustment values for ADJUST or OPTION return to default. Therefore, when you made adjustments
in the field.
• Changed Main Controller PCB
• Changed Engine Controller PCB
• After RAM clear execution
Therefore, when you made adjustments and changed values of the Service Mode in the field, be sure to write down the changed
values in the service label. When there is no relevant field in the service label, write down the values in a blank field.
Remote UI Service Mode
■ Function Overview
It is possible to display, configure, and execute various service mode modes as well as restart the host machine by using remote
UI.
■ Operating conditions
In order to operate service mode using Remote UI, the following conditions must be met.
9. Service Mode
237
Содержание MF735C Series
Страница 1: ...Revision 2 0 MF735C Series Service Manual ...
Страница 13: ...Product Overview 1 Product Lineup 5 Specifications 7 Parts Name 10 ...
Страница 23: ...No Name 6 Home key 7 Stop key 8 NFC Near Field Communication mark 1 Product Overview 14 ...
Страница 81: ...Periodical Service 4 Periodically Replaced Parts 73 Consumable Parts 74 Periodical Services 75 ...
Страница 82: ...Periodically Replaced Parts This machine does not have any periodically replaced parts 4 Periodical Service 73 ...
Страница 83: ...Consumable Parts This machine does not have any consumable parts 4 Periodical Service 74 ...
Страница 84: ...Periodical Services This machine does not require any periodical service 4 Periodical Service 75 ...
Страница 86: ...List of Parts Major Units ADF Reader 1 2 No Name 1 ADF Unit 2 Reader Unit 5 Parts Replacement and Cleaning 77 ...
Страница 118: ... Procedure 1 Remove the ADF Sensor Unit 2x 5 Parts Replacement and Cleaning 109 ...
Страница 119: ...2 Remove the ADF Sensor Unit CAUTION Be careful not to lose the springs 5 Parts Replacement and Cleaning 110 ...
Страница 144: ... Procedure 1 Remove the Memory Relay PCB 2x 1x 5 Parts Replacement and Cleaning 135 ...
Страница 149: ...10 Loosen the screws and remove the Laser Scanner Unit Fixation Pins 2x 5 Parts Replacement and Cleaning 140 ...
Страница 159: ...3 Remove the PCB Holder 3x 4 Remove the Drum Motor 4x 1x 5 Parts Replacement and Cleaning 150 ...
Страница 180: ...7 Remove the Registration Unit 2x 5 Parts Replacement and Cleaning 171 ...
Страница 181: ...Adjustment 6 Adjustment at Parts Replacement 173 ...
Страница 211: ...Troubleshooting 7 Test Print 203 Troubleshooting Items 216 Debug Log 219 ...
Страница 230: ...Error Jam Alarm 8 Overview 222 Error Code 225 Jam Code 232 Alarm Code 235 ...
Страница 346: ...Installation 10 Copy Control Interface Kit C1 338 MiCARD Attachment Kit B1 345 Copy Card Reader F1 351 ...
Страница 353: ...17 2x 18 1x 19 20 21 Connect the power plug to the outlet 22 Turn ON the main power switch 10 Installation 344 ...
Страница 356: ...6 7 8 9 2x 10 1x 10 Installation 347 ...
Страница 357: ...11 12 Installing the Card Reader 1 1x M4x16 2 10 Installation 348 ...
Страница 358: ...3 4 NOTE Be sure that it does not protrude from the depression 5 6 7 1x 10 Installation 349 ...
Страница 359: ...8 3x 9 1x 1x 10 Connect the power plug to the outlet 11 Turn ON the main power switch 10 Installation 350 ...
Страница 362: ...4 2x 5 NOTE Release the claw while opening the Right Cover Unit in the direction of the arrow 6 7 10 Installation 353 ...
Страница 372: ...APPENDICES Service Tools 364 General Circuit Diagram 365 Backup Data List 368 Soft counter specifications 370 ...


