


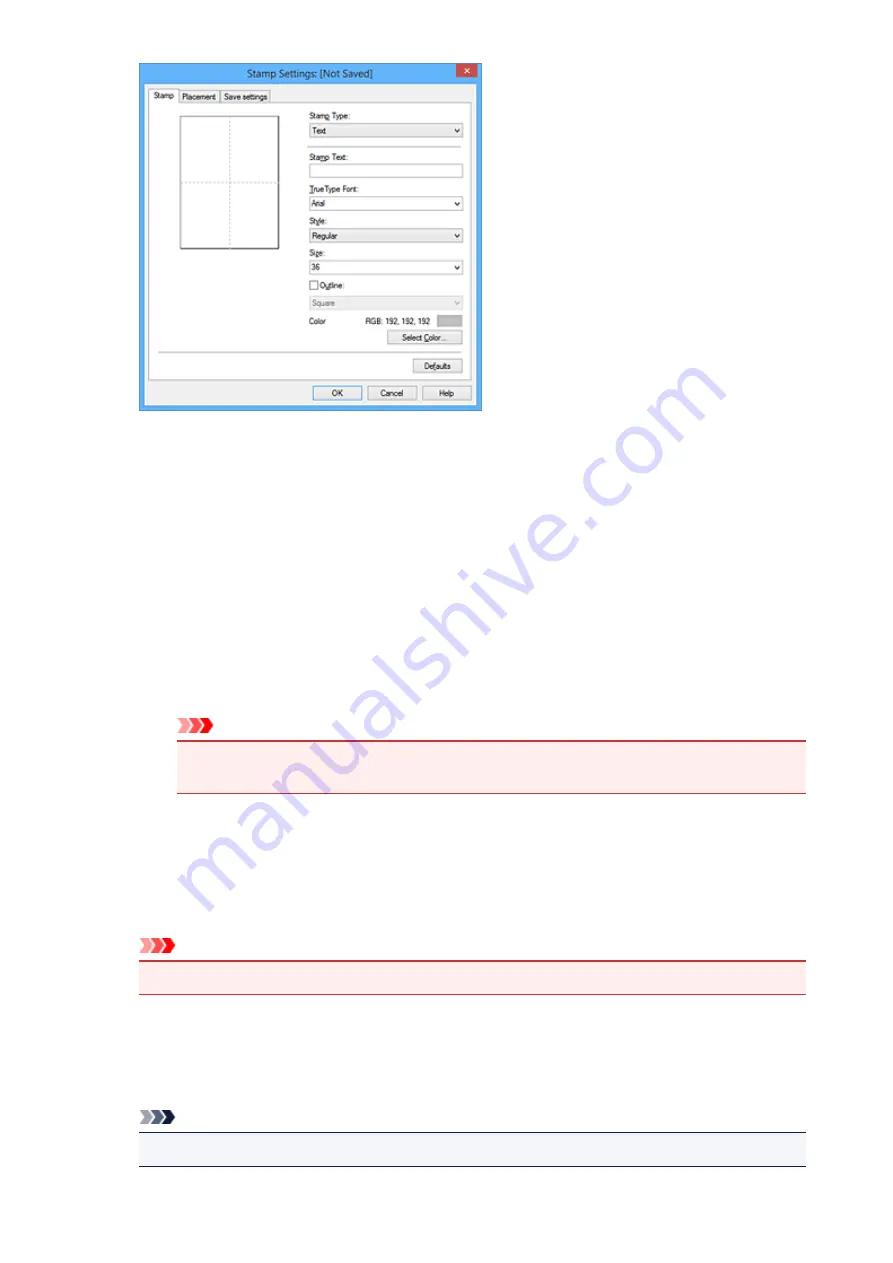
4. Configure the stamp while viewing the preview window
•
Stamp
tab
Select
Text
,
Bitmap
, or
Date/Time/User Name
that matches your purpose for
Stamp Type
.
◦ For
Text
registration, the characters must already be entered in
Stamp Text
. If necessary,
change the
TrueType Font
,
Style
,
Size
, and
Outline
settings. You can select the color of
the stamp by clicking
Select Color...
.
◦ For
Bitmap
, click
Select File...
and select the bitmap file (.bmp) to be used. If necessary,
change the settings of the
Size
and
Transparent white area
.
◦ For
Date/Time/User Name
, the creation date/time and user name of the printed object are
displayed in
Stamp Text
. If necessary, change the settings of
TrueType Font
,
Style
,
Size
,
and
Outline
. You can select the color of the stamp by clicking
Select Color...
.
Important
•
Stamp Text
appears grayed out and is unavailable when
Date/Time/User Name
is
selected.
•
Placement
tab
Select the stamp position from the
Position
list. You can also select
Custom
from the
Position
list and specify coordinates for
X-Position
and
Y-Position
.
You can also change the stamp position by dragging the stamp in the preview window.
To change the stamp position angle, type a value in the
Orientation
box directly.
Important
•
Orientation
cannot be changed when
Bitmap
is selected for
Stamp Type
on the
Stamp
tab.
5. Save the stamp
Click the
Save settings
tab and enter a title in the
Title
box, and then click
Save
.
Click
OK
when the confirmation message appears.
Note
• Spaces, tabs, and returns cannot be entered at the beginning or end of a title.
418
Содержание MB5000 Series
Страница 38: ...10 When connection is complete click Back until the screen below appears Proceed with the setup 38 ...
Страница 90: ...90 ...
Страница 118: ...Manual Online This function displays the Online Manual 118 ...
Страница 131: ...Safety Guide Safety Precautions Regulatory and Safety Information 131 ...
Страница 139: ...139 ...
Страница 141: ...Main Components Front View Rear View Inside View Operation Panel 141 ...
Страница 159: ...Loading Paper Originals Loading Paper Loading Originals Inserting the USB Flash Drive 159 ...
Страница 176: ...Printing Area Printing Area Other Sizes than Letter Legal Envelopes Letter Legal Envelopes 176 ...
Страница 189: ...Inserting the USB Flash Drive Inserting the USB Flash Drive Removing the USB Flash Drive 189 ...
Страница 192: ...Replacing an Ink Tank Replacing an Ink Tank Checking the Ink Status 192 ...
Страница 231: ...4 After wiping close the document feeder cover by pushing it until it clicks into place 5 Close the document tray 231 ...
Страница 236: ...236 ...
Страница 281: ...Information about Network Connection Useful Information about Network Connection 281 ...
Страница 328: ...5 Delete Deletes the selected IP address from the list 328 ...
Страница 384: ...Printing Printing from a Computer Printing Using the Operation Panel of the Machine Paper setting for Printing 384 ...
Страница 385: ...Printing from a Computer Printing with Application Software that You are Using Printer Driver 385 ...
Страница 402: ...Note Selecting Scaled changes the printable area of the document 402 ...
Страница 413: ...Related Topic Changing the Printer Operation Mode 413 ...
Страница 435: ...Note During Grayscale Printing inks other than black ink may be used as well 435 ...
Страница 440: ...Adjusting Intensity Adjusting Contrast 440 ...
Страница 548: ...About Special Copy Menu Copying Thick Originals Such as Books 548 ...
Страница 556: ...See Two Sided Copying for two sided copying 556 ...
Страница 557: ...Scanning Scanning from a Computer Scanning from the Operation Panel of the Machine 557 ...
Страница 561: ...Note Refer to Settings Dialog Box for how to set the applications to integrate with 561 ...
Страница 571: ... Documents with colors in the background of text Documents containing multiple languages 571 ...
Страница 574: ...5 Select Select Source according to the items to be scanned 6 Select Auto scan for Paper Size then click OK 574 ...
Страница 598: ...Defaults You can restore the settings in the displayed screen to the default settings 598 ...
Страница 624: ...Instructions Opens this guide Defaults You can restore the settings in the displayed screen to the default settings 624 ...
Страница 644: ...Related Topic Scanning Items Larger than the Platen Image Stitch 644 ...
Страница 665: ...665 ...
Страница 688: ...Related Topic Scanning in Basic Mode 688 ...
Страница 737: ...Other Scanning Methods Scanning with WIA Driver Scanning Using the Control Panel Windows XP Only 737 ...
Страница 746: ...746 ...
Страница 839: ...Receiving Faxes Receiving Faxes Changing the Paper Settings Memory Reception Receiving Faxes Using Useful Functions 839 ...
Страница 894: ...4 When a confirmation message is displayed click Yes 894 ...
Страница 947: ...Problems with Printing Quality Print Results Not Satisfactory Ink Is Not Ejected 947 ...
Страница 949: ...Back of the Paper Is Smudged Colors Are Uneven or Streaked 949 ...
Страница 967: ...Problems with Scanning Problems with Scanning Scan Results Not Satisfactory Software Problems 967 ...
Страница 988: ...Software Problems The E mail Client You Want to Use Does Not Appear in the Screen for Selecting an E mail Client 988 ...
Страница 990: ...Problems with Faxing Problems Sending Faxes Problems Receiving Faxes Cannot Send a Fax Clearly Telephone Problems 990 ...
Страница 1052: ...1660 Cause The ink tank is not installed Action Install the ink tank 1052 ...
Страница 1090: ...5500 Cause Ink tank has not been properly recognized Action Contact the service center 1090 ...
Страница 1091: ...5501 Cause Ink tank has not been properly recognized Action Contact the service center 1091 ...
Страница 1092: ...5B00 Cause Printer error has occurred Action Contact the service center 1092 ...
Страница 1093: ...5B01 Cause Printer error has occurred Action Contact the service center 1093 ...


