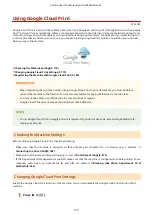


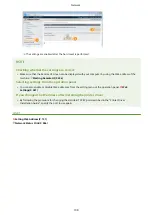


3
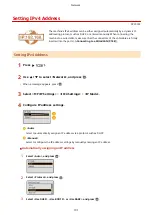
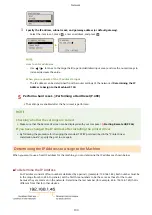
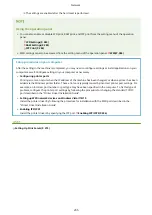
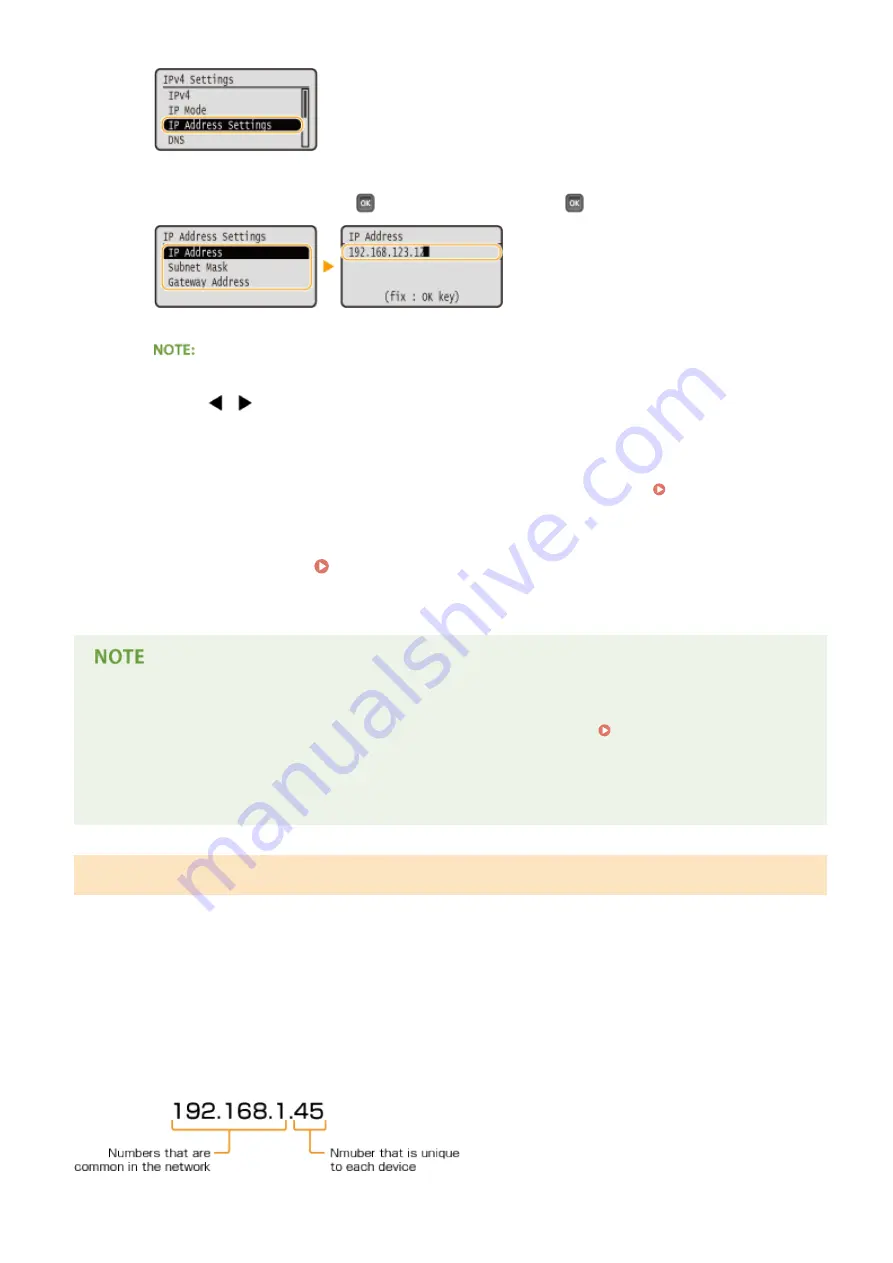
Specify the IP address, subnet mask, and gateway address (or default gateway).
●
Select the item to set, press
, enter an address, and press
.
How to enter addresses
●
Use
/
to move to the target field (a period-delimited input area), and use the numeric keys to
increase/decrease the value.
When you are unsure of the IP address to input
●
The IP address can be determined from the router settings of the network. Determining the IP
Address to Assign to the Machine(P. 193)
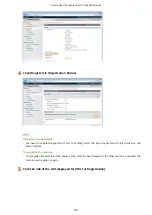
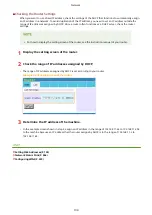
5
Perform a hard reset. Performing a Hard Reset(P. 498)
➠
The settings are enabled after the hard reset is performed.
Checking whether the settings are correct
●
Make sure that the Remote UI screen can be displayed with your computer. Starting Remote UI(P. 336)
If you have changed the IP address after installing the printer driver
●
By following the procedure for changing the standard TCP/IP port described in the "Printer Driver
Installation Guide", specify the port to use again.
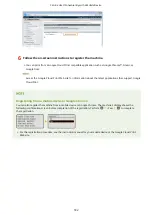
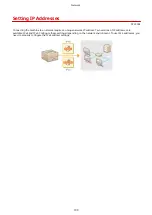
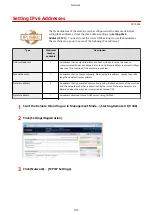
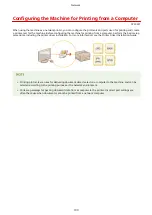
Determining the IP Address to Assign to the Machine
When you want to use a fixed IP address for the machine, you can determine the IP address as shown below.
◼
To Determine the IP Address
An IP address consists of four numbers delimited by a period (.) (example: 192.168.1.45). Each number must be
in the range from 0 to 255. In general, set the first three numbers to be the same as those for the router
because they are common in the network. Determine the last number (for example, 45 in 192.168.1.45) that is
different from that for other devices.
Network
193
Содержание LBP710Cx
Страница 1: ...LBP712Cx LBP710Cx User s Guide USRMA 0722 00 2016 04 en Copyright CANON INC 2016 ...
Страница 21: ... Saving Energy This section describes how to reduce power consumption Saving Energy P 62 Basic Operations 15 ...
Страница 51: ...Paper P 620 Basic Operations 45 ...
Страница 58: ...4 on 1 Postcard Insert the postcard with the upper end toward the machine Basic Operations 52 ...
Страница 78: ...Printing a Document 72 ...
Страница 93: ...LINKS Basic Printing Operations P 73 Printing a Document 87 ...
Страница 97: ...LINKS Basic Printing Operations P 73 Enlarging or Reducing P 82 Printing a Document 91 ...
Страница 102: ...Basic Printing Operations P 73 Printing Borders P 94 Printing Watermarks P 97 Printing a Document 96 ...
Страница 108: ...LINKS Basic Printing Operations P 73 Printing a Document 102 ...
Страница 140: ...LINKS Using the Encrypted Print P 135 Installing an SD Card P 633 Printing a Document 134 ...
Страница 154: ... It may take some time until printing starts LINKS Using Remote UI P 335 Printing a Document 148 ...
Страница 179: ...4 Click Edit 5 Specify the required settings and click OK Can Be Used Conveniently with a Mobile Device 173 ...
Страница 195: ...LINKS Connecting to a Network P 186 Network 189 ...
Страница 202: ...4 Click Edit in IPv6 Settings 5 Select the Use IPv6 check box and configure the required settings Network 196 ...
Страница 250: ...LINKS Entering Sleep Mode P 63 Network 244 ...
Страница 290: ...Printing a Document Stored in the Machine Stored Job Print P 136 Security 284 ...
Страница 296: ... Functions of the Keys Operation Panel P 24 Security 290 ...
Страница 309: ...3 Click Security IPSec Settings 4 Click IPSec Policy List 5 Click Register IPSec Policy Security 303 ...
Страница 316: ...3 Click Security IPSec Settings 4 Click Edit 5 Select the Use IPSec check box and click OK Security 310 ...
Страница 334: ...Using TLS for Encrypted Communications P 297 Configuring IPSec Settings P 301 Security 328 ...
Страница 344: ...Using Remote UI 338 ...
Страница 359: ...LINKS Remote UI Screens P 339 Using Remote UI 353 ...
Страница 383: ...Paper Source 0YSF 05E See Select Feeder Menu P 500 Setting Menu List 377 ...
Страница 516: ...Troubleshooting 510 ...
Страница 600: ...LINKS Utility Menu P 491 Job Menu P 496 Maintenance 594 ...
Страница 611: ...Third Party Software 0YSF 090 Appendix 605 ...
Страница 630: ...Appendix 624 ...
Страница 651: ...Manual Display Settings 0YSF 091 Appendix 645 ...
Страница 675: ...Scalable Fonts PCL Appendix 669 ...
Страница 676: ...Appendix 670 ...
Страница 677: ...Appendix 671 ...
Страница 678: ...OCR Code Scalable Fonts PCL Bitmapped Fonts PCL Appendix 672 ...
Страница 701: ... 16 MD4 RSA Data Security Inc MD4 Message Digest Algorithm ...
Страница 712: ... 27 including the GNU Public Licence ...
Страница 736: ... 51 SOFTWARE ...
Страница 749: ...Search Enter keyword s here 1 ...
Страница 752: ...2 ...
Страница 759: ...3 Click Manual Installation 4 Click Browse select the license file and the application file to install click Next 9 ...
Страница 762: ...12 ...
Страница 768: ...3 Click Delivered Update 4 Click Apply Firmware 5 Confirm the firmware to apply click Yes 5 ...
Страница 770: ...3 Click Delivered Update 4 Click Delete Firmware 7 ...
Страница 773: ...5 Confirm the information of the scheduled delivery click Yes The scheduled delivery is deleted 10 ...
Страница 783: ... 1 Whole contents Shows the all chapters and sections of this guide Click an item to view the contents Site Map 6 ...
Страница 789: ...Search Enter keyword s here 1 ...
Страница 810: ...Starting MEAP Applications Stopping MEAP Applications Starting Stopping MEAP Applications 10 ...
Страница 813: ...When the restart prompt message is displayed Follow the on screen instructions to restart the printer 13 ...
Страница 818: ...4 Click License Management 5 18 ...
Страница 821: ...4 Click License Management 5 21 ...
Страница 822: ...Click Disable 6 Click Yes The license file is disabled 22 ...
Страница 824: ...4 Click License Management 5 24 ...
Страница 825: ...Click Download 6 Follow the on screen instructions and specify a file storage directory The license file is saved 25 ...
Страница 827: ...4 Click License Management 5 27 ...
Страница 828: ...Click Delete 6 Click Yes The license file is deleted 28 ...
Страница 830: ...4 Click Authentication Information Settings 5 30 ...
Страница 832: ...When cancelling authentication information Click Delete 32 ...
Страница 835: ...4 The display order changes 1 Move the applets up and down by clicking Up and Down 2 Click Update 3 ...
Страница 837: ...5 ...
Страница 846: ...14 ...
Страница 847: ...Checking System Information Checking Application Information Checking License Files Checking Information 15 ...
Страница 849: ...17 ...
Страница 855: ...4 Click Yes The setting information of the application is deleted 23 ...
Страница 858: ...4 Follow the on screen instructions and specify a file storage directory The log file is saved 26 ...
Страница 860: ...4 Click Yes The log data is deleted 28 ...
Страница 889: ... 1 Whole contents Shows the all chapters and sections of this guide Click an item to view the contents Site Map 6 ...


