


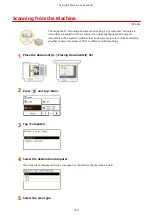

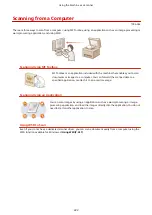


Scanning from a Computer
1053-046
There are three ways to scan from a computer: using MF Toolbox, using an application such as an image-processing or
word-processing application, and using WSD.
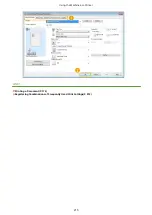
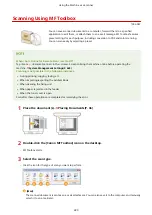
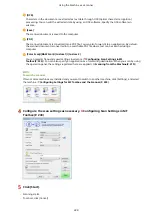
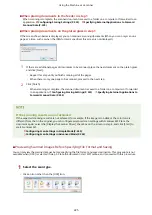
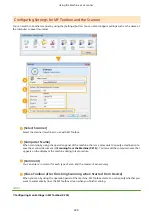
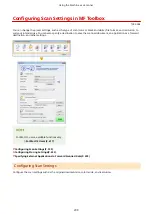
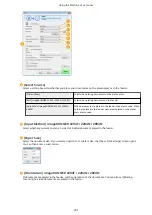
Scanning Using MF Toolbox
MF Toolbox is an application included with the machine that enables you to scan
documents or images to a computer. You can forward the scanned data to a
specified application, or attach it to an e-mail message.
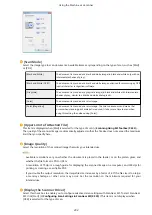
Scanning Using an Application
You can scan images by using an application such as a word-processing or image-
processing application, and load the images directly into the application. You do not
need to start another application to scan.
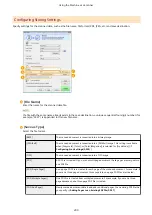
Using WSD to Scan
Even if you do not have a dedicated scanner driver, you can scan a document easily from a computer using the
WSD function available for Windows. Using WSD(P. 257)
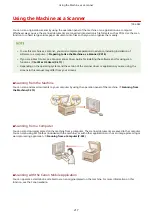
Using the Machine as a Scanner
222
Содержание imageRunner 2004
Страница 1: ...imageRUNNER 2204F 2204N 2004N 2004 User s Guide USRMA 0997 01 2017 03 en Copyright CANON INC 2017 ...
Страница 28: ...Control Panel 1053 00A imageRUNNER 2204F 2204N 2004N Basic Operations 20 ...
Страница 56: ... You can use only the paper printed with this machine Basic Operations 48 ...
Страница 59: ...Basic Operations 51 ...
Страница 100: ...LINKS Basic Copy Operations P 77 2 Sided Copying imageRUNNER 2204F 2204N 2004N P 88 Copying 92 ...
Страница 103: ...Basic Copy Operations P 77 Copying 95 ...
Страница 108: ...Basic Copy Operations P 77 Copying 100 ...
Страница 115: ... Sending Faxes Directly from Your Computer Sending Faxes from Your Computer PC Fax P 150 Faxing imageRUNNER 2204F 107 ...
Страница 204: ...Printing a Document P 174 Printing Borders P 194 Printing Watermarks P 197 Using the Machine as a Printer 196 ...
Страница 213: ...Printing a Document P 174 Using the Machine as a Printer 205 ...
Страница 246: ...LINKS Configuring Scan Settings in ScanGear MF P 239 Using the Machine as a Scanner 238 ...
Страница 279: ...6 Click Print Printing starts Linking with Mobile Devices imageRUNNER 2204F 2204N 2004N 271 ...
Страница 283: ...6 Click Fax Fax sending starts Linking with Mobile Devices imageRUNNER 2204F 2204N 2004N 275 ...
Страница 358: ...4 Click Edit 5 Specify SNMPv1 settings Network imageRUNNER 2204F 2204N 2004N 350 ...
Страница 388: ...LINKS Configuring Printer Ports P 333 Security 380 ...
Страница 394: ...Registering Address Book from Remote UI imageRUNNER 2204F P 416 Security 386 ...
Страница 483: ...Troubleshooting 475 ...
Страница 531: ... Page Setup tab Paper Type Plain L Troubleshooting 523 ...
Страница 533: ...Loading Paper P 40 Check whether mixed sizes and types of paper are loaded together Troubleshooting 525 ...
Страница 548: ... After cleaning is completed and the message Finished appears press to return to the Home Screen Maintenance 540 ...
Страница 579: ...For more information about this function see Storing Received Faxes into Memory Memory Reception P 141 Appendix 571 ...
Страница 596: ... Printable Area The shaded areas in the image below indicate the printable area of the document Appendix 588 ...
Страница 608: ...7 Click Next Exit Viewing the e Manual Double click the shortcut icon of the e Manual on the desktop Appendix 600 ...
Страница 611: ...4 Click Next Uninstall begins Wait a moment This process may take some time 5 Click Exit 6 Click Back Exit Appendix 603 ...
Страница 612: ...Appendix 604 ...
Страница 624: ...Appendix 616 ...
Страница 637: ... 10 this software is based in part on the work of the Independent JPEG Group ...
Страница 647: ... 20 including the GNU Public Licence ...


