manualshive.com logo in svg
background image

Appendices

77

Chapter 3

Symptoms The scanned image is abnormal for certain documents.

Problem

Functions such as [Auto-detection], [Deskew], or [Border 
Removal] were used when scanning documents containing 
text or photos up to their edges. (The scanner cannot 
accurately process the edges of documents.)

Solution

Turn off functions such as [Auto-detection], [Deskew], or [Border 
Removal] when scanning documents containing text or photos up 
to their edges. (See “Software Settings,” on p. 49.)

Symptoms The scanned image is abnormal in some applications.

Problem

A function not supported by the application was used.

Solution

Some applications do not support functions such as auto-detection 
of the paper size. Scanning documents with an application such as 
this will result in an abnormal scanned image. Try scanning with 
auto-detection of the paper size set to “off.”

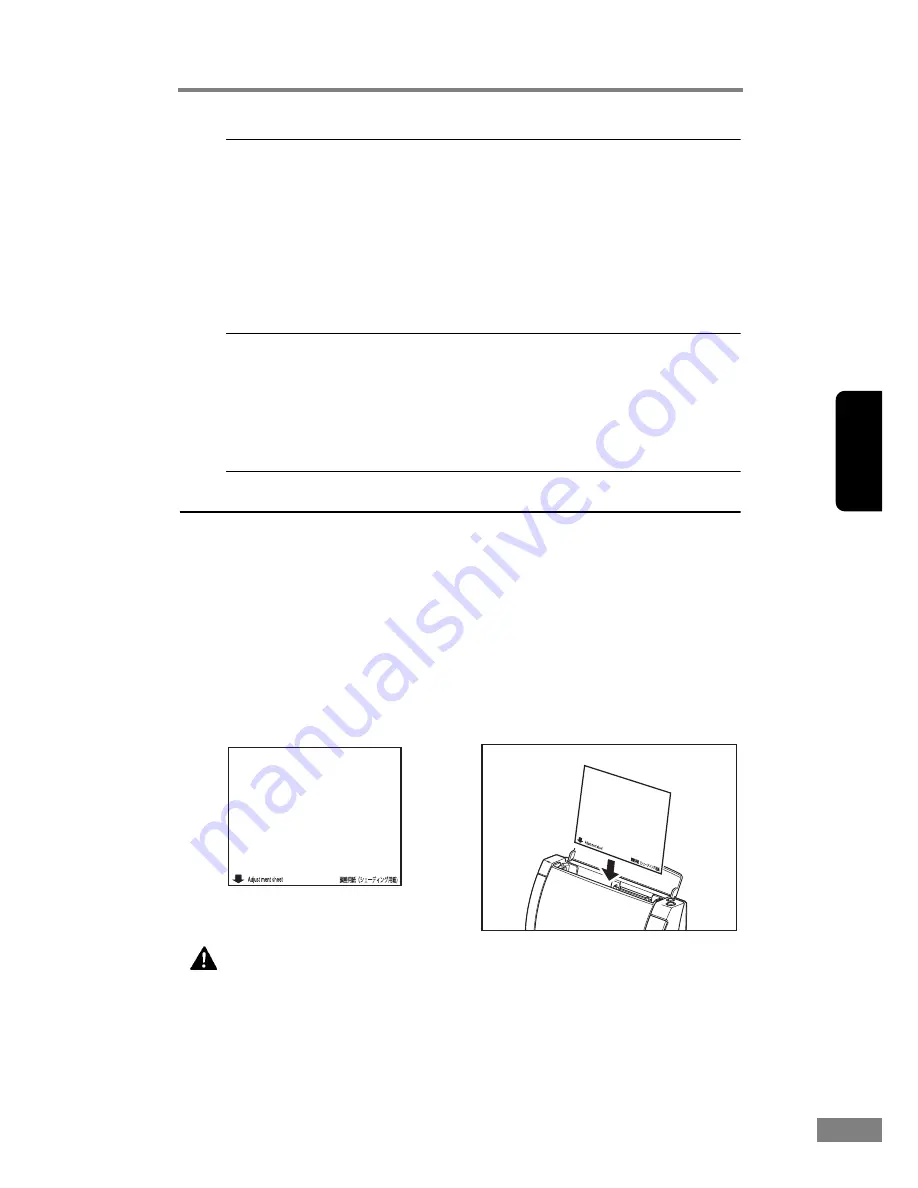
Adjusting the Scanner

To adjust the scanner, set the supplied Adjustment Sheet (Shading Sheet) in the 
scanner. Orient the adjusting sheet in the direction indicated by the arrow when 
setting it in the scanner. After setting the Adjustment Sheet in the scanner, click 
the Windows [Start] button, and then click [Programs] (All Programs in the 
case of Windows XP) 

Æ

 [Canon Document Scanner], and then [DR-2050C & 

2080C Adjustment Tool], or use the [Scanner Adjustment] function of the ISIS/
TWAIN driver. Follow the instructions on the dialog box that appears on the 
screen to adjust the scanner. Refer to Help for the ISIS/TWAIN driver for 
information about the ISIS/TWAIN driver [Scanner Adjustment].

CAUTION
Before performing scanner adjustment, be sure to clean the 
scanning glass (see p. 59). Attempting to perform scanner 
adjustment while the scanning glass is dirty can cause vertical 
lines in the scanned image. Note that performing scanner 
adjustment will cause previous adjustment data to be deleted. 
Once deleted, adjustment data cannot be recovered.

Adjustment Sheet 

(Shading Sheet)

Содержание imageFORMULA DR-2050C

Страница 1: ...Document Scanner Maintenance Guide DR 2050C DR 2050SP...

Страница 2: ...Roller Replacement Cycle 62 Resetting the Counter 63 Removing and Attaching the Feed Roller 65 Removing and Attaching the Retard Roller 68 3 Troubleshooting 72 The Scanner Does Not Turn ON 72 The Scan...

Страница 3: ...or other organic solvents to clean the scanner Such solvents can damage or discolor the exterior of the scanner or create a risk of fire or electric shock Cleaning the Scanner Moisten a cloth with pl...

Страница 4: ...t b 3 Use a blower to keep the interior of the scanner free of dust and paper particles 4 Use a clean dry cloth to wipe dirt off the scanning glass Wipe both the top and bottom scanning glasses CAUTIO...

Страница 5: ...p 66 p 69 IMPORTANT After removing the feed roller and retard roller clean them and then return them to the scanner 7 Wipe the removed rollers with a firmly wrung cloth moistened with water 8 Attach t...

Страница 6: ...me to rotate the metal rollers in small increments CAUTION There are two metal rollers one for the Front Unit and one for the scanner Be sure to wipe both of them Do not spray water or neutral deterge...

Страница 7: ...ceeds 30 000 a roller replacement message will appear when the computer is started When you are using the DR 2050SP in the Presentation mode a message prompting you to change the rollers is displayed...

Страница 8: ...pen the Counter setup dialog box 1 Click the Start button click Settings on the Start menu click Control Panel For Windows XP click the Start button click Control Panel 2 For Windows XP switch the Con...

Страница 9: ...64 Appendices 3 Select CANON DR 2050C USB and then click Properties 4 Click the Counter tab...

Страница 10: ...r Follow the procedure below to remove and attach the feed roller for cleaning or replacement Note When attaching the feed roller during installation operate the roller fastening lever according to th...

Страница 11: ...ing the OPEN knob from both sides a pull the front unit forward to open it b 2 Open the roller cover on the scanner side Insert a finger into the depression in the cover and open it 3 Raise the roller...

Страница 12: ...shaft and then remove it Attaching the Feed Roller 1 Set the feed roller into the hollow inside the roller cover and align the notch in the roller with the scanner shaft 2 Slide the roller lock lever...

Страница 13: ...of the top of the Front Unit Return the unit fully to its original position until you hear it click into place Removing and Attaching the Retard Roller Follow the procedure below to remove and attach...

Страница 14: ...llers Doing so may damage them Removing the Retard Roller 1 Pressing the OPEN knob from both sides a pull the front unit forward to open it b 2 Holding the edges of the roller cover on the inside of t...

Страница 15: ...rom the shaft and then remove it Attaching the Retard Roller 1 Position the retard roller so the notch in the roller is facing the scanner s shaft 2 Slide the roller lock lever to the right and then i...

Страница 16: ...oller in place 4 Attach the roller cover Be sure that the upper unit is completely closed by pushing on both edges with both hands until you hear a click 5 Gently press the left and right sides of the...

Страница 17: ...the scanner does not turn on Is the power cord connected correctly Is the power cord connected securely Is the power cord inserted into the power outlet For details on connecting the power cord see S...

Страница 18: ...cations that are running Problem Resident applications such as anti virus software are draining memory resources Solution Quit all resident applications Problem Temporary files cannot be created in th...

Страница 19: ...start the computer When scanning continues make sure that the last document scanned was scanned correctly Documents Are Not Fed Correctly The following are possible causes when documents are not fed c...

Страница 20: ...tions Problem The application you are using to open the TIFF file does not support multi page TIFF files Solution Open the file with an application that supports multi page TIFF files Symptoms A TIFF...

Страница 21: ...g Side to Double sided Symptoms A black margin appears around the scanned document Problem A document smaller than the preset paper size has been scanned Or the loaded document has shifted out of posi...

Страница 22: ...the Scanner To adjust the scanner set the supplied Adjustment Sheet Shading Sheet in the scanner Orient the adjusting sheet in the direction indicated by the arrow when setting it in the scanner Afte...

Отзывы: