


Selecting <On> prints in toner saving mode. Select <On> when you want to check the layout or other
appearance characteristics before proceeding to final printing of a large job. See <Toner Save>(P. 496)
for the description of the setting.
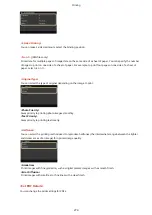
<Gradation>
Specify the processing method used to reproduce gradation. <High 2> gives finer gradation than <High
1>. See <Gradation>(P. 496) for the description of the setting.
<Density Fine Adjustment>
When fine lines or small text are faded, increase the density to give less faded print. See <Density Fine
Adjustment>(P. 496) for the description of the setting.
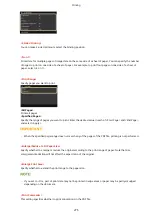
<Resolution>
Specify the resolution to process print data. See <Resolution>(P. 497) for the description of the setting.
<Special Smoothing Mode>
Specify the mode to print data with a smooth finish. If the quality of the printout is not acceptable in
<Mode 1> (default), try another mode. See <Special Smoothing Mode>(P. 497) for the description of
the setting.
<Toner Volume Correction>
When the toner volume for text or lines exceeds the limit value of the machine, make a correction so that
the toner volume does not exceed the limit value. See <Toner Volume Correction>(P. 498) for the
description of the setting.
<Line Control>
Specify the processing method used to reproduce lines. See <Line Control>(P. 498) for the description
of the setting.
<Width Adjustment>
Configure a setting to print text or fine lines in bold. See <Width Adjustment>(P. 499) for the
description of the setting.
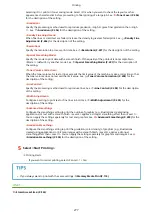
<Advanced Smoothing>
Configure the smoothing setting to print the outline of graphics (e.g., illustrations created using
applications) or text with a smooth finish. <Level 2> applies a stronger smoothing effect than <Level 1>.
You can apply the setting separately for text and graphics. See <Advanced Smoothing>(P. 499) for the
description of the setting.
<Gradation Smoothing>
Configure the smoothing setting to print the gradation (color density) of graphics (e.g., illustrations
created using applications) or bit map images with a smooth finish. <Level 2> applies a stronger
smoothing effect than <Level 1>. You can apply the setting separately for graphics and images. See
<Gradation Smoothing>(P. 500) for the description of the setting.
5
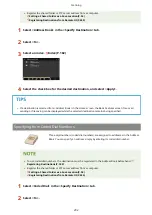
Select <Start Printing>.
➠
Printing starts.
●
If you want to cancel printing, select <Cancel> <Yes>.
●
If you always want to print with the same settings: Memory Media Print(P. 176)
LINKS
Printing
277
Содержание imageCLASS MF735Cdw
Страница 57: ...3 Follow the on screen instructions to install the drivers LINKS Printing from a Computer P 258 Setting Up 49 ...
Страница 84: ... Menu Preferences Network Device Settings Management On Setting Up 76 ...
Страница 121: ...MF735Cdw MF733Cdw MF731Cdw MF634Cdw MF632Cdw LINKS Loading Paper in the Paper Drawer P 141 Basic Operations 113 ...
Страница 164: ...Basic Operations 156 ...
Страница 175: ...LINKS Loading Paper in the Paper Drawer P 141 Loading Paper in the Multi Purpose Tray P 149 Basic Operations 167 ...
Страница 181: ...5 Select Apply LINKS Basic Operation P 128 Basic Operations 173 ...
Страница 223: ... Sending and Receiving Faxes via the Internet Using Internet Fax I Fax P 247 Faxing 215 ...
Страница 232: ...Useful Functions When Sending P 230 Checking Status and Log for Sent and Received Documents P 242 Faxing 224 ...
Страница 241: ...3 Select Start Sending The faxes are sent LINKS Basic Operations for Sending Faxes P 217 Faxing 233 ...
Страница 315: ...LINKS Basic Operations for Scanning Originals P 284 Sending I Faxes P 248 Adjusting Density P 305 Scanning 307 ...
Страница 323: ...Sending I Faxes P 248 Scanning 315 ...
Страница 326: ...LINKS Checking Status and Log for Scanned Originals P 301 Scanning 318 ...
Страница 329: ...LINKS Using ScanGear MF P 322 Scanning 321 ...
Страница 352: ...6 Click Fax Fax sending starts Linking with Mobile Devices 344 ...
Страница 358: ...Updating the Firmware 437 Initializing Settings 439 Managing the Machine 350 ...
Страница 414: ...Configuring Basic E Mail Settings P 86 Setting a Shared Folder as a Save Location P 94 Managing the Machine 406 ...
Страница 434: ...LINKS Remote UI Screen P 420 Managing the Machine 426 ...
Страница 436: ...5 Click Edit 6 Specify the required settings 7 Click OK Managing the Machine 428 ...
Страница 606: ... Is the transfer belt inside the machine dirty Cleaning the Transfer Belt ITB P 584 Maintenance 598 ...
Страница 609: ...5 Select Apply Maintenance 601 ...
Страница 623: ...Troubleshooting 615 ...
Страница 679: ...2 Gently pull out the original 3 Gently close the feeder 3 Place the original again Troubleshooting 671 ...
Страница 693: ...Third Party Software 1647 0ER For information related to third party software click the following icon s Appendix 685 ...
Страница 721: ... Import Export of the Setting Data See Setting Menu List P 442 Appendix 713 ...
Страница 727: ...Appendix 719 ...
Страница 767: ... 18 MD4 RSA Data Security Inc MD4 Message Digest Algorithm ...