0F40-054
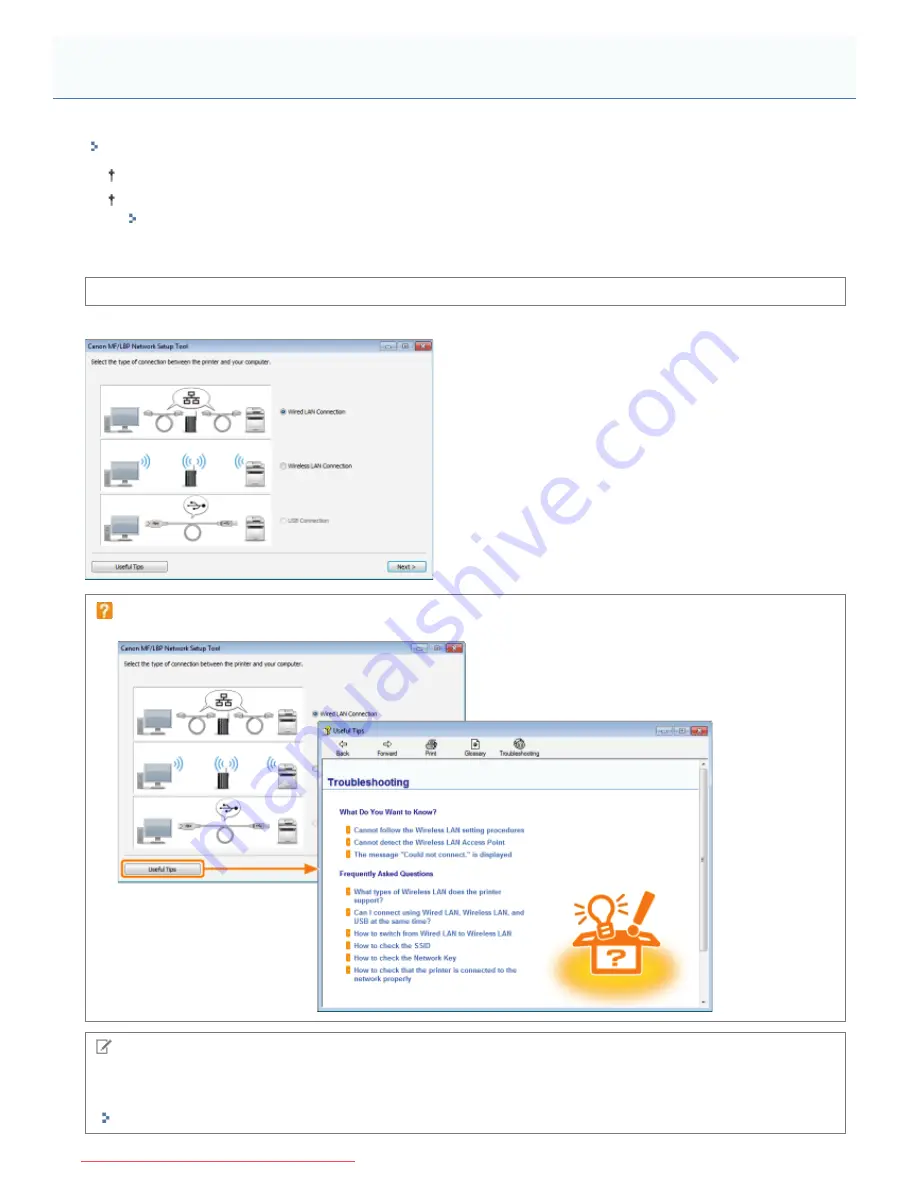
Use "MF/LBP Network Setup Tool" to specify the network connection settings.
"Directly Starting the MF/LBP Network Setup Tool"
For the system requirements of "MF/LBP Network Setup Tool," see "
MF/LBP Network Setup Tool
."
When you install the printer driver using "Easy Installation," "MF/LBP Network Setup Tool" starts automatically.
"Easy Installation"
Before specifying the settings, see "
Connecting the Printer and Computer
."
The setting procedure varies depending on your environment. Follow the instructions on the screen to specify the settings.
If you have a problem during the connection settings
Click [Useful Tips] at the bottom left of the screen and see the help contents.
NOTE
Setting the IP address using the ARP/PING command
You can also set the IP address using the ARP/PING command in Command Prompt.
"Basic Operations/Various Information for Windows"
Specifying the Connection Settings
㻞㻞㻢㻌㻛㻌㻡㻝㻠
Downloaded from ManualsPrinter.com Manuals
Содержание imageCLASS LBP7110Cw
Страница 1: ...㻝㻌㻛㻌㻡㻝㻠 Downloaded from ManualsPrinter com Manuals ...
Страница 81: ...㻤㻝㻌㻛㻌㻡㻝㻠 Downloaded from ManualsPrinter com Manuals ...
Страница 83: ...It takes approximately 60 seconds 㻤㻟㻌㻛㻌㻡㻝㻠 Downloaded from ManualsPrinter com Manuals ...
Страница 88: ...㻤㻤㻌㻛㻌㻡㻝㻠 Downloaded from ManualsPrinter com Manuals ...
Страница 119: ...㻝㻝㻥㻌㻛㻌㻡㻝㻠 Downloaded from ManualsPrinter com Manuals ...
Страница 121: ... 2 Click Next ĺ Proceed to the Printer Information Screen 㻝㻞㻝㻌㻛㻌㻡㻝㻠 Downloaded from ManualsPrinter com Manuals ...
Страница 124: ...㻝㻞㻠㻌㻛㻌㻡㻝㻠 Downloaded from ManualsPrinter com Manuals ...
Страница 153: ...㻝㻡㻟㻌㻛㻌㻡㻝㻠 Downloaded from ManualsPrinter com Manuals ...
Страница 183: ...3 Click OK Then the Page Setup sheet reappears 㻝㻤㻟㻌㻛㻌㻡㻝㻠 Downloaded from ManualsPrinter com Manuals ...
Страница 204: ... Low 㻞㻜㻠㻌㻛㻌㻡㻝㻠 Downloaded from ManualsPrinter com Manuals ...
Страница 249: ...㻞㻠㻥㻌㻛㻌㻡㻝㻠 Downloaded from ManualsPrinter com Manuals ...
Страница 255: ...㻞㻡㻡㻌㻛㻌㻡㻝㻠 Downloaded from ManualsPrinter com Manuals ...
Страница 282: ...6 Click Close 7 Click Apply 8 Click OK NOTE 㻞㻤㻞㻌㻛㻌㻡㻝㻠 Downloaded from ManualsPrinter com Manuals ...
Страница 286: ...㻞㻤㻢㻌㻛㻌㻡㻝㻠 Downloaded from ManualsPrinter com Manuals ...
Страница 303: ...9 Click Finish 㻟㻜㻟㻌㻛㻌㻡㻝㻠 Downloaded from ManualsPrinter com Manuals ...
Страница 317: ... 2 Click OK 㻟㻝㻣㻌㻛㻌㻡㻝㻠 Downloaded from ManualsPrinter com Manuals ...
Страница 323: ...㻟㻞㻟㻌㻛㻌㻡㻝㻠 Downloaded from ManualsPrinter com Manuals ...
Страница 353: ...㻟㻡㻟㻌㻛㻌㻡㻝㻠 Downloaded from ManualsPrinter com Manuals ...
Страница 355: ...4 Click Edit 5 Configure the SNMPv1 protocol 㻟㻡㻡㻌㻛㻌㻡㻝㻠 Downloaded from ManualsPrinter com Manuals ...
Страница 362: ...4 Click Generate Key 5 Specify a key to be created 㻟㻢㻞㻌㻛㻌㻡㻝㻠 Downloaded from ManualsPrinter com Manuals ...
Страница 366: ...4 Click Register Key and Certificate 5 Click Install 㻟㻢㻢㻌㻛㻌㻡㻝㻠 Downloaded from ManualsPrinter com Manuals ...
Страница 372: ...8 Click Register 㻟㻣㻞㻌㻛㻌㻡㻝㻠 Downloaded from ManualsPrinter com Manuals ...
Страница 378: ...㻟㻣㻤㻌㻛㻌㻡㻝㻠 Downloaded from ManualsPrinter com Manuals ...
Страница 389: ...㻟㻤㻥㻌㻛㻌㻡㻝㻠 Downloaded from ManualsPrinter com Manuals ...
Страница 393: ...6 Enter a login name 7 Select the Use TLS check box 㻟㻥㻟㻌㻛㻌㻡㻝㻠 Downloaded from ManualsPrinter com Manuals ...
Страница 397: ...4 Click Edit 5 Select the Use IEEE 802 1X check box 㻟㻥㻣㻌㻛㻌㻡㻝㻠 Downloaded from ManualsPrinter com Manuals ...
Страница 401: ...㻠㻜㻝㻌㻛㻌㻡㻝㻠 Downloaded from ManualsPrinter com Manuals ...
Страница 436: ...7 Disconnect the USB cable from the computer then restart Windows 㻠㻟㻢㻌㻛㻌㻡㻝㻠 Downloaded from ManualsPrinter com Manuals ...


