
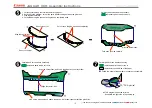
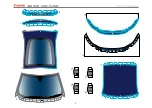


Line up the glue spots and attach the pieces. Hold them together until the glue dries.
Align the center lines, and curve the paper as you attach them.
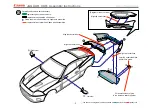
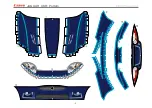
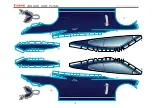
1. Carefully score along the fold lines before cutting out.
2. As shown in the diagram, cut out the parts without cutting between the glue tabs.
3. Glue together carefully.
4. Cut between the glue tabs once the glue has completely dried.
Fold each glue tab carefully.
The lines in the diagram are divided as follows: ( )Mountain fold ( )Valley fold.
Align the center lines.
Align the center lines.
Align the center lines.
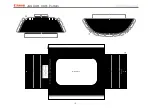
Do not cut out yet.
Do not cut out yet.
Cut out once the glue has dried completely.
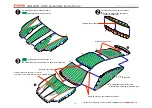
Carefully add curves where necessary.
represents parts to add curves to.
Carefully add curves where necessary.
represents parts to add curves to.
represents the underside of the paper.
Carefully add curves where necessary.
represents parts to add curves to.
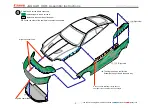
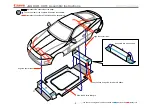
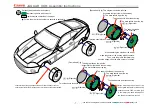
Follow the order of the numbers in squares to assemble.
This diagram shows the left side.
Assemble the right side in the same way.
Right side
- 4 -
JAGUAR XKR : Assembly Instructions
Содержание Creative Park JAGUAR XKR
Страница 9: ... 2 JAGUAR XKR Pattern ...
Страница 10: ... 3 JAGUAR XKR Pattern ...
Страница 11: ...JAGUAR XKR Pattern 4 ...
Страница 12: ...JAGUAR XKR Pattern 5 Cut out this part ...
Страница 13: ...Cut out this part JAGUAR XKR Pattern 6 ...
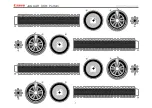
Страница 14: ...Right Front Left Front Right Rear Left Rear 7 JAGUAR XKR Pattern Out side Out side Out side Out side ...


