3 System Connections
Mounting the Camera Unit
25
Mounting the Camera Unit
Replacing the Camera Rotator’s Mounting According to the Installation Position
The camera rotator is shipped with the mounting for the camera bracket in a position appropriate for using the camera
in upright mode. However, when the robotic camera system is installed in underslung position, the camera mounting
bracket must be attached to the top part of the camera rotator so the mounting on the camera rotator needs to be
replaced.
1.
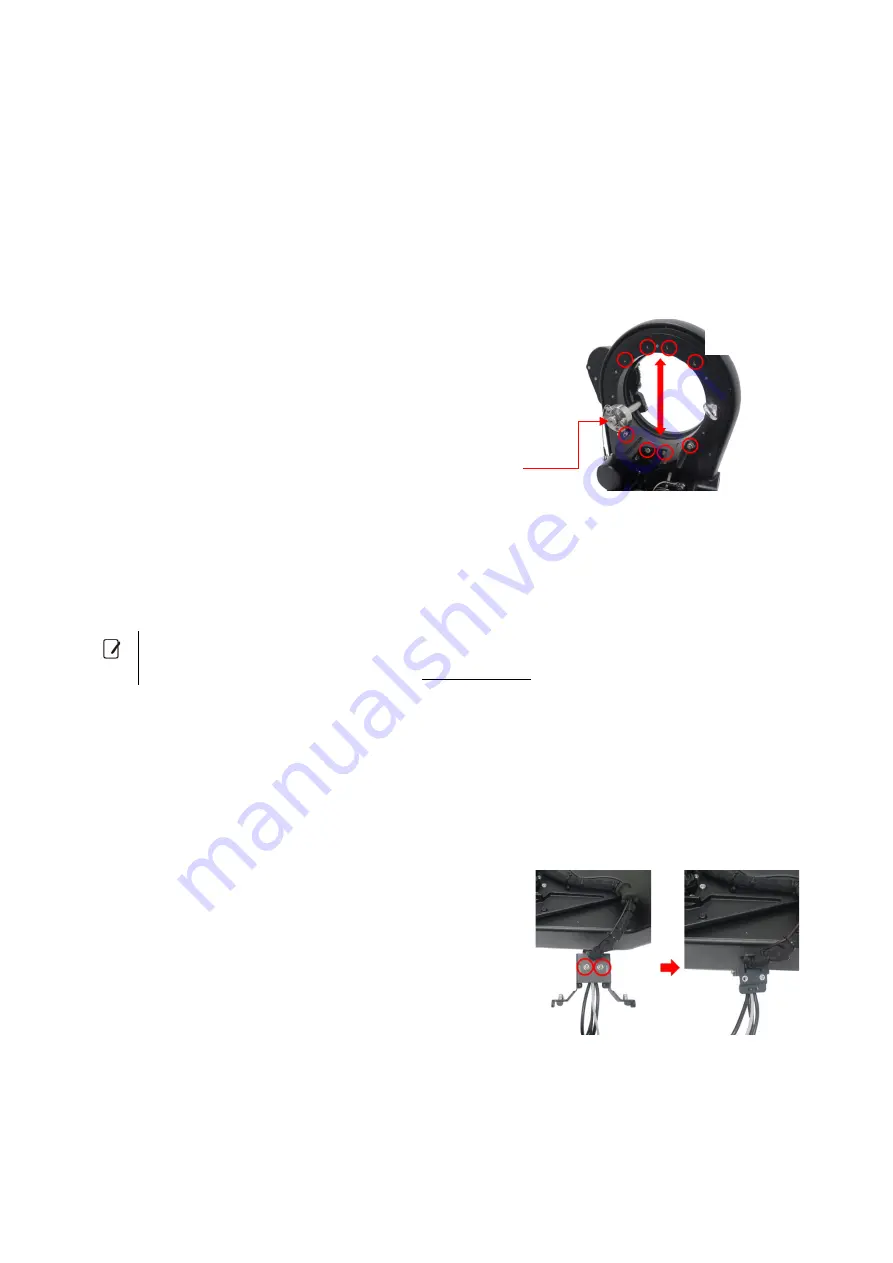
Turn the camera rotator counter-clockwise so the
mounting for the camera mounting bracket is at the
bottom and check the position of the hole for the
zoom unit shaft.
At the bottom: For upright position
At the top: For underslung position
2.
If the position does not match the mode in which you plan to use the system (upright/underslung),
replace the mounting for the camera mounting bracket.
Remove the fixation hex head bolts (M5, x4) and attach the mounting for the camera mounting bracket to the
opposite side.
When using the robotic camera system in underslung position, for all the rest of the setup and installation
procedures, turn the camera rotator in the opposite direction to the one described in the procedure.
Passing the Camera Head’s Cables through the Optional Rain Cover’s Rear Cover
When using the optional URC-S1 Camera Remote Rain Cover, make sure to pass the camera head’s cables through the
rain cover’s rear cover.
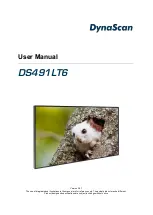
1.
Loosen the hex head bolts (M5, x2) and remove the part on
the cable clamp that is used to attach to the camera
mounting bracket.
Zoom unit
shaft hole
For underslung
position
For upright
position


