


Chapter 3
3-31
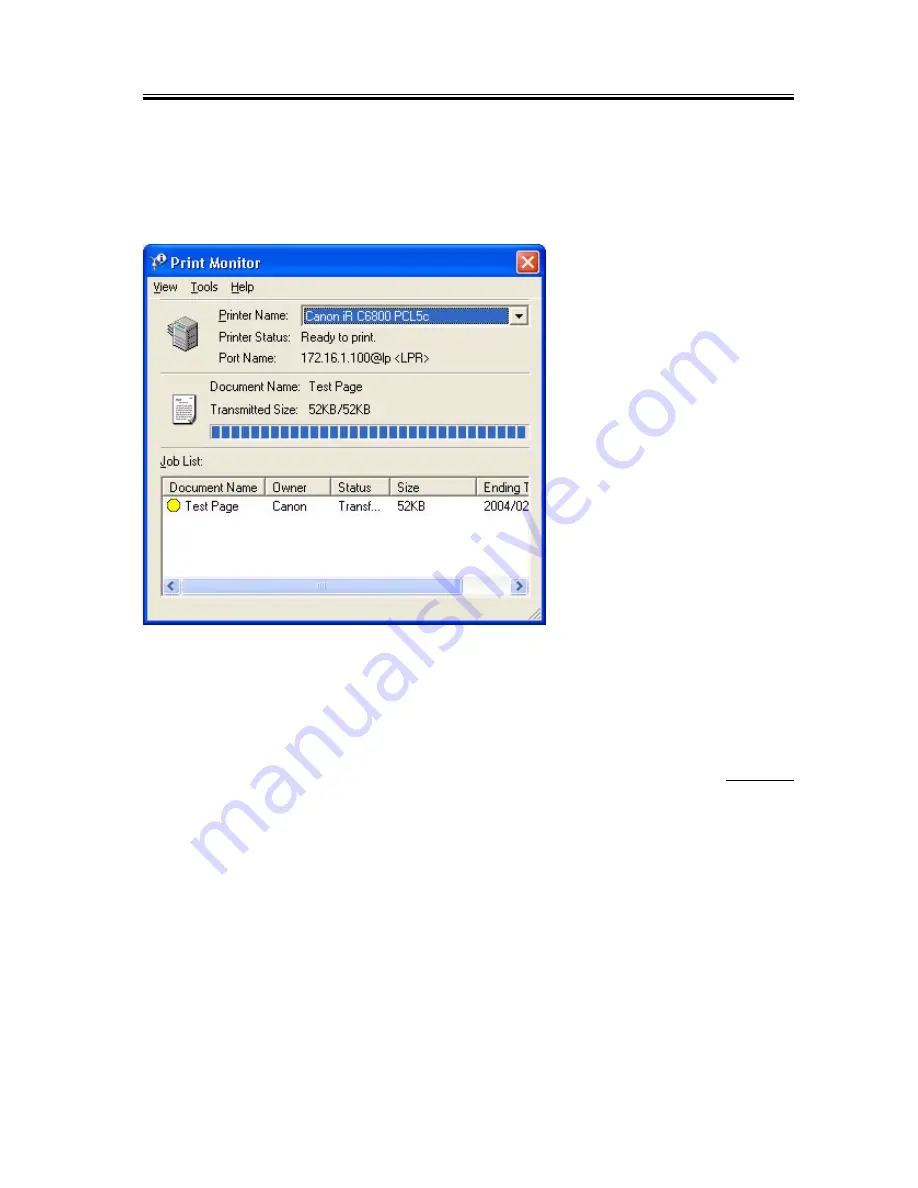
Monitor Screen
- The monitor to screen (Print Monitor) is displayed to suit the print instructions sent to the printer, showing the
job status from the client and the status of the printer connected by way of the port monitor. The program used for
the Print Monitor screen is part of the port monitor.
Print Mnitor Screen
F-3-52
3.2.9
Installing Canon LPR2
0005-3101
If you are using standard TCP/IP port, you need not install Canon LPR2
If the limits imposed by the user environment preclude the use of the standard TCP/IP port and, as a result. you need
to select Canon LPR2, install it as follows:
1) Set the User Software CD-ROM in the CD-ROM drive. When the PCL CD-ROM Setup screen has appeared, click
the close box to close the screen.
Note:
If the PCL CD-ROM Setup screen does not appear when you have set the User Software CD-ROM, go to step 2).
2) Click [start] and then [My Computer].
Содержание Color Network Multi-PDL Printer Kit-C1
Страница 1: ...Mar 18 2004 Service Manual Canon Color Color Network Multi PDL Printer Kit C1 ...
Страница 2: ......
Страница 6: ......
Страница 9: ...Contents Chapter 4 Maintenance 4 1 Notes when service 4 1 4 1 1Points to Note 4 1 ...
Страница 10: ......
Страница 11: ...Chapter 1 Specifications ...
Страница 12: ......
Страница 14: ......
Страница 21: ...Chapter 2 Functions ...
Страница 22: ......
Страница 24: ......
Страница 32: ......
Страница 33: ...Chapter 3 Installation ...
Страница 34: ......
Страница 42: ...Chapter 3 3 6 F 3 4 2 Select and click Network and Internet Connections F 3 5 ...
Страница 44: ...Chapter 3 3 8 F 3 8 6 Check the name of the network interface card and TCP IP F 3 9 ...
Страница 49: ...Chapter 3 3 13 F 3 17 9 Check to see that Canon iR C6800 PCL5c has been added then click OK F 3 18 ...
Страница 61: ...Chapter 3 3 25 F 3 39 7 Check that LPDSVC DL_ is displayed in File name field and click Open F 3 40 8 Click OK ...
Страница 63: ...Chapter 3 3 27 F 3 43 2 Select the Ports tab then click Add port F 3 44 3 Select LPR Port and click New Port ...
Страница 68: ...Chapter 3 3 32 F 3 53 3 Double click the CD ROM drive Double click the SETUP EXE icon in the LPR port folder ...
Страница 69: ...Chapter 3 3 33 F 3 54 4 Click Next F 3 55 5 Select I accept the terms in the license agreement then click Next ...
Страница 71: ...Chapter 3 3 35 7 See that the installation starts F 3 58 8 Click Finish F 3 59 ...
Страница 78: ...Chapter 3 3 42 F 3 71 2 Select and click Printers and Other Hardware F 3 72 ...
Страница 84: ...Chapter 3 3 48 F 3 80 ...
Страница 89: ...Chapter 3 3 53 F 3 84 2 Select and click Network and Internet Connections F 3 85 ...
Страница 91: ...Chapter 3 3 55 F 3 88 6 Check the name of the network interface card and TCP IP F 3 89 ...
Страница 106: ...Chapter 3 3 70 F 3 116 4 Click Browse F 3 117 5 Select CD ROM drive from Look in dropdown list ...
Страница 115: ...Chapter 3 3 79 F 3 133 3 Double click the CD ROM drive Double click the SETUP EXE icon in the LPR port folder F 3 134 ...
Страница 130: ...Chapter 3 3 94 F 3 160 ...
Страница 135: ...Chapter 3 3 99 F 3 164 2 Select and click Network and Internet Connections F 3 165 ...
Страница 137: ...Chapter 3 3 101 F 3 168 6 Check the name of the network interface card and TCP IP F 3 169 ...
Страница 143: ...Chapter 3 3 107 F 3 179 11 Select Add Port and click Settings F 3 180 12 Select Standard TCP IP Port and click OK ...
Страница 152: ...Chapter 3 3 116 F 3 196 4 Click Browse F 3 197 5 Select CD ROM drive from Look in dropdown list ...
Страница 161: ...Chapter 3 3 125 F 3 213 3 Double click the CD ROM drive Double click the SETUP EXE icon in the LPR port folder F 3 214 ...
Страница 169: ...Chapter 3 3 133 F 3 229 7 Click OK F 3 230 ...
Страница 171: ...Chapter 3 3 135 F 3 231 2 Select and click Printers and Other Hardware F 3 232 3 Select and click Printers and Faxes ...
Страница 177: ...Chapter 3 3 141 F 3 240 ...
Страница 182: ...Chapter 3 3 146 F 3 244 2 Double click the Network icon ...
Страница 185: ...Chapter 3 3 149 F 3 247 2 Double click the System icon ...
Страница 186: ...Chapter 3 3 150 F 3 248 3 Make the following selections Device Manager CDROM CD ROM DRIVE ...
Страница 200: ...Chapter 3 3 164 F 3 272 11 Select Add Port and click Settings F 3 273 12 Select Canon LPR 2 0 and click OK ...
Страница 213: ...Chapter 3 3 177 F 3 291 2 Double click the System icon ...
Страница 214: ...Chapter 3 3 178 F 3 292 3 Make the following selections Device Manager CDROM CD ROM DRIVE ...
Страница 238: ...Chapter 3 3 202 F 3 332 2 Double click the Network icon ...
Страница 241: ...Chapter 3 3 205 F 3 335 2 Double click the System icon ...
Страница 242: ...Chapter 3 3 206 F 3 336 3 Make the following selections Device Manager CDROM CD ROM DRIVE ...
Страница 262: ......
Страница 263: ...Chapter 4 Maintenance ...
Страница 264: ......
Страница 265: ...Contents Contents 4 1 Notes when service 4 1 4 1 1 Points to Note 4 1 ...
Страница 266: ......
Страница 268: ......
Страница 269: ...Mar 18 2004 ...
Страница 270: ......


