background image

56

S   T   E   P       3

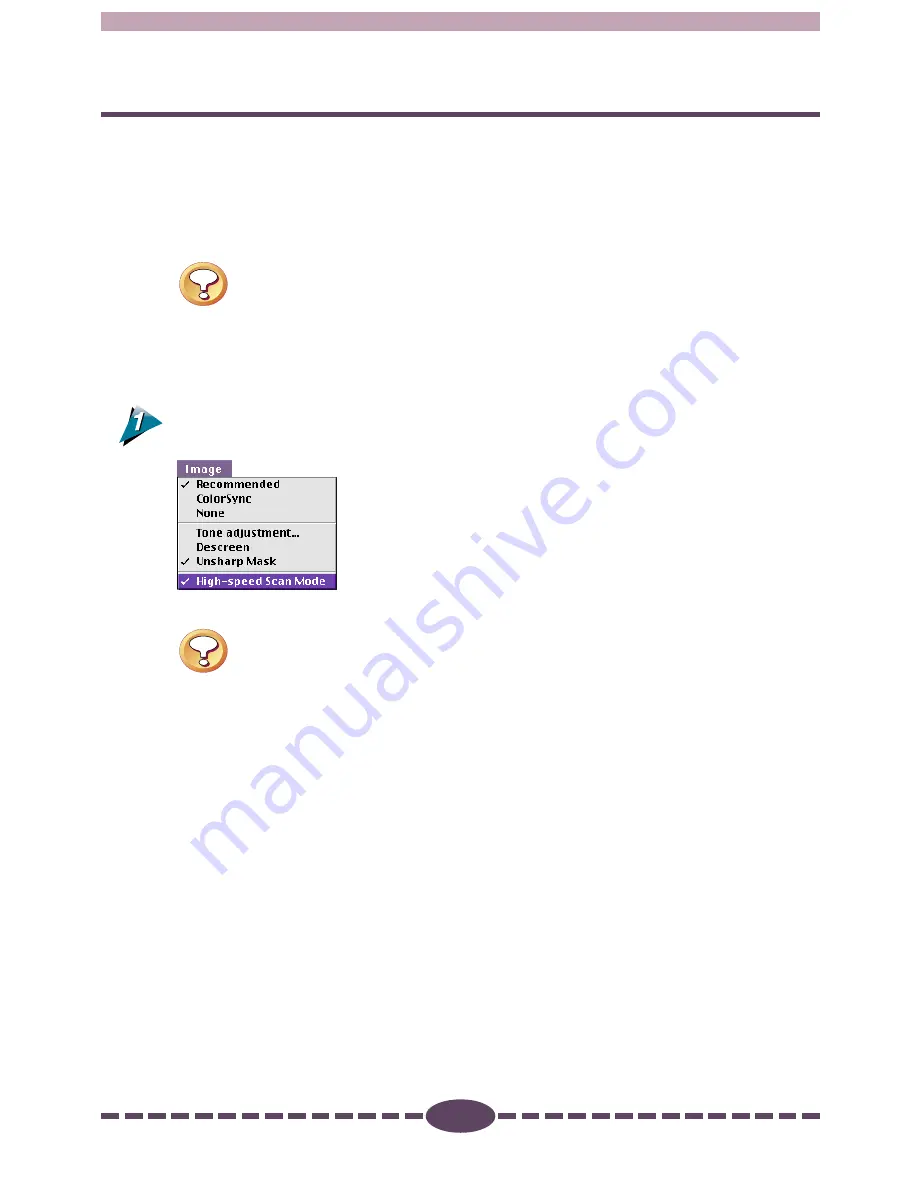
High-speed Scan Mode

This function is available when the image source is set to [Platen]. When a check
mark is placed beside this option, scanning can be accomplished faster because the
lamp output data (auto color adjustment data) from the first pass is used for
subsequent passes. The default setting is Off for this function.

Caution

• When you select [Film] from the [Preferences] menu, the High-speed Scan

Mode is not available.

Operating Procedures

Select [High-speed Scan Mode] from the [Image] menu.

Caution

• It may take some time to acquire the lamp output data on the first scan

after the high speed scanning mode is selected. Similarly, the first scan
after Plug-in Module CS-U is started make take some time even when the
high speed scanning mode is selected.

Содержание 4.1

Страница 1: ...f o r M a c i n t o s h CanonPlug inModuleCS U4 1 forCanoScanD1230U D2400UColorImageScanner User sGuide ...

Страница 2: ...tronic Manual Describes handling and care of the scanner and introduces the accompanying software programs CanoScan D1230U D2400U Product Guide Electronic Manual Tells you how to use Adobe Photoshop LE and ScanSoft OmniPage SE Electronic Manuals Manual for Each Application Software When using the accompanying application software After you have read this book and mastered the use of Canon Plug in ...

Страница 3: ...Preparations Required Reading p 13 All users should read this section This section describes the procedures and settings required before scanning including positioning the original and selecting the output device resolution magnification and scanning mode Scanning Required Reading p 29 All users should read this section to learn the procedures for scanning images and saving scanned images Adjustin...

Страница 4: ...g in Module CS U Control Panel 14 Positioning Originals 16 Previewing 17 Selecting the Output Device 18 Setting the Resolution and Magnification 19 Setting the Scan Mode 21 Verifying the Image before Scanning 23 Rotating the Image 24 Setting Preferences 25 Output Device 25 Aspect Ratio 25 Unit 26 Preview Window 26 Reset Default Settings 27 STEP 2 29 Scanning 29 Setting the Scan Area 30 Zooming 31 ...

Страница 5: ...d or lost data due to the operation or malfunction of hardware and software While every effort has been made to ensure that the information contained in this guide is accurate and complete no liability can be accepted for any errors or omissions Canon Inc reserves the right to change the specifications of the hardware and software described within this guide at any time without prior notice Please...

Страница 6: ...c PowerBook or iBook with built in USB ports performance on Macintosh compatibles is not guaranteed Main Memory 32 MB or more 64 MB or more recommended Application Software CanoScan Toolbox Adobe Photoshop LE Other plug in compatible application programs Display 32 000 colors or more System Software Mac OS 8 5 9 Caution The ColorSyncTM Profiles file is installed along with Plug in Module CS U Colo...

Страница 7: ...ent Button pp 40 52 Close Box p 14 Scan Mode p 21 Zoom In Button p 31 Zoom Out Button p 32 Output Device p 18 Resolution pp 19 20 Magnification pp 19 20 Image Size pp 19 20 Required Free memory p 21 Browser Button p 23 Scan Button p 33 Preview Button p 17 Preview Window p 14 26 RGB values p 14 Auto Tone Adjustment Button p 40 Rotation Button p 24 Zoom Reset Button p 32 Available whin Film is selec...

Страница 8: ...se no problem there is no need to adjust these settings Scan p 29 Adjust and Edit Scanned Images p 39 Verify the Image before Scanning Browser Window p 23 Are the Brightness and Color Satisfactory p 30 p 31 p 33 p 34 p 35 Histogram Tone Curve Brightness and Contrast Color Balance Gamma Value Threshold Value Auto Tone ColorSyncTM Unsharp Mask Descreen High Speed Scan Mode p 41 p 44 p 47 p 49 p 50 p...

Страница 9: ...check the image to be scanned in detail before commencing the scan This function presents a much higher quality image than the preview function Histogram Function Realizes Beautiful Contrast Simple operation allows you to achieve beautiful contrast with half tone gradations Gamma Curve Adjusts Image Brightness The Gamma Curve feature provides four methods you can use to refine in detail the level ...

Страница 10: ...noScan Setup Utility will start automatically If it doesn t double click the CD ROM icon followed by the setup icon 2 Click Install the Software to install Plug in Module CS U and the other application programs Start Plug in Module CS U p 14 1 Start Adobe Photoshop LE or other plug in compatible application 2 Open the File menu select Acquire and CanonPI CS U 4 1 0 Position materials for scanning ...

Страница 11: ...tion before Scanning p 23 1 Click on the Browser button The selection frame will appear 2 Move the selection frame to specify the area of the image you want verified and click the mouse button Plug in Module CS U will read the image and display the browser image 3 After you have examined the browser image click the mouse anywhere Specify the Area of the Image to be Scanned p 30 Select the area to ...

Страница 12: ...Photoshop LE or other plug in compatible application window as an Untitled file Save the Scanned Image p 34 Save the image with Adobe Photoshop LE or other plug in compatible application specifying a folder and file name When the amount of light of the lamp inside the scanner is insufficient the message Now adjusting lamp may be displayed Wait as is until the amount of light increases enough 8 7 8...

Страница 13: ...plained on the indicated pages Displaying the Plug in Module CS U Control Panel p 14 Positioning Originals p 16 Previewing p 17 Selecting the Output Device p 18 Setting the Resolution and Magnification p 19 Setting the Scan Mode p 21 Verifying the Image Before Scanning p 23 Rotating the Image p 24 Setting Preferences p 25 ...

Страница 14: ...ay more options in a pull down menu Adjusts the settings for the scanning job such as the scan mode output device resolution and magnification The image size and disk size that were specified in the preview window are automatically displayed here Preview Window Displays the image in preview mode Buttons Click the appropriate button to zoom rotate or browse the image or correct colors adjust the hi...

Страница 15: ...hin Adobe Photoshop LE Open the File menu select Import and CanonPI CS U 4 1 0 The Plug in Module CS U control panel will display Caution Plug in Module CS U is not a stand alone application program It must be started from a plug in compatible application program such as CanoScan Toolbox or Adobe Photoshop LE The size of the Plug in Module CS U control panel will vary according to the resolution o...

Страница 16: ... so the original does not shift out of position Caution Be careful not to dirty the document glass when placing items on it If an original has distinct horizontal or vertical lines you should try to position it on the document glass as squarely as possible to have the lines appear straight The maximum scanable size is the area of the entire document glass Straighten out curls or folds in originals...

Страница 17: ...w button The image will be scanned and appear in the preview window Hint To change the size of the preview window use the Window Size settings in the Preview Window Settings dialog p 26 The Dynamic Preview function enables changes to settings such as the scan mode and brightness to be immediately reflected in the preview image Caution The preview image provides only an approximation of the scan an...

Страница 18: ...vice that corresponds best to your output device and use of the image Operating Procedures Click the arrow on the Output Device section of the control panel and select a device from the pop up menu Caution You can set the device categories in the pop up menu in advance You can also add new devices to the pop up menu See Setting Preferences p 25 ...

Страница 19: ... vertical 0 5x magnification The scanning resolution changes accordingly Magnification changed to 50 Magnification Scanning Resolution Magnification 50 Scanned at 360 dpi Image size 5 x5 12 7 x 12 7cm Image size 2 5 x2 5 6 35 x 6 35cm Output device corrects to 720 dpi Hint Magnification and Resolution Why does the image size change with the magnification Let us answer this with an example using a ...

Страница 20: ...s You are advised against setting the resolution higher than necessary For example if you scan an A4 21 0 x 29 7 cm 8 3 x 11 7 in size image in the color mode the amount of data varies according to the resolution Slider Drag the slider bar in either direction or use the arrow keys to change the resolution Click here to return the magnification factor to 100 Click inside these boxes to enter values...

Страница 21: ...y be used with Photoshop LE and certain other applications 24 bit Color Expresses a dot with 8 bits or 256 shades for each primary color red green and blue RGB for a total of 24 bits A dot can be expressed in up to 16 7 million distinct shades Use this option for most color photographs Color 42 48 bit Scans the image with finer color gradations Select it when a particularly high quality image is r...

Страница 22: ...ine whether or not 14 16 bit Grayscale and 42 48 bit Color scanning is supported Adobe Photoshop Ver 3 0 or later and Adobe Photoshop LE supplied with this package support these modes If you scan an image with a version of Adobe Photoshop compatible with 42 bit Color a 14 16 bit Grayscale or 42 48 bit Color image is scanned as a 16 bit Channel Mode image 14 16 bit Grayscale and 42 48 bit Color ima...

Страница 23: ... shape of the selection frame cannot be changed because it is automatically determined by the scanning resolution Move the pointer in the selection frame inside the preview window The mouse cursor will change to a sign shape Move the Selection Frame to the desired position with the mouse cursor Moving the mouse will move the Selection Frame Click the mouse button when the selection frame is in the...

Страница 24: ...s of 90 or 180 degrees To rotate the image click the appropriate button Caution If you rotate the image in the preview area the scanned image will also rotate Operating Procedures Use these buttons to rotate the image To rotate the image clockwise 90 degrees To rotate the image clockwise 180 degrees To rotate the image counterclockwise 90 degrees ...

Страница 25: ...be changed for the devices or the devices can be removed Hint The preset devices cannot be edited or deleted Aspect Ratio To set the size of the area to be scanned drag the mouse to size the selection frame in the preview window The area inside the borders of the selection frame will be scanned Adds a new device Allows you to remove a device from the list Allows you to change the name and resoluti...

Страница 26: ...switch on Automatically perform a preview Save preview image and None Only one button can be selected The maximum values are determined by the type of monitor you are using Allows you to enter values and change settings for the preview window options Preview Window Settings Dialog Caution Changing the preview window size will cause the image previously displayed in the preview window to disappear ...

Страница 27: ...commended Unsharp Mask On Descreen Off Shut of Lamp Time 12minutes Film Type Color Negative Close Plug in After Scan This setting determines whether or not Plug in Module CS U closes automatically after completion of the scanning job After you install Plug in Module CS U this setting is set to off To turn this feature on open the Preferences menu and select Close plug in after scan Platen Film Whe...

Страница 28: ...tput Device Aspect Ratio Unit or Preview Window options displays the respective dialog Choose the desired value in the dialog and select OK to change the setting A confirmation dialog will display if Reset Default Settings is selected The settings will be reset if OK is selected in that dialog You can select either Platen or Film The selected one is checked ...

Страница 29: ...dures for conducting the final scan saving the scanned image in a file and editing image files Follow the procedures below to perform the final scan Setting the Scan Area p 30 Zooming p 31 Scanning p 33 Saving Scanned Images p 34 Scanning Film p 35 ...

Страница 30: ...e mouse button outside the selection frame causes the selected area to be deselected Moving the mouse cursor within the selection frame changes it to an omni directional arrow Dragging the cursor in this state will cause the selection frame to move without changing its shape Placing the mouse cursor over the dotted line of the selection frame causes the cursor to change into one of four shapes Dra...

Страница 31: ...r enlargement with the zoom features You can use the zoom function to select an area with high precision or to select small areas for scanning Procedures to Zoom In Select the area you want to enlarge with the zoom function See Setting the Scan Area p 30 Selection Frame ...

Страница 32: ...nd click the Zoom In button again Click the Zoom Out button to restore the view prior to zooming Click the Zoom Reset Button to restore the size just after previewing Hint The image cannot be zoomed unless an area is selected The selection can be zoomed up to six times consecutively If the selected area is too small the Zoom In button will be disabled and the selection cannot be zoomed ...

Страница 33: ...p LE To Initiate the Scan Specify the Scan Area See Setting the Scan Area p 30 Click on the Scan button The scan will start Click close box to guit the Plug in Module CS U When you select close Plug in After Scan the Plug in Module CS U quits antomatically Hint The scan button cannot be clicked if the scan area is set too small less than 64x64 pixels or not specified The scan cannot be performed i...

Страница 34: ...es After an image is scanned the image is displayed as Untitled When you save the image you can give the file a name and select the folder where it is to be stored Open the File menu and select Save As The Save dialog will open Select the folder you want to use for the file Enter a name for the file and click the Save button Enter a file name here To select a folder click the arrow and select the ...

Страница 35: ... placement instructions Operating Procedures Insert the film into the film guide and place the assembly on the scanner s document glass platen Close the film adapter unit Open the Preferences menu and select Film The shape of the preview area will change to a square and you will be able to select the Film Settings option from the Film menu Open the Film menu and select Film Settings Scanning Film ...

Страница 36: ...his function is available when Film is selected and Auto Exposure is set to On If a check mark is placed beside this option you can scan a new film using the exposure data from a prior film If for example a film is shot under the same lighting conditions and settings as another several frames can be scanned with the same exposure data making it possible to achieve finely matched color tones Cautio...

Страница 37: ... film and select the area you want to scan Set the scan mode resolution magnification and tone adjustment settings as required With CanoScan D2400U Remove Dust and Scratches function is available p 38 Click on the Scan button ...

Страница 38: ...sing Caution This function cannot be used with black and white film It may also fail to have any effect on KODACHROME film Areas under dirt and scratches may not be removed if the selected scan area is too small There are occasions when areas under dirt or scratches on the top or bottom edges cannot be removed If the edge of the film guide is included in the scan area the areas under dirt or scrat...

Страница 39: ...e after the image is previewed 8 bit 14 16bit Grayscale and 24 bit 42 48bit Color Tone Adjustment p 40 Histogram Settings p 41 Tone Curve Settings p 44 Brightness and Contrast Settings p 47 Adjusting Color Balance p 49 Gamma Value Settings p 50 Black White Adjusting Threshold Value p 52 24 bit Color Auto Tone Correction ColorSync p 53 Unsharp Mask p 54 Descreen p 55 High speed Scan Mode p 56 Savin...

Страница 40: ...ve brightness contrast color balance and gamma If black and white has been selected as the scan mode the threshold feature also becomes available on the histogram tab The settings selected in the Tone Adjustment dialog are also reflected in the next preview image To scan a new item ensure that you click the All Reset button to restore all of the settings to their default values Auto Tone Adjustmen...

Страница 41: ...o achieve beautiful tones with the best possible contrast Hint You can enhance images with the histogram options only when the image has been previewed in the color or grayscale scan modes You cannot enhance the image with the histogram when ColorSyncTM is selected How to Interpret Histograms You can select the entire image or specify an area for which a histogram will be generated The height of t...

Страница 42: ...e area of the image the entire area to be scanned for which a histogram will be generated See Setting the Scan Area p 30 The histogram will not display correctly if an extremely small area is selected To select small areas first expand the display with the Zoom In button See Zooming p 31 Click the histogram tab in the Tone Adjustment dialog to display the histogram options Click the Auto button Al...

Страница 43: ...et to black 0 To restore the histogram settings click this Reset button To restore all settings to their defaults click the All Reset button White Eyedropper Button Click the White Eyedropper and click the position in the preview image you want to set to white 255 Displays the current level at the highlight mark Click the up or down arrows in the spinbox to increase or decrease the setting or ente...

Страница 44: ...g examples show you how to manipulate the graph to change the settings When you test these settings yourself you can see the changes immediately reflected in the preview window or the browser to achieve many interesting effects OUTPUT INPUT OUTPUT INPUT OUTPUT INPUT Unadjusted Curve If you want to brighten the light areas If you want to invert the shadows and highlights Drag the mid tones of the i...

Страница 45: ...he pointer control point in the graph expressed as a value from 0 to 255 where 0 is the darkest and 255 the lightest If the output level is larger than the input level this results in a lighter image To create a control point on the line just click anywhere in the graph After a control point is displayed in the line you can click to move it in any direction As you move it to another location the v...

Страница 46: ...adjustment Gamma Value 1 The data bends upward over the range of input values from shadows to highlights making the adjusted image brighter in the display Gamma Value 1 The data bends downward over the range of input values from shadows to highlights making the adjusted image darker in the display CAUTION The tone curve cannot be adjusted manually in one of the color scan modes when ColorSync is s...

Страница 47: ...ark areas of the image A low contrast setting creates a small difference between light and dark shades and the distinction between light and dark areas of the image are not as obvious If the image appears slightly out of focus increase the contrast setting to sharpen the image If the contrast setting is too high shadows will blacken and the highlights will wash out Brightness Brightness is the ove...

Страница 48: ...ed in the image currently displayed in the preview window Drag the slidebar left or right to adjust the brightness setting You can also click the up or down arrow in the spinbox to raise or lower its value or enter a number directly into the entry box 127 127 Drag the slidebar left or right to adjust the Contrast setting The Tone Adjustment settings can be saved in a file and reloaded for later us...

Страница 49: ...ettings You may have to adjust the settings and execute some test prints to attain the best match between what you see in the image on the display and in the printout Operating Procedure Click the color balance tab in the Tone Adjustment dialog Adjust the color balance for each or all of the primary colors red green and blue RGB Click the OK button Adjust the color by dragging the slidebar left or...

Страница 50: ... a scanning job Plug in Module CS U receives the image read from the scanner as input and sends it to the parent application as output The gamma value in this interval where Plug in Module CS U converts input to output is the Plug in Module CS U gamma value On the other hand the data received from Plug in Module CS U as input is sent to the screen display as output The gamma value in this interval...

Страница 51: ...etting Drag left or right to change the setting Click the up or down arrow in the spinbox to increase or decrease the value or enter a number directly into the entry box 0 1 10 0 The Tone Adjustment settings can be saved in a file and reloaded for later use To restore the gamma default settings click this button To restore all the default settings click this button After you click the Custom butto...

Страница 52: ... images To Set the Threshold Value When the scan mode is set to black and white click the Tone Adjustment button or pull down the Image menu and select Tone Adjustment Threshold Value 128 Standard Threshold Value 70 Threshold Value 180 Click the OK button The preview image will change to reflect the new settings Drag the slidebar left or right to adjust the threshold setting After adjusting the th...

Страница 53: ... scanning This mode is most appropriate for advanced users Caution This function is available only when the scan mode is set to one of the color modes not to the grayscale or black and white modes The Tone Adjustment menu item Tone Adjustment button and Auto Tone Adjustment button are disabled when the ColorSync option is selected The previous settings are in effect when Plug in Module CS U is sta...

Страница 54: ... On Caution This setting is not available for the black and white scanning mode If Plug in Module CS U is started within an application that hides the Plug in Module CS U control panel the previous setting will be maintained Operating Procedures Open the Image menu and select Unsharp Mask A check mark will appear beside the Unsharp Mask option in the menu when this function is set to On To set it ...

Страница 55: ...eferences menu the Descreen function is not available The Descreen function cannot be switched on for scanning resolutions higher than 601 dpi The previous setting is enabled for the Descreen function when Plug in Module CS U is opened by a software application operating in the windowless mode Operating Procedures Open the Image menu and select Descreen A check mark will appear beside the Descreen...

Страница 56: ...nt passes The default setting is Off for this function Caution When you select Film from the Preferences menu the High speed Scan Mode is not available Operating Procedures Select High speed Scan Mode from the Image menu Caution It may take some time to acquire the lamp output data on the first scan after the high speed scanning mode is selected Similarly the first scan after Plug in Module CS U i...

Страница 57: ...a file Hint In addition to settings the settings file may also be used to store preview images It is useful to save the preview image with the settings to quickly grasp to which image the settings apply To Save Settings in a Settings File Open the Setting File menu and select Save Specify the folder where you want to store the file and enter a name for it Click the Save button Insert a check mark ...

Страница 58: ...ting File menu and select Load Select the folder where the file is stored and click the name of the file you want to load Click the Open button The file you selected opens and the settings stored in the file are enabled for the Tone Adjustment settings ...

Страница 59: ... printer while a color image should be scanned at 180 dpi to be output to a color bubble jet printer 360 dpi To output a color or grayscale image to a bubble jet printer use a resolution equal to half the resolution of the printer Set the resolution to 180 dpi for example for output on a 360 dpi printer Scan in Black and White mode if you are scanning line art or other items that are Black and Whi...

Страница 60: ...60 Appendices Troubleshooting p 61 Error Messages p 65 Glossary p 66 Index p 71 Canon Customer Support Help Desk p 73 ...

Страница 61: ...c OS 9 Solution Scanner software has not been installed Click the Cancel button to close the dialog Detach the scanner and install the required software from the CanoScan Setup Utility CD ROM before reattaching the scanner Quick Start Guide Problem Plug in Module CS U does not appear as an option on the menus of a plug in compatible application program Solution Plug in Module CS U is not correctly...

Страница 62: ...ice to the lowest possible values p 19 Solution 3 Rescan after closing all the application programs other than the one used to start Plug in Module CS U Solution 4 Rescan after you have restarted the application program used to start Plug in Module CS U Solution 5 Quit the application program used to start Plug in Module CS U and increase the memory allocated to it Click the application program ic...

Страница 63: ...e Preview area are strange Solution 1 The original is faded Try retouching the colors with an image editing program image editing program manual Solution 2 Color balance and brightness are incorrectly set Reset them Solution 3 The fluorescent lamp inside the scanner is not sufficiently warmed Please wait for a minute or two then perform a preview scan again Solution 4 Calibration slot on the film ...

Страница 64: ...olution Photos are adhering to the document glass are causing the light to refract creating the striped patterns Shift the photo to a different position on the document glass or clean the document glass before rescanning Problem Coloring of the preview image and the printed image is different Solution 1 Insufficient printer toner ink Replenish or replace the toner printer manual Solution 2 Color b...

Страница 65: ...wering the scanning resolution or reducing the scanning area Restart the computer If the same error code displays after restarting the computer contact the nearest Canon Customer Support Help Desk Error Message Scanner is not connected Connect the scanner Scanning unit is locked Release the lock switch and connect the PC to the scanner again 1 Cannot complete scan command Insufficient memory RAM 2...

Страница 66: ... adjusted See Threshold Value Black Eyedropper Tool Tool used to the select the darkest portion of an image in the preview area Used with the Histogram function to adjust image brightness When this tool is clicked on the image all areas that are darker are set to pure black Brightness The intensity of light in a scanned image Raising an image s brightness increases its overall brilliance while dec...

Страница 67: ...e images Images are reproduced as columns and rows of dots A scanner s resolution is the measure of the number of dots it can read and reproduce per inch dpi DPI Dots per inch An expression of monitor and printer resolution Measured as the number of dots per horizontal inch on monitors and the number of dots that can be printed by a printer in an inch See also Pixel Optical Resolution and Resoluti...

Страница 68: ...t basic level an image file contains bitmap information which is the color information for each dot in each column and row of an image The various file formats TIFF BMP etc use different methods of storing and recalling this information Magnification An expression of the relationship between the scanning resolution and the output resolution stated as a percentage If the output resolution is set to...

Страница 69: ...bject The image shown in the preview area can be used to adjust the scan area brightness and color balance before initiating the final scan Remove Dust and Scratches This function is available with a Film Adapter Unit FAU S13 equipped CanoScan D2400U It utilizes the properties of infrared light to detect small flecks of dirt or scratches on film and retouches them Resolution The density of the dot...

Страница 70: ... of data to each pixel Scanning The process of using a scanner to read image data Scanned data is sent to the computer as image data Shadows The darkest portions of an image scanned in a color or grayscale image mode Threshold Value The dividing value at which a pixel is determined to be either black or white when the image is reproduced as a black and white image The higher the threshold the dark...

Страница 71: ...view 9 17 F File size 20 Free memory 7 G Gamma tab 51 Gamma value 50 67 Grayscale 68 H Highlight mark 42 Highlights 41 Histogram 41 68 Histogram tab 42 I Image file 68 Image menu 40 Image size 7 Install 6 10 L Load Settings file 53 M Magnification 7 11 19 20 68 Menu bar 14 Moiré 55 68 O Optical resolution 59 68 Output device 7 11 18 25 59 P Pixel 69 Plug in Software 69 Preferences 25 Preview 17 Pr...

Страница 72: ... gamma value 51 Settings file 57 Shadow mark 42 Shadows 41 70 Special features 9 Start Plug in Module CS U 10 T Threshold 52 Threshold value 52 70 Tone Adjustment 40 Tone Adjustment button 7 40 Tone Adjustment dialog 36 Tone curve 44 70 Tone curve tab 45 Tone curve value 46 U Unit 26 Unsharp mask 54 70 W White Eyedropper button 43 White Eyedropper tool 70 Z Zoom In button 7 Zoom Out button 7 Zoomi...

Страница 73: ...stria CANON SCHWEIZ A G Industriestrasse 12 CH 8305 Dietlikon Switzerland Tel 01 835 61 61 Fax 01 835 68 60 Hotline 157 30 20 CANON ESPAÑA S A C Joaquin Costa No 41 28002 Madrid Spain Help Desk 906 301255 Tel 91 5384500 Fax 91 4117780 CANON DANMARK Vasekær 12 DK 2730 Herlev Denmark Hotline 44 88 26 66 http www canon dk CANON NORGE AS Hallagerbakken 110 Boks 33 Holmlia 1210 Oslo 12 Norway Tlf 2262 ...

Отзывы: