background image

Managing the Address Book

2-10

Ma

na

ging

 Job

s

 a

nd 

Ma

ch

ine

 Dat

a

2

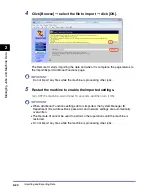
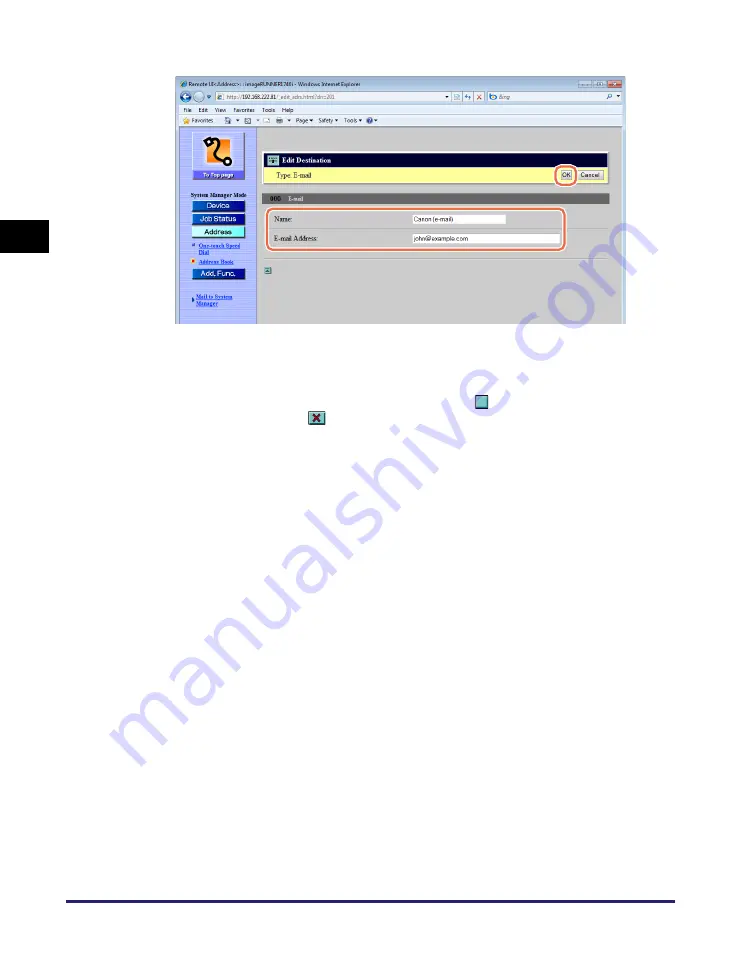
Edit the settings as necessary 

 click [OK].

The page returns to the Address Book page.

To delete the destination:

On the Address Book page shown in step 1, click [

] (Select) next to the address 

you want to delete 

 [

] (Delete).

The selected destination is deleted.

Содержание 1730

Страница 1: ...ENG Please read this guide before operating this product After you finish reading this guide store it in a safe place for future reference Remote UI Guide Remote UI Guide ...

Страница 2: ...imageRUNNER 1750i 1740i 1730i 1730 Remote UI Guide ...

Страница 3: ...M Sending and Fax Instructions Sending and Facsimile Guide CD ROM Remote User Interface Instructions Remote UI Guide This Document CD ROM Network Connectivity Security Management System Settings Guide CD ROM Color Network ScanGear Instructions Network ScanGear Guide CD ROM USB Memory Media Printing Instructions PS PCL UFRII LT Printer Instructions Printer Guide CD ROM Windows Printer Driver Instru...

Страница 4: ...nagement Customizing Settings Appendix Includes the glossary and index Chapter 1 Chapter 2 Chapter 3 Chapter 4 Chapter 5 Considerable effort has been made to ensure that this manual is free of inaccuracies and omissions However as we are constantly improving our products if you need an exact specification please contact Canon ...

Страница 5: ...ote UI 1 5 Buttons on the Remote UI 1 6 System Requirements 1 7 Before Using the Remote UI 1 8 Starting the Remote UI 1 9 Viewing the Machine Status and Information 1 14 Chapter 2 Managing Jobs and Machine Data Managing Jobs 2 2 Managing the Print Jobs 2 2 Viewing the Job Logs 2 4 Managing the Address Book 2 5 Editing the Destinations 2 6 Importing and Exporting Data 2 11 Exporting Address Book Da...

Страница 6: ...nt ID Management and User Management 3 2 Managing the Department IDs 3 6 Managing the User IDs 3 10 Chapter 4 Customizing Settings Customizing the System Settings 4 2 Editing the LDAP Server Settings 4 10 Editing the Forwarding Settings 4 14 Specifying the Authorized Send Settings 4 17 Customizing the Machine Settings 4 26 Specifying the SNMPv3 Settings 4 29 Enabling SNMPv3 4 30 Specifying the Use...

Страница 7: ...e items carefully to operate the machine correctly and avoid damage to the machine or property NOTE Indicates a clarification of an operation or contains additional explanations for a procedure Reading these notes is highly recommended Keys and Buttons Used in This Manual The following tables provide a few examples of how keys buttons and other user interfaces such as icons displayed on the screen...

Страница 8: ... a particular combination of accessories and optional equipment are not displayed in the web browser Therefore the screen shots of the Remote UI used in this manual may differ from the ones you actually see on your web browser depending on the model or options you have installed or activated The IP addresses shown in the screen shots and text in this manual are for illustrative purposes only The b...

Страница 9: ... names herein may be the trademarks of their respective owners Availability of the Optional Equipment Of the optional equipment described in the manuals the Copy Card Reader F1 may not be available depending on the country or region of purchase For more information on the optional equipment see Chapter 4 Optional Equipment in the Reference Guide Microsoft Windows 2000 operating system Windows 2000...

Страница 10: ...of Canon Inc Disclaimers The information in this document is subject to change without notice CANON INC MAKES NO WARRANTY OF ANY KIND WITH REGARD TO THIS MATERIAL EITHER EXPRESS OR IMPLIED EXCEPT AS PROVIDED HEREIN INCLUDING WITHOUT LIMITATION THEREOF WARRANTIES AS TO MARKETABILITY MERCHANTABILITY FITNESS FOR A PARTICULAR PURPOSE OR USE OR NON INFRINGEMENT CANON INC SHALL NOT BE LIABLE FOR ANY DIR...

Страница 11: ...x ...

Страница 12: ...nd how to start it Overview of the Remote UI 1 2 Functions of the Remote UI 1 3 The Top Page of the Remote UI 1 4 Logon Modes of the Remote UI 1 5 Buttons on the Remote UI 1 6 System Requirements 1 7 Before Using the Remote UI 1 8 Starting the Remote UI 1 9 Viewing the Machine Status and Information 1 14 ...

Страница 13: ... To use the Remote UI all you need is a web browser and a network connection between your computer and the machine First set the IP Internet Protocol address for the machine from the machine s control panel and set up the necessary network connection Then start your web browser and enter the IP address of the machine The Remote UI top page is displayed on your computer screen and is ready for you ...

Страница 14: ...ing must be enabled See To specify the System Manager ID and System Password on p 4 9 Importing and exporting the machine data You can save and load the machine data such as Address Book data or the Additional Functions setting data See Importing and Exporting Data on p 2 11 Managing key pairs and digital certificates You can install and register key pairs and digital certificates See Managing Key...

Страница 15: ...ings on p 4 1 The Top Page of the Remote UI When you enter the IP address of the machine on your web browser and press the ENTER key on your computer keyboard the Remote UI top page is displayed NOTE The appearance of the Remote UI top page depends on the management mode applied to the machine For more information see Enabling Department ID Management and User Management on p 3 2 For instructions ...

Страница 16: ...unctions except those restricted to the System Manager Major functions open to End Users and the System Manager are Checking the machine status such as paper or toner amount Checking the job status and deleting their own jobs NOTE For the End Users to delete their own jobs the Permit End user s Job Operation setting must be enabled See To specify the System Manager ID and System Password on p 4 9 ...

Страница 17: ... to display the machine status and various setting information Click to display the status of the jobs and the logs of the jobs processed by the machine Click to manage the Address Book of the machine Click to specify or change various settings on the machine This button works similarly as the Additional Functions key on the machine s control panel Click to update or refresh the current page with ...

Страница 18: ...0 Windows XP Windows Vista Windows 7 Web Browser Microsoft Internet Explorer 6 0 or later Macintosh OS Operating System Mac OS X 10 3 or later except Classic Environment Web Browser Safari 2 0 3 or later Safari 1 3 2 on Mac OS X 10 3 x is also supported NOTE Other than the software listed above no other software such as a web server is necessary There is already a web server inside the machine ...

Страница 19: ...he System Settings Guide Specify the name of the device in the Device Info Settings to identify the machine you operate from the Remote UI by the specified name IMPORTANT Connection via a proxy server is not possible If your system environment has a proxy server specify the IP address of the machine as an proxy exception on your web browser Set your web browser not to access the IP address of the ...

Страница 20: ...nter from the machine s control panel If you use other characters they may not be displayed or recognized properly on the machine 1 Start your web browser 2 Enter the appropriate URL into Address or Location bar in the web browser press the ENTER key on your computer keyboard http the IP address of the machine If you do not know the appropriate URL consult your network administrator The Remote UI ...

Страница 21: ...ct the option button for System Manager Mode enter the System Manager ID and System Password IMPORTANT The System Manager ID and System Password are both set to 7654321 at purchase Change them before using the machine See To specify the System Manager ID and System Password on p 4 9 To log in to the Remote UI in the End User Mode select the option button for End User Mode enter the user name or le...

Страница 22: ...s not shown correctly check the following settings Cache settings on your web browser HTTP port number default is 80 For information on other network connection problems and remedies see Chapter 8 Troubleshooting in the System Settings Guide or consult your network administrator ...

Страница 23: ... the Remote UI 1 When Department ID Management is enabled Enter the Department ID and password You can log in as the System Manager by entering the System Manager ID in the Department ID text box and the System Password in the Password text box ...

Страница 24: ...assword text box When both Department ID Management and User Management are enabled NOTE The same Remote UI top page as shown in When User Management is enabled on p 1 13 appears Enter the User ID and password You can log in as the System Manager by entering the User ID registered as the System Manager in the User ID text box and its password in the Password text box 4 Click OK The Device Status p...

Страница 25: ...the Remote UI the Device Status page in the Device menu is displayed From the Device menu you can view the current status of the machine information about the consumables such as paper and other information about the machine 1 Click Device click the hyperlink to the page you want to display in the Device menu The information page you selected is displayed ...

Страница 26: ...he information about the machine such as the system manager s information and the location where the machine is installed Device Features page Displays the information about the machine such as the maximum print speed the total RAM size and the number of the drawers attached to the machine Network Settings page Displays the information about the machine s network settings Counter Check page Displa...

Страница 27: ...Viewing the Machine Status and Information 1 16 Introduction to the Remote UI 1 ...

Страница 28: ...g Data 2 11 Exporting Address Book Data 2 12 Importing Address Book Data 2 13 Exporting User Management Data 2 14 Importing User Management Data 2 15 Resetting Imported User Management Data 2 17 Exporting Additional Functions Setting Data 2 21 Importing Additional Functions Setting Data 2 23 Managing Key Pairs and Digital Certificates from a Web Browser 2 25 Installing and Registering a Key and Ce...

Страница 29: ...lowing sections Print Job Status Log Send Receive Fax Job Log Send Store Receive Job Log Managing the Print Jobs You can manage the print jobs that are being processed or waiting to be processed by the machine NOTE End Users can delete their own print jobs when the Permit End user s Job Operation setting is enabled See To specify the System Manager ID and System Password on p 4 9 ...

Страница 30: ...2 1 Click Job Status Status in the Job Status menu The list of print jobs being processed or waiting to be processed by the machine is displayed 2 To delete a print job click Select next to the job you want to delete Delete The selected job is deleted ...

Страница 31: ...jobs Send Store Receive Job Log the last 128 jobs IMPORTANT The Job Logs are displayed only when the Job Log Display setting in the Edit System Settings page is enabled See Customizing the System Settings on p 4 2 1 Click Job Status Log you want to view in the Job Status menu The screen shot above shows the screen displayed when you select the Log of the Print Job The Print Job page shows a list o...

Страница 32: ...ses File Server Address You can manage file server addresses with the information to save scanned documents in a file server such as the protocol and path name of the destination folder Fax Number You can manage fax numbers Group Address You can manage group addresses which enable you to include multiple addresses in a single group NOTE For instructions on how to manage the Address Book on the mac...

Страница 33: ...dress Book The Address Book and One touch Speed Dial use a similar procedure for editing destinations 1 Click Address One touch Speed Dial or Address Book from the menu displayed under Address If the address book is protected by a password the Enter password page appears Enter the password click OK The Address Book page is displayed NOTE You can select the address numbers to display from the Selec...

Страница 34: ...page is displayed Select the type of the address from the Type drop down list box specify the necessary settings depending on the type of address you selected click OK The new address is registered in the machine and the page returns to the Address Book page NOTE For more information on the address types see Chapter 4 Specifying Destinations Easily and Quickly in the Sending and Facsimile Guide ...

Страница 35: ...oup Name text box Click Address Book The list of addresses registered in the machine is displayed in the new window Specify the type of address from the drop down list box Select the check boxes next to the addresses you want to include to the group click OK The selected addresses are displayed in the Members List Make sure that the addresses you want to add to the group are displayed in the Membe...

Страница 36: ...g Jobs and Machine Data 2 To edit the details of the destination Click the name or any number next to the name on the Address Book page shown in step 1 The Destination Details page appears Click Edit The Edit Destination page is displayed ...

Страница 37: ...ine Data 2 Edit the settings as necessary click OK The page returns to the Address Book page To delete the destination On the Address Book page shown in step 1 click Select next to the address you want to delete Delete The selected destination is deleted ...

Страница 38: ...peration is complete Otherwise the machine may malfunction During an exporting operation the page does not change until the operation is complete Do not click Start Export while the computer indicates that the operation is still being processed The Import Export function is available only when the Remote UI is in the System Manager Mode The importing exporting operation is performed based on the l...

Страница 39: ... Address Book Data You can save export the Address Book data stored in the machine as a file 1 Click Add Func Import Export in the Add Func menu The Import Export page is displayed 2 Click Address Book on the page shown in step 1 The Import Export Address Book page is displayed ...

Страница 40: ...w data The machine imports exports the Address Book data based on the index numbers displayed on the address list on the Address Book page on the Remote UI An address entry is overwritten if the imported Address Book data contains an address entry with the same index number Do not load the Address Book when the machine has Delayed Send jobs If the machine is in the Sleep mode press the machine s c...

Страница 41: ...se select the file to import click OK The Remote UI starts importing the data and when it is complete the page returns to the Import Export Address Book page IMPORTANT Do not import any files while the machine is processing other jobs Exporting User Management Data You can save export the User Management data stored in the machine as a file IMPORTANT All the User IDs are exported as User End User ...

Страница 42: ... into the machine from a saved exported file IMPORTANT Be sure to disable the Department ID Management and User Management before importing the User Management data See Enabling Department ID Management and User Management on p 3 2 All the User IDs are registered or overwritten as User End User when the machine imports the User ID data and their passwords are cleared You must reset the passwords f...

Страница 43: ...ep 1 in Exporting Address Book Data on p 2 12 The Import Export User Management Data page is displayed 3 Click Import For help see the screen shot in step 3 in Exporting User Management Data on p 2 14 The Import User Management Data page is displayed 4 Click Browse select the file to import click OK The Remote UI starts importing the data and when it is complete the page returns to the Import Expo...

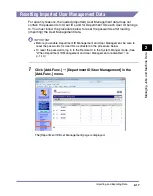
Страница 44: ...w to reset the passwords after loading importing the User Management data IMPORTANT Before you enable Department ID Management and User Management be sure to reset the passwords for User IDs as directed in the procedure below To reset the passwords log in to the Remote UI in the System Manger mode See When Department ID Management and User Management are disabled on p 1 10 1 Click Add Func Departm...

Страница 45: ...g and Exporting Data 2 18 Managing Jobs and Machine Data 2 2 Click Settings The Department ID User Management Settings page is displayed 3 Click User Management Settings The Register New User page is displayed ...

Страница 46: ... Machine Data 2 4 Click Cancel on the Register New User page Specifying the new user information is not required in this step The User IDs registered in the machine are displayed 5 Click the User ID to reset the passwords The Edit User page is displayed ...

Страница 47: ...er Types of all the User IDs are set to User End User every user is regarded as the System Manager and will be able to log in to the machine and the Remote UI in the System Manager Mode Change Password for the User ID Select this check box and enter the password for the User ID in the Password and Confirm text box Change Password for the Department ID Select this check box and enter the password f...

Страница 48: ...on the Register New Department page To display the list of the User IDs again follow steps 1 to 4 Exporting Additional Functions Setting Data You can save export the Additional Functions setting data stored in the machine as a file NOTE The Additional Functions settings you can export are displayed on the page shown in step 3 1 Click Add Func Import Export in the Add Func menu For help see the scr...

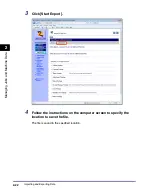
Страница 49: ...and Exporting Data 2 22 Managing Jobs and Machine Data 2 3 Click Start Export 4 Follow the instructions on the computer screen to specify the location to save the file The file is saved in the specified location ...

Страница 50: ... page shown in step 3 in Exporting Additional Functions Setting Data on p 2 21 1 Click Add Func Import Export in the Add Func menu For help see the screen shot in step 1 in Exporting Address Book Data on p 2 12 The Import Export page is displayed 2 Click Additional Functions For help see the screen shot in step 1 in Exporting Address Book Data on p 2 12 The Import Export Additional Functions page ...

Страница 51: ...e the machine is processing other jobs 5 Restart the machine to enable the imported settings Turn OFF the machine wait at least 10 seconds and then turn it ON IMPORTANT When Additional Functions settings data is imported the System Manager ID Department IDs Address Book password and network settings are automatically overwritten The Remote UI cannot be used to perform other operations until the ma...

Страница 52: ...es such as servers client computers etc Up to 10 CA certificates including the pre installed CA certificates can be registered This section focuses on how to install and register key pairs and digital certificates from a computer on the network For instructions on how to generate a key pair for SSL communications see Chapter 3 Setting up the Machine for Your Network Environment in the System Setti...

Страница 53: ... Certificate Install a key pair or a private key and certificate in the machine as described below You can also register the key pair or delete unnecessary key pair files 1 Click Add Func Settings in the Add Func menu The Settings page is displayed 2 Click TCP IP Settings on the page shown in step 1 The TCP IP Settings page is displayed ...

Страница 54: ...2 27 Managing Jobs and Machine Data 2 3 Scroll the page until Certificate Settings appears click Key and Certificate Settings The Key and Certificate Settings page is displayed 4 Click Register Key and Certificate The Register Key and Certificate page is displayed ...

Страница 55: ...ur Network Environment in the System Settings Guide 5 Select the function To install a new key and certificate Click Install The Install Key and Certificate page is displayed Click Browse select the key pair file to install click Start Installation The Remote UI starts installing the key and certificate and when it is complete the page returns to the Register Key and Certificate page IMPORTANT The...

Страница 56: ...ster the key and certificate Click Select next to the key pair file you want to register Register Enter the key name and password up to 24 characters respectively click OK The Remote UI starts registering the key and certificate and when it is complete the page returns to the Register Key and Certificate page ...

Страница 57: ... Key and Certificate Key pairs become invalid when the certificate expires or when the file becomes corrupted If this happens delete unnecessary key pair files as described below 1 Click Add Func Settings in the Add Func menu For help see the screen shot in step 1 in Installing and Registering a Key and Certificate on p 2 26 The Settings page is displayed 2 Click TCP IP Settings on the page shown ...

Страница 58: ...ay not be able to delete a key pair In this case check what the key pair is being used for indicated under Key Usage and perform the following If the key pair is used for SSL disable the SSL settings for e mails I faxes and the Remote UI See Chapter 3 Setting up the Machine for Your Network Environment and Chapter 6 Protecting the Machine from Unauthorized Access in the System Settings Guide If th...

Страница 59: ...ling and Registering a Key and Certificate on p 2 26 The Settings page is displayed 2 Click TCP IP Settings on the page shown in step 1 For help see the screen shot in step 1 in Installing and Registering a Key and Certificate on p 2 26 The TCP IP Settings page is displayed 3 Scroll the page until Certificate Settings appears click CA Certificate Settings For help see the screen shot in step 3 in ...

Страница 60: ...Install CA Certificate page is displayed Click Browse select the CA certificate file to install click Start Installation The Remote UI starts installing the CA certificate and when it is complete the page returns to the Register CA Certificate page IMPORTANT The maximum number of characters that you can enter for the file name is 24 including the file extension cer or der ...

Страница 61: ...ant to register Register The Remote UI starts registering the CA certificate and when it is complete the page returns to the CA Certificate Settings page To delete the installed but not registered CA certificate Click Select next to the file you want to delete Delete The selected file is deleted 6 Restart the machine Turn OFF the machine wait at least 10 seconds and then turn it ON ...

Страница 62: ...e the screen shot in step 1 in Installing and Registering a Key and Certificate on p 2 26 The Settings page is displayed 2 Click TCP IP Settings on the page shown in step 1 For help see the screen shot in step 1 in Installing and Registering a Key and Certificate on p 2 26 The TCP IP Settings page is displayed 3 Scroll the page until Certificate Settings appears click CA Certificate Settings For h...

Страница 63: ...d Machine Data 2 4 Click Select next to the CA certificate you want to delete Delete The selected CA certificate is deleted NOTE If you want to display the details of a certificate click Certificate 5 Restart the machine Turn OFF the machine wait at least 10 seconds and then turn it ON ...

Страница 64: ...er describes how to specify the Department ID Management and User Management settings by using the Remote UI Managing the Department IDs and User IDs 3 2 Enabling Department ID Management and User Management 3 2 Managing the Department IDs 3 6 Managing the User IDs 3 10 ...

Страница 65: ...ager ID and System Password are properly set to log in to the Remote UI in the System Manager Mode before enabling Department ID Management See To specify the System Manager ID and System Password on p 4 9 Before enabling Department ID User Management register at least one Department ID User ID beforehand See Managing the Department IDs on p 3 6 and Managing the User IDs on p 3 10 First register a...

Страница 66: ...ecifying Department ID and User Management 3 The page above displays the list of the Department IDs The page above displays the list of the User IDs 2 Click Settings on the page shown in step 1 The Department ID User Management Settings page appears ...

Страница 67: ...x make sure that at least one User ID is registered Enable Department ID Management Select this check box to enable Department ID Management When it is enabled the users must enter their Department ID and password when it is set to log in to the machine and the Remote UI Department ID Management Settings Click this button to register a Department ID See Managing the Department IDs on p 3 6 Enable ...

Страница 68: ...this button to register a User ID See Managing the User IDs on p 3 10 Allow Printer Jobs with Unknown IDs Select this check box to allow the machine to accept print jobs from unknown IDs Allow Remote Scan Jobs with Unknown IDs Select this check box to allow the machine to accept remote scan jobs from unknown IDs Add Username to Document Name Select this check box to add the User ID to the name of ...

Страница 69: ...ck Add Func Department ID User Management in the Add Func menu NOTE The list of the Department IDs switches to the list of the User IDs by clicking Change List View The Change List View button appears when both the Department ID Management and the User Management are enabled and at least one ID is registered for each mode The page above displays the list of the Department IDs ...

Страница 70: ... a new Department ID NOTE You can register up to 1 000 Department IDs Click Settings on the page shown in step 1 The Department ID User Management Settings page is displayed Click Department ID Management Settings The Register New Department page is displayed You can also display the Register New Department page by clicking New on the list of the Department IDs shown in step 1 ...

Страница 71: ...s in the System Settings Guide The maximum number of digits you can register for the Department ID is seven If you enter fewer than seven digits the machine automatically adds zeros to the beginning Example If 321 is entered the Department ID will be displayed as 0000321 Print Total is the sum of Copy and Print Department ID Enter a numeric ID seven digits maximum Set Password Select this check bo...

Страница 72: ...partment ID you want to edit The Edit Department ID page is displayed Edit the settings as necessary click OK To delete the Department ID On the Department ID list shown in step 1 click Select next to the Department ID you want to delete Delete The selected Department ID is deleted IMPORTANT When the optional Copy Card Reader F1 is attached to the machine do not delete a Department ID ...

Страница 73: ... assign a Department ID and the password for the Department ID to each User ID Users can log in to the machine and the Remote UI by entering the User ID that belongs to a Department ID User IDs can be registered edited or deleted only on the Remote UI while User Management can be enabled and disabled both on the machine s control panel and on the Remote UI 1 Click Add Func Department ID User Manag...

Страница 74: ... User Management 3 The Register New User page is displayed You can also display the Register New User page by clicking New on the list of the User IDs shown in step 1 in Managing the Department IDs on p 3 6 Specify the necessary settings on the Register New User page click OK ...

Страница 75: ...nly on the Remote UI User ID Enter a User ID a log in name 32 characters maximum Set Password Select this check box to set a password for the User ID Password Enter the password 32 characters maximum Confirm Enter the password again to confirm it Department ID Enter the Department ID the User ID belongs to seven digits maximum Set Password Select this check box to set a password for the Department...

Страница 76: ...fying Department ID and User Management 3 To edit the User ID Click the User ID you want to edit on the list of the User IDs shown in step 1 in Managing the Department IDs on p 3 6 The Edit User page is displayed Edit the settings as necessary click OK ...

Страница 77: ...3 To delete the User ID Click Select next to the User ID you want to delete Delete For help see the screen shot in step 1 in Managing the Department IDs on p 3 6 The selected User ID is deleted IMPORTANT When the optional Copy Card Reader F1 is attached to the machine do not delete a User ID ...

Страница 78: ...4 2 Editing the LDAP Server Settings 4 10 Editing the Forwarding Settings 4 14 Specifying the Authorized Send Settings 4 17 Customizing the Machine Settings 4 26 Specifying the SNMPv3 Settings 4 29 Enabling SNMPv3 4 30 Specifying the User Information for SNMPv3 4 31 Specifying the Context Settings for SNMPv3 4 34 Verifying SSL Server Certificates 4 37 ...

Страница 79: ...isted left System Manager Settings System Manager s name and other information Add Func System Settings Edit See p 4 5 System Manager Settings System Manager ID and System Password Add Func System Settings Edit Register ID and Password See p 4 9 Device Info Settings Add Func System Settings Edit Department ID Management Add Func Department ID User Management See p 3 6 User ID Management Add Func D...

Страница 80: ...e p 4 10 Job Log Display Add Func System Settings Edit Memory Media Send Log Add Func System Settings Edit Use USB Device Add Func System Settings Edit PDL Selection Plug n Play Add Func System Settings Edit Memory Media Settings Add Func System Settings Edit Secure Print Settings Add Func System Settings Edit Mem Used When Warning Displayed Add Func System Settings Edit Other Settings Available o...

Страница 81: ...Customizing the System Settings 4 4 Customizing Settings 4 2 Click Edit The Edit System Settings page is displayed ...

Страница 82: ...Customizing the System Settings 4 5 Customizing Settings 4 To specify the System Settings Specify the necessary settings click OK ...

Страница 83: ...To specify the System Manager ID and System Password on p 4 9 Support IMPORTANT Support can be specified only on the Remote UI System Manager Enter the name of the System Manager 32 characters maximum Phone Enter the contact information of the System Manager 64 characters maximum E mail Address Enter the e mail address of the System Manager 64 characters maximum System Manager Comment Enter the co...

Страница 84: ...SB Settings Chapter 7 Other System Settings Communications Settings Chapter 4 Setting the Send Function E Mail I Fax Settings Chapter 4 Setting the Send Function Fax Settings Chapter 4 Setting the Send Function Store Print When Forwarding Chapter 4 Setting the Send Function Remote UI Settings Chapter 6 Protecting the Machine from Unauthorized Access PDL Selection PnP Chapter 7 Other System Setting...

Страница 85: ...t the Send Function displayed on the Edit System Settings page For help see the screen shot in To specify the System Settings on p 4 5 The Restrict Send Function page is displayed Specify the necessary settings click OK NOTE For information on the settings see Chapter 4 Setting the Send Function in the System Settings Guide ...

Страница 86: ... at purchase Change them before using the machine IMPORTANT Permit End user s Job Operation can be specified only on the Remote UI Set ID and Password Select this check box to set the System Manager ID and System Password System Manager ID Enter the System Manager ID seven digits maximum Set Change Password Select this check box to set or change the System Password System Manager Password Enter th...

Страница 87: ...ver settings is available only when the Remote UI is in the System Manager Mode NOTE For instructions on how to edit the LDAP server settings on the machine s control panel see Chapter 3 Setting up the Machine for Your Network Environment in the System Settings Guide 1 Click Add Func Register LDAP Server in the Add Func menu The Register LDAP Server page is displayed ...

Страница 88: ... Your Network Environment in the System Settings Guide If Authorized Send is activated Authentication Method appears on this page Specify whether to carry over the login information user name and password from Authorized Send to the authentication information used when users search for e mail addresses and fax numbers via the LDAP server To use the same user name and password for LDAP search authe...

Страница 89: ...name you want to edit on the page shown in step 1 The Edit LDAP Server or Edit LDAP Search Server page is displayed Edit the settings as necessary click OK To delete the LDAP server On the page shown in step 1 click Select next to the LDAP server you want to delete Delete The selected LDAP server is deleted ...

Страница 90: ...Click Register Edit LDAP Search Attributes on the page shown in step 1 The Register Edit LDAP Search Attributes page is displayed Specify or edit the necessary settings click OK NOTE For information on the settings see Chapter 3 Setting up the Machine for Your Network Environment in the System Settings Guide ...

Страница 91: ...nager Mode NOTE For instructions on how to edit the forwarding settings on the machine s control panel see Chapter 4 Setting the Send Function in the System Settings Guide 1 Click Add Func Forwarding Settings in the Add Func menu The Forwarding Settings page is displayed 2 Edit the forwarding settings To register a new forwarding condition Click Add New Conditions on the page shown in step 1 The A...

Страница 92: ...n the System Settings Guide To forward all received documents without specific conditions Click Forwarding without Conditions on the page shown in step 1 The Add New Conditions page is displayed Specify the necessary settings click OK NOTE For information on the settings see Chapter 4 Setting the Send Function in the System Settings Guide ...

Страница 93: ...he Receive Type drop down list box all the forwarding settings registered in the machine are displayed The Edit Conditions page is displayed Edit the settings as necessary click OK To delete the forwarding condition On the Forwarding Settings page shown in step 1 click Select next to the forwarding condition that you want to delete Delete the Selected Conditions The selected forwarding condition i...

Страница 94: ...an specify the Authorized Send settings on the Remote UI only IMPORTANT Specifying the Authorized Send settings is available only when the Remote UI is in the System Manager Mode 1 Click Add Func Send Function Authentication Settings in the Add Func menu The Send Function Authentication Settings page is displayed ...

Страница 95: ...Specifying the Authorized Send Settings 4 18 Customizing Settings 4 2 Specify the necessary settings click OK ...

Страница 96: ...cation servers can be registered To change or delete the registered server settings select the desired server name and press Edit or Delete Display authentication screen when operation to send is started Select this check box to activate Authorized Send and authenticate users who send documents from the machine To enable the settings in the Send Function Authentication Settings page this check box...

Страница 97: ... the authentication method used when the machine communicates with the authentication server Select Use to use the Simple authentication method or Use Security Authentication to use the Kerberos authentication method The Kerberos authentication method is available for Active Directory Domain Name If you select Use Security Authentication for Login Information enter the directory tree name of the A...

Страница 98: ...ils Location to Start Search is left blank Attribute of User Name cannot be specified when the Kerberos authentication method is selected in Login Information If this method is selected or Attribute of User Name is left blank sAMAccountName is automatically used as the user attribute name If Attribute of E mail Address is left blank mail is automatically used as the mail attribute name LDAP Search...

Страница 99: ...nticate a user against the authentication server and to retrieve attributes about the user from the server SMTP Authentication Basic Settings To edit the SMTP authentication settings press Change Settings For instructions on how to specify the SMTP authentication settings see Chapter 3 Setting up the Machine for Your Network Environment in the System Settings Guide Authentication Method You can sp...

Страница 100: ...n the User text box and the Password text box of the screen Users need to enter the user name and password each time they send documents to a file server When Sending File to Address Registered in Address Book This setting is used when users specify the destination by selecting the file server address from the Address Book list Select the desired option from the following Assume the same authentic...

Страница 101: ...ext box and the Password text box of the screen Users need to enter the user name and password each time they send documents to a file server Assume the same authentication information as when operation to send was started and do not display authentication screen Does not display the authentication screen The user name and password for Authorized Send is used as the login information E mail Send D...

Страница 102: ... File Server and Folder Path Selecting Add user name enables you to use the user name of a logged on user to specify the destination of sending documents under the specified folder For example if share is entered in Folder Path and the user name of a logged on user is john the john folder in the share folder is specified as the destination For instructions on how to send documents to the folder of...

Страница 103: ...Settings in the Reference Guide Additional Functions menu on the Machine Menus on the Remote UI References Common Settings Add Func Settings Common Settings Chapter 3 Configuring the Machine s Basic Settings in the Reference Guide Copy Settings Available only on the machine s control panel Chapter 4 Customizing Settings in the Copying Guide Timer Settings Add Func Settings Timer Settings Chapter 3...

Страница 104: ...m you want to edit The settings page for the selected item is displayed Report Settings Add Func Settings Report Settings Chapter 8 Printing Communication Reports and Lists in the Sending and Facsimile Guide Address Book Settings Address Chapter 4 Specifying Destinations Easily and Quickly in the Sending and Facsimile Guide System Settings See the table on p 4 2 Additional Functions menu on the Ma...

Страница 105: ... The screen shot above is for the Volume Settings NOTE For information on the settings see the other references listed on the table in Customizing the Machine Settings on p 4 26 For information on the settings of Send Function Authentication Settings see Specifying the Authorized Send Settings on p 4 17 ...

Страница 106: ...led See the following information on the settings for SSL communication Chapter 3 Setting up the Machine for Your Network Environment in the System Settings Guide Managing Key Pairs and Digital Certificates from a Web Browser on p 2 25 NOTE The settings for SNMPv3 can be specified only on the Remote UI while the settings for SNMPv1 can be specified both on the machine s control panel and the Remot...

Страница 107: ... Customizing Settings 4 Enabling SNMPv3 Enable SNMPv3 as described below 1 Click Add Func Settings in the Add Func menu The Settings page is displayed 2 Click SNMP Settings on the page shown in step 1 The SNMP Settings page is displayed ...

Страница 108: ...he machine Turn OFF the machine wait at least 10 seconds and then turn it ON IMPORTANT The setting for Use SNMP v 3 becomes effective after the machine is restarted while restarting the machine is not necessary to enable the settings for User Settings p 4 31 and Context Settings p 4 34 Specifying the User Information for SNMPv3 Specify the user information for SNMPv3 as described below 1 Click Add...

Страница 109: ...ings The User Settings page is displayed 4 Select the function To register a new user NOTE A default user initial is registered Edit it as necessary User Name initial MIB Access Permission ON Security Settings Auth Yes Encry Yes Authent Algorithm MD5 Authentication Password initial Encryption Algorithm DES Encryption Password initial You can register up to five users including the default user ini...

Страница 110: ...x to give read write permission to the user Security Settings Select the security setting Auth Yes Encry Yes Auth Yes Encry No or Auth No Encrypt No If you select Auth Yes Encry Yes for example both authentication and encryption are enabled Authent Algorithm Select the algorithm to be used for authentication MD5 or SHA1 Authentication Password Enter the password for authentication 6 to 16 alphanum...

Страница 111: ...utton for the user you want to delete under Select in the user list in the User Settings page click Delete The selected user is deleted Specifying the Context Settings for SNMPv3 Specify the context settings for SNMPv3 as described below 1 Click Add Func Settings in the Add Func menu For help see the screen shot in step 1 in Enabling SNMPv3 on p 4 30 The Settings page is displayed Encryption Algor...

Страница 112: ...lp see the screen shot in step 3 in Specifying the User Information for SNMPv3 on p 4 31 The Context Settings page is displayed 4 Select the function To register a new context NOTE You can register up to five contexts A default context NULL is registered It is not shown in the context list and cannot be deleted Click Register The Register Context page is displayed Enter the context name up to 32 c...

Страница 113: ...ant to edit in the context list in the Context Settings page The Edit Context page is displayed Edit the context name click OK To delete a context Select the button for the context you want to delete under Select in the context list in the Context Settings page click Delete The selected context is deleted ...

Страница 114: ... SMTP The machine verifies the certificate by checking the expiration date certificate chain and as well as CN Common Name IMPORTANT The settings for the SSL server certificate verification are available only on the Remote UI System Manager Mode 1 Click Add Func Settings in the Add Func menu The Settings page is displayed 2 Click E mail I Fax Settings on the page shown in step 1 The E mail I Fax S...

Страница 115: ...cation select the check box for Add CN to Verification Items To set the machine to verify the SSL server certificate when sending data with SMTP Select the check box for Confirm SSL Certificate for SMTP TX To include the CN Common Name for the verification select the check box for Add CN to Verification Items IMPORTANT If you do not enable the SSL server certificate verification settings described...

Страница 116: ...blem with the certificate communication will not be completed and the error message SSL Error POP or SSL Error SMTP Send error code 0842 for the job log will be displayed 4 Click OK on the page shown in step 3 5 Restart the machine Turn OFF the machine wait at least 10 seconds and then turn it ON ...

Страница 117: ...Verifying SSL Server Certificates 4 40 Customizing Settings 4 ...

Страница 118: ...5 1 CHAPTER 5 Appendix This chapter includes the glossary and index Glossary 5 2 Index 5 6 ...

Страница 119: ... Web site A cookie allows the Web site to recognize the user on subsequent visits Cookies are generally used to enable a user to automatically sign on to certain Web sites and to customize the features offered by such sites D DHCP Dynamic Host Configuration Protocol A protocol which automatically specifies the network settings of a client on a TCP IP network Many of the settings required to set up...

Страница 120: ...ternet Protocol address A network address used by IP Internet Protocol to specify a computer or device on the Internet Currently two versions of IP are in use IPv4 and IPv6 IPv4 Internet Protocol version 4 An IPv4 address is a 32 bit numeric address usually written as four numbers delimited by periods For example 128 121 4 5 IPv6 Internet Protocol version 6 An IPv6 address is 128 bit long and cons...

Страница 121: ...hat upon receiving a URL tries to supply the requested file from its cache If the proxy server cannot locate the file in its cache it obtains the file from the remote server and saves a copy in its cache so that the next request can be obtained locally R RARP Reverse Address Resolution Protocol A protocol which associates a network adapter address MAC address with an IP Internet Protocol address R...

Страница 122: ...ator A standard way of specifying the location of an object usually a Web page on the Internet The URL for a Web page would look something like this http www w3 org default htm Here http indicates that a Web page is being accessed www w3 org is the address of the server containing the Web page and default htm is the file name under which the Web page is stored on the server ...

Страница 123: ...5 2 Buttons on the Remote UI 1 6 C CA certificate 2 25 Cookie 5 2 D Department ID Deleting 3 9 Editing 3 9 Registering 3 7 Department ID Management 3 2 Enabling 3 2 DHCP 5 2 E End User Mode 1 10 F Forwarding Settings 4 14 Deleting the Forwarding Condition 4 16 Editing the Forwarding Condition 4 16 Forwarding Documents without specific conditions 4 15 Registering a Forwarding Condition 4 14 FTP 5 2...

Страница 124: ...ng 4 8 S SNMPv3 4 29 SSL 5 4 SSL encryption 5 4 SSL server certificate 4 37 System Manager ID specifying 4 9 System Manager Mode 1 10 System Password specifying 4 9 System requirements 1 7 OS Macintosh 1 7 OS Windows 1 7 Web browser Macintosh 1 7 Web browser Windows 1 7 System Settings specifying 4 5 T TCP IP 5 5 Top page of the Remote UI 1 4 U URL 1 9 5 5 User ID Deleting 3 14 Editing 3 13 Regist...

Страница 125: ...Index 5 8 Appendix 5 ...

Страница 126: ...ttp www canon europe com for details on your regional dealer CANON LATIN AMERICA INC 703 Waterford Way Suite 400 Miami Florida 33126 U S A CANON AUSTRALIA PTY LTD 1 Thomas Holt Drive North Ryde Sydney N S W 2113 Australia CANON CHINA CO LTD 15F Jinbao Building No 89 Jinbao Street Dongcheng District Beijing 100005 China CANON SINGAPORE PTE LTD 1 HarbourFront Avenue 04 01 Keppel Bay Tower Singapore ...

Отзывы: