


Appendix B. Tube Installation
B-11
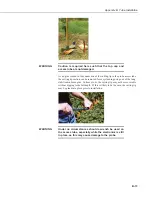
Remove the EasyAG
TM
dolly, thread a Fair Rite
TM
bead onto a loop in the
cable but do not tighten it into place yet (refer to final installation photo for
this).
Push the cable through the cable gland and attach the wiring according to the
diagram in Section 4.
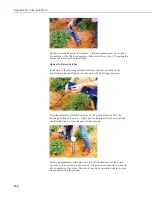
Step 5 - Inserting the Electronics
Reinstall the sensor circuitry and attach the connector or attach wiring as
required. Tighten the cable gland and seal around the inside threaded section
with silicone glue.
Step 6
–
Fitting the Top Cap Lid
Replace the lid of the top cap. Tighten the screws completely to ensure an
effective seal.
Содержание EasyAG SDI-12
Страница 2: ......
Страница 3: ......
Страница 26: ...Appendix A Normalization and Function Test A 6 ...
Страница 40: ...Appendix B Tube Installation B 14 ...
Страница 42: ...Appendix C Site Selection C 2 ...
Страница 44: ...Appendix D SDI 12 Commands D 2 ...


