background image

Electric Pizza Ovens 

– Mod. “MS”


Ed.

1/2012 Rev.0 - 


19


  ENG


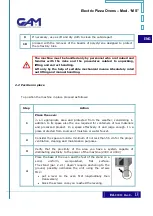
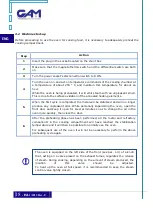
3.3 Periodic use of the oven 


Before using the oven carry out the following check-outs and arrangements:


Step 

Action 

Insert the plug in the socket located on the shunt box 


Make sure that the  magnetothermic  switch and the differential switch are both 
on. 

Turn the power socket’s disconnection switch to I/ON.


Turn the oven on and act on the thermostat of the baking chamber, setting the 
desired temperature (usually between 300 to 330 °C). 

Wait for the oven to reach the desired temperature.


When the desired temperature is reached, open the door and place the pizzas in 
the oven. It is even possible to place them directly on the refractory material 
instead of on containers or pans.  


It is recommended, in order to avoid thermal shock in the cell area and limit the consumption 
of energy, to open the door only for the time necessary to introduce or take out the pizzas or 
other food. 


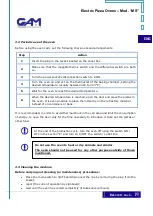
3.3 Cleaning the machine 

Before carrying out cleaning (or maintenance) procedures:


Place the main switch to 0/0FF and disconnect the line by removing the plug from the 
socket; 


report the current operation by signboard; 


wait until the oven has cooled completely (it takes several hours) 

At the end of the production cycle, turn the oven off using the switch ON / 
OFF in the section “E” and turn on 0/OFF  the switch / outlet line. 

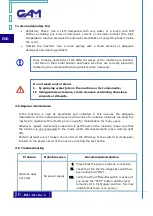
Do not use the oven to heat or dry animals and similar.  

The  oven  should  not  be  used  for  any  other  purpose  outside  of  those 
mentioned. 


Содержание MS44

Страница 1: ...ELECTRIC PIZZA OVENS Models MS44 MS66 INSTALLATION OPERATING AND MAINTENANCE ISTRUCTIONS...

Страница 2: ...atically referred to the current standards and regulations for mechanical products specifically the UNI standards and the CEI standards for electric and electronic equipment The units that are describ...

Страница 3: ...electric equipment Wiring diagram 1 7 3 Safety devices of mechanical equipment Section 2 Installing the machine 2 1 Unpacking 2 2 Position in place 2 2 1 Assembly of the stand 2 3 Connection to the e...

Страница 4: ...n charge of installing operating adjusting servicing and cleaning the machine Provides significant information Indicates a potentially hazardous situation that may arise if the operations described ar...

Страница 5: ...en the door use the insulated handle Do not put in the oven food packaging such as sealed metal cans or other material as it may explode due to high temperature with serious consequences for both the...

Страница 6: ...dels of different sizes to meet the diverse needs of professional customers such as the kitchens of restaurants institutions cafeterias pizzerias etc wherever it is necessary to cook preparations of f...

Страница 7: ...0x770 1010x1470x770 ABSORBTION kW 9 6 14 4 NET WEIGHT Kg 142 193 NET WEIGHT TOP Kg 178 243 STAND mm 1010x850x910 1010x1200x910 DIMENSIONS PACKING mm 1150x1240x870 1150x1590x870 NEUTRAL UNIT Mm Kg 1010...

Страница 8: ...ation of the baking chamber with insulating material for high temperature Electric armored heating elements of durable high quality materials Single phase power supply 230V or three phase 400V AC at 5...

Страница 9: ...the following An operations and maintenance instructions manual A catalogue of spare parts with exploded diagram Warranty Certificate EC Declaration of Conformity Only the price list and the order co...

Страница 10: ...onditions in their corresponding places To tamper modify or change the elements of the machine and the safety devices constitute fraudulent actions and bear civil and penal responsibilities for any di...

Страница 11: ...the compartment containing the equipment for command and control general wiring connecting devices of the circuit unit made of cables suitable for harsh operating conditions and proper voltage limit...

Страница 12: ...e anti static PVC bag and the expanded polystyrene 5 Unscrew the L elements around the machine 6 Open the packaging completely and introduce the ropes and the lifting belts under the bedplate towards...

Страница 13: ...from the weather considering in addition to its space also the one required for containers of raw materials and processed product In a space effectively lit and large enough In a place protected from...

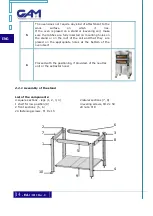
Страница 14: ...r on the roof of the cell and that they are placed on the appropriate holes at the bottom of the oven itself 6 Proceed with the positioning if provided of the neutral unit or the extractor hood 2 2 1...

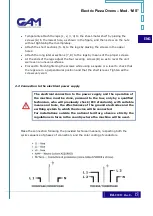
Страница 15: ...level to check that the legs are in a perpendicular position and that the shelf is level Tighten all the screws very well 2 3 Connection to the electrical power supply The electrical connection to the...

Страница 16: ...echnical staff The specialist installer near the point of installation of the oven must Place a length of power cable near the unit so as to permit the installed power cable to reach the power socket...

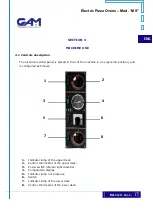
Страница 17: ...front of the machine in an ergonomic position and is configured as follows 1 Indicator lamp of the upper deck 2 Control thermostat of the upper deck 3 Power switch internal light chamber 4 Temperatur...

Страница 18: ...tal will be stabilized and will no longer produce any unpleasant odor While personally supervising the oven open the front door and keep it open for several minutes so as to change the air in the oven...

Страница 19: ...en possible to place them directly on the refractory material instead of on containers or pans It is recommended in order to avoid thermal shock in the cell area and limit the consumption of energy to...

Страница 20: ...o the mains cable disconnected and green warning light off Perform at least every 15 days the control on the efficiency of the switch circuit breaker located on the power circuit of the oven by pressi...

Страница 21: ...act a specialized technician It is absolutely forbidden for the user to modify the machine for any reason The manufacturer shall not be liable for any damages to people animals objects or the environm...

Страница 22: ...nic equipment as well as waste disposal The appliance and packaging are marked with the crossed out dust bin symbol which indicates that the product must be collected separately from other waste at th...

Страница 23: ...dealer that made the sale and according to what is stated in the previous paragraph to replace or repair free of charge those parts that are defective due to original material defects or due to defec...

Отзывы: