


19
Adjusting Oven Temperature
Your new range is calibrated at the factory for
temperature. However, due to individual variances and
preferences, it may be necessary to adjust individual
ovens once they have been installed.
When first using oven, follow recipe times and
temperatures. Before adjusting oven baking temperature,
test a recipe by using a temperature set higher or lower
than the recommended temperature. The baking results
should help you to decide how much adjustment is
needed.
NOTE: Remove aluminum foil from oven—it will alter oven
performance. Check for blocked heat vents. If it still
appears the oven is not performing as expected, a
calibration may be done.
An accurate digital thermometer is necessary to
calibrate oven. Store purchased oven thermometers do
not measure oven temperature accurately.
To change oven temperature through oven control:
1.
Turn oven temperature knob to OFF.
2.
Press and hold HRS+ and HRS- pads for
approximately 5 seconds. A double digit number will
display.
3.
Immediately, press either HRS+ or HRS- pad.
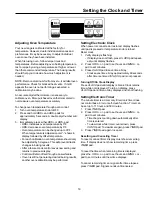
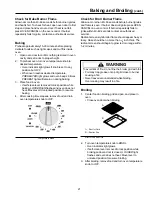
Setting the Clock and Timer
TIMER
CLOCK
+
+
MINS
HRS
MINS
HRS
Setting Electronic Clock
When power is connected or restored, display flashes
until pad is pressed or temperature knob is turned.
Reset clock.
1.
Verify display is flashing.
• If display does not flash, press
CLOCK pad repeat-
edly until display flashes.
2.
Press
HRS + or - pad to set hours and MINS + or -
pad to set minutes.
3.
Press
CLOCK pad to save time-of-day.
• Clock saves time-of-day approximately 60 seconds
after time is entered if
CLOCK pad is not pressed.
Turning Off/On Clock Display
Press
CLOCK pad until display is blank. Clock retains
time while not displayed. To turn on display, press
CLOCK pad until time-of-day displays and is not flashing.
Setting Electronic Timer
The minute timer is a timer only. Electronic timer does
not control bake, broil, or self-clean function. Timer can
be set up to 11 hours and 59 minutes.
1.
Press
TIMER pad.
2.
Press
HRS + or - pad to set hours and MINS + or -
pad to set minutes.
• Timer begins counting down automatically after
time is entered.
• To view clock while timer counts down, press
CLOCK pad. To view timer again, press TIMER pad.
3.
Press
TIMER pad again to cancel.
Resetting and Canceling Timer
To reset or cancel timer, display must show remaining
time. If display does not show remaining time, press
TIMER pad.
To reset the time when remaining time is displayed,
press the
HRS + or - pad to set hours and MINS + or -
pad to set minutes until new time displays.
To cancel remaining time or signal after time elapses,
press
TIMER pad. Signal sounds until canceled.
• HRS+ increases oven temperature by 5°F.
• HRS- decreases oven temperature by 5°F.
• Oven temperature can be changed up to 35°F.
When temperature is adjusted cooler “-” shows in
display followed by offset temperature.
• For each calibration, oven temperature should only
be adjusted by 5 degrees. This will prevent drastic
changes in baking results.
• After a few seconds control saves new setting and
returns to previous display.
• Control will retain offset through a power failure.
• If oven is still not generating desired baking results,
another oven calibration may be performed.