background image

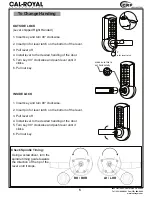
OUTSIDE LEVER

HANDING

OUTSIDE

INSIDE

RH

RHR

RH Spindle

(Blue)

LH Spindle

(Red)

LH

LHR

LH Spindle

(Red)

RH Spindle

(Blue)

OUTSIDE

INSIDE

RH Spindle

(Blue)

LH Spindle

(RED)


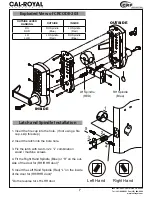
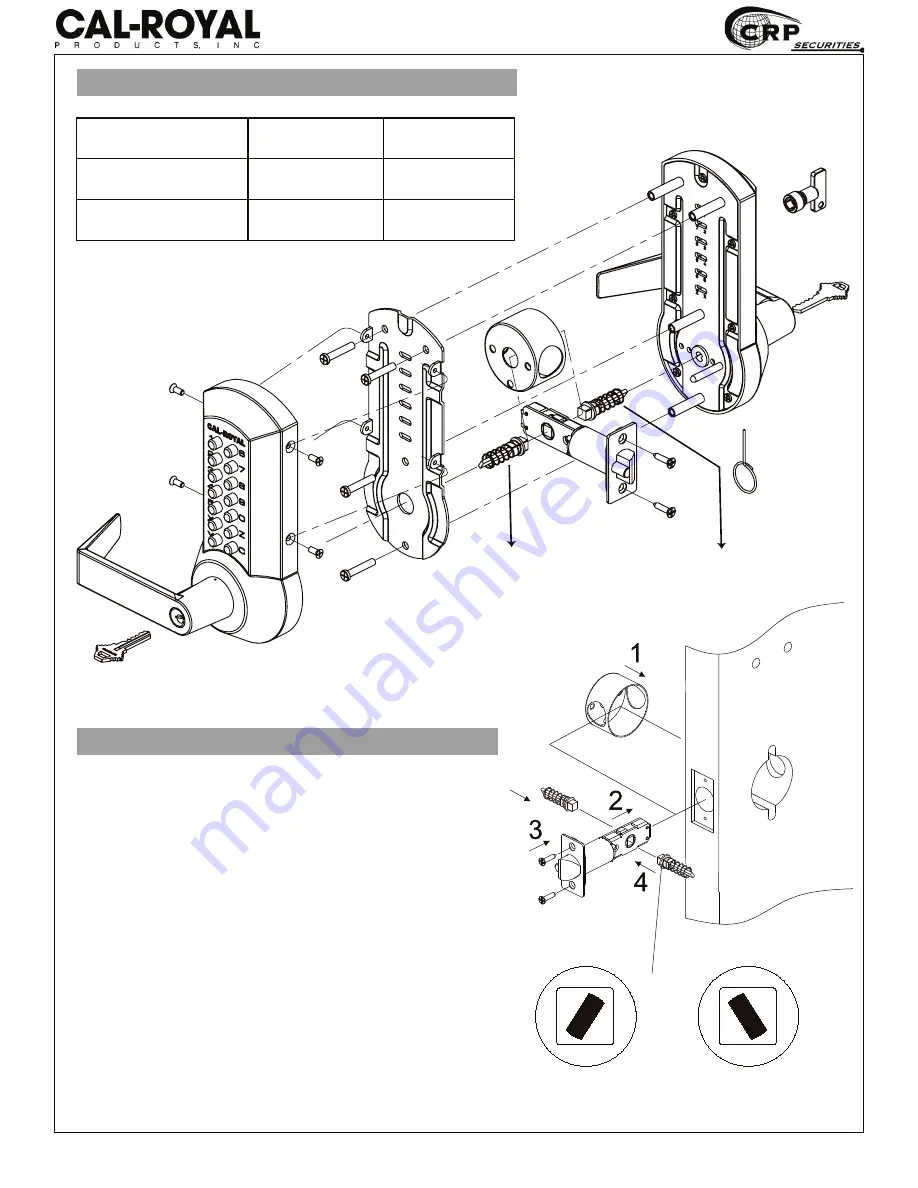
Exploded View of CRCODE-203

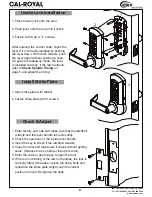
Latch and Spindle Installation

,QVHUWWKH¿UHFXSLQWRWKHKROH,IQRWXVLQJD¿UH

    cup, skip this step)

2. Insert the latch into the bore hole.

3. Fix the latch with two 8-32 x 

3

/

4

” combination

    wood / machine screws. 

4. Fit the Right Hand Spindle (Blue) or “R” on the out-
side of the door for (RH/RHR door)

1

5. Insert the Left Hand Spindle (Red) “L” on the inside 
of the door for (RH/RHR door)

1

1

Do the reverse for LH/LHR door.

Left Hand

Right Hand

5

7

6605 Flotilla St., Commerce, CA 90040

Tel (323) 888-6601 Fax (323) 888-6699

www.cal-royal.com


Содержание CRCODE-203

Страница 1: ...vent missing important steps Note Improper installations may result in damage to the lock which will void the factory warranty 2 Please keep this Instruction Manual for future reference 3 Contact deal...

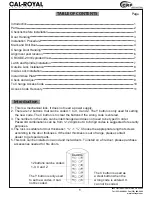
Страница 2: ...es not work push the C button followed by the code Otherwise it is not necessary to push the C button before entering the code 2 The digits after the C button can be entered in any order to confuse ta...

Страница 3: ...ntered 3 The numbers in the code can be interchanged and does not need to be typed in order Password combinations can be from 1 12 digits but 4 to 6 digit codes is suggested for security purposes 4 Th...

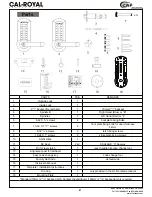
Страница 4: ...CHLAGE C Keyway 12 Pin for lever latch 1 lever handle direction change tool 13 Alignment post for latchbolt 1 14 Easy code change key 1 code change tool 15 Factory Set Code 1 default code 16 Instructi...

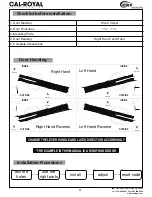
Страница 5: ...HE EXAMPLE IN THIS MANUAL IS A RIGHT HAND DOOR Right Hand Left Hand Right Hand Reverse Left Hand Reverse 1 Door Material Wood Steel 2 Door Thickness 1 3 8 1 3 4 3 Mounting Plate 4 Door Handing Right H...

Страница 6: ...Drill 1 hole on the edge of the door Chisel a UDEEHW GHHS WR DOORZ ODWFK IDFH XVK W with door edge Mortise for latchbolt front 1 1 8 width x 2 1 4 height x 5 32 deep 2 5 Drill Pilot hole for latchbol...

Страница 7: ...tally INSIDE LOCK 1 Insert key and turn 90 clockwise 2 Insert pin for lever latch on the bottom of the lever 3 Pull lever off 4 Install lever to the desired handing of the door 5 Turn key 90 clockwise...

Страница 8: ...nment post to the desired position on the back plate of the Outside Lock Post positions provided for A Left hand 2 3 4 backset B Left hand 2 3 8 backset C Right hand 2 3 4 backset D Right hand 2 3 8 b...

Страница 9: ...QRW XVLQJ D UH cup skip this step 2 Insert the latch into the bore hole 3 Fix the latch with two 8 32 x 3 4 combination wood machine screws 4 Fit the Right Hand Spindle Blue or R on the out side of th...

Страница 10: ...ck Installation 1 Place Outside Lock on door 2 Align hub onto the spindle and 4 screw posts through prep doors 3 Align the mounting plate of the Outside lock and fasten with 4 screws 8 6605 Flotilla S...

Страница 11: ...stuck Remove the key before closing the door 5 Enter the code or use the key to open the door 6 If there is no binding of the latch or handles the lock is FRUUHFWO WWHG 2WKHUZLVH ORRVHQ WKH LQJ EROWV...

Страница 12: ...s approximately 2mm turn counter clockwise 180 or until it stops turning All buttons should now be in non code position 6 Test that all the buttons are in non code by pressing the C button and turning...

Страница 13: ...ton will pop back up once the code is changed Before pressing the access code make sure to press EXWWRQ OHDU UVW Access Code Recovery 1 Remove the Outside Lock The buttons included in the access code...

Страница 14: ...12 6605 Flotilla St Commerce CA 90040 Tel 323 888 6601 Fax 323 888 6699 www cal royal com...

Страница 15: ......

Страница 16: ...6605 FLOTILLA ST COMMERCE CA 90040 TEL 323 888 6601 FAX 323 888 6699 WEBSITE www cal royal com EMAIL sales cal royal com...

Отзывы: