


DISASSEMBLY
sEctioN 6.1
maJor DisassEmBlY
Part 6
Page 153
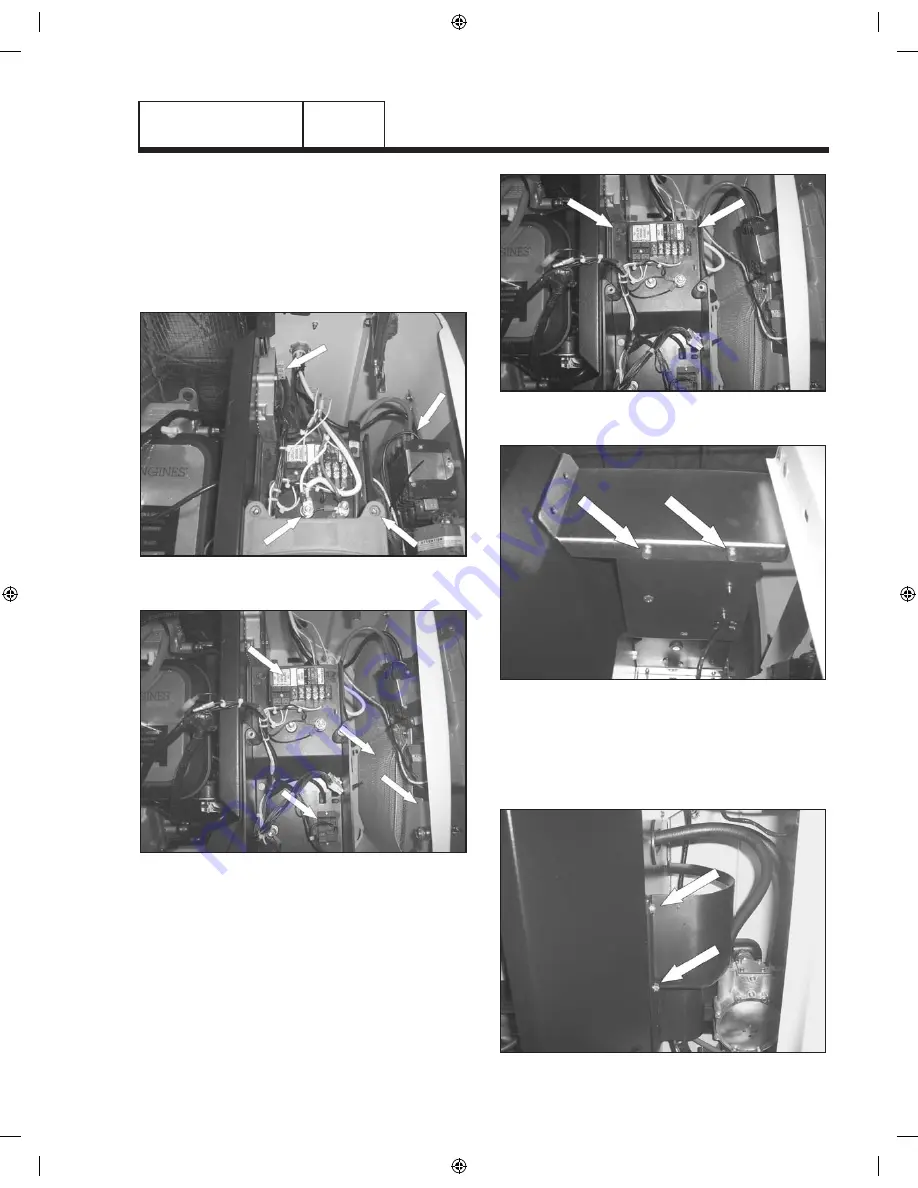
4. Remove Stator Wires: Remove all wires from the voltage
regulator, remove the neutral and ground wires from
landing lugs, and remove N1 & N2 wires from main bea-
kers. See Figure 5.
5. Remove Control Wires: Remove Wires #N1,#N2, #0,
#15B, #23, GFCI Outlet, and unit status lights from the
control box. See Figure 6.
Figure 5.
Figure 6.
6. Remove controller mounting box: Using an 8mm socket
remove the two screws from the rear of the control-
ler mounting box. See Figure 7. Using a 10mm socket
remove the two bolts from under the front of the control-
ler mounting box. See Figure 8.
Figure 7.
Figure 8.
7. Remove engine intake baffle: Using a 10mm socket
remove the two bolts from the engine intake baffle. Pull
baffle toward you carefully, there are tabs holding the
backside of the baffle to the divider panel. See Figure 9.
Figure 9.
0G9266revA.indd 153
10/15/2008 11:28:25 AM
Содержание FOR BYPASS AND FAN POWERED HUMIDIFIERS
Страница 56: ...Page 54 NOTES 0G9266revA indd 54 10 15 2008 11 27 21 AM...
Страница 189: ...Page 187 0G9266revA indd 187 10 15 2008 11 28 53 AM...
Страница 190: ...Page 188 0G9266revA indd 188 10 15 2008 11 28 53 AM...
Страница 191: ...0G9266revA indd 189 10 15 2008 11 28 53 AM...