


9
Searching for an Object (P
oints
O
f
I
nterest
)
You can search for objects including roads, hotels, banks,
restaurants, etc. using this feature. Read the following
sections to learn how to use the search functions.
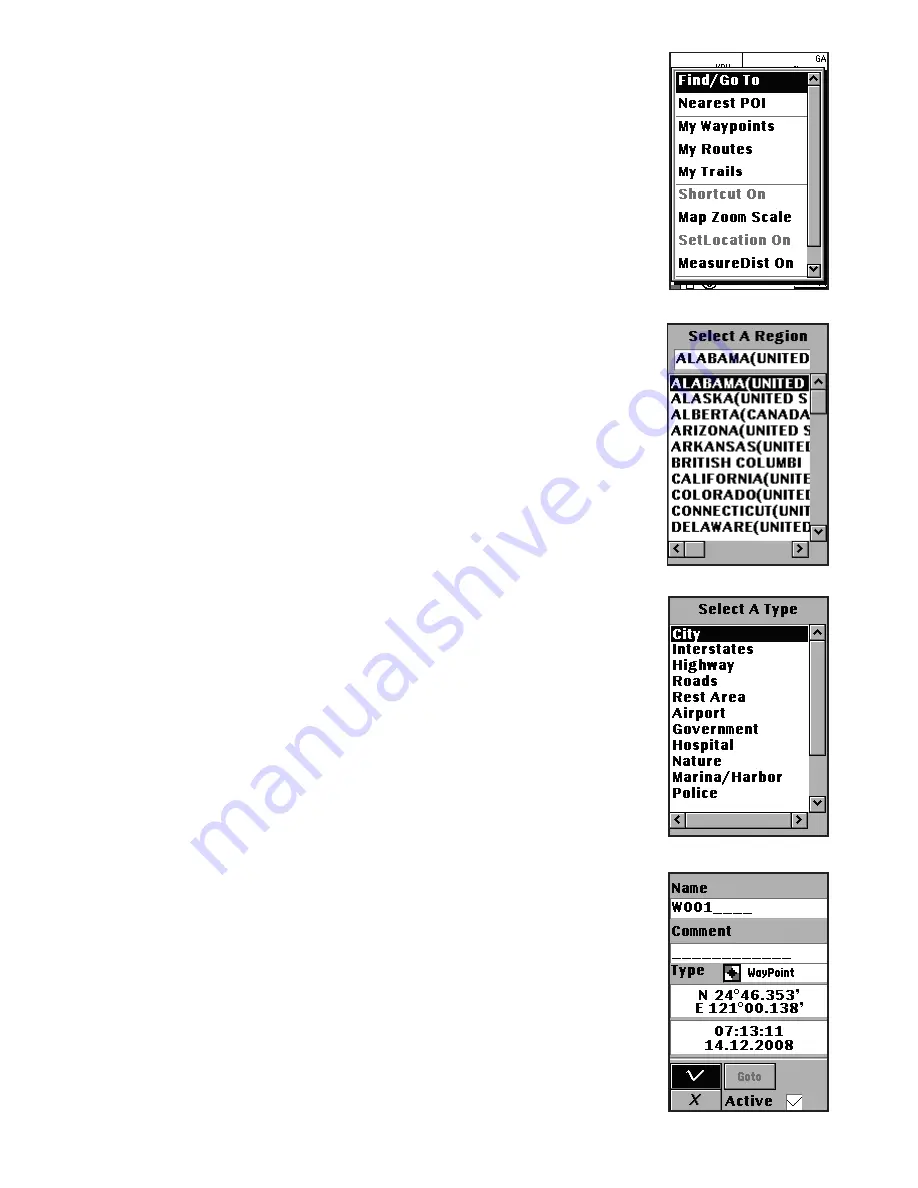
1. From the map page, press the
Menu
button and use the
navigation keys to select the
Find/Go To
option and press
OK
(
Fig. 8
), then
Select A Region
using the navigation
keys, and press OK (
Fig. 9
).
2.
Select A Type
of object using the navigation keys and
press
OK
(
Fig. 10
), then
Select A Name
of the object. Use
the navigation keys to move the highlight to the search
bar and press
OK
, then use the up/down keys to select
the object and press
OK
to go to the map page. You will
now see the object on the map page.
Nearest Search
You also can use the nearest search function to search the
nearest object. Read the following sections to learn how to
search the nearest object you want to find.
1. From the map page, press the
Menu
button, select
Nearest POI,
and press
OK
.
2.
Select A Type
first, using the navigation keys, then
press
OK
. Select the
Distance
then
Select A Name
with
the navigation keys and press
OK
. Use the up/down keys
to highlight your selection and press
OK
. You will then see
the object on the map page.
Creating Waypoints
You can freely create, name and save waypoints anywhere
on the map, to mark any location you like for future reference
and navigation. To create a new waypoint from the map
page:
1. Position the cursor at the location where you want to
set the waypoint (using the navigation keys), then press
and hold the
OK
button. The new waypoint page will be
displayed (
Fig. 11
).
2. Press the navigation “
Up
” key to highlight the name and/
or comment fields, press
OK
, then the navigation “
Down
”
key to use the text entry window. Enter text/numbers,
using the navigation keys to select a character, then press
OK
to enter it and move to the next space. When finished,
press the
ESC
(Power)button twice to exit the text entry
window and return to the Name or Comment field.
3. Highlight the
√
option and press
OK
to save changes
Fig. 8
Fig. 9
Fig. 10
Fig. 11


