background image

29

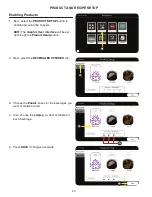
PRODUCT AND RECIPE SETUP

2. Press 

OK if changes are made.

2. Press 

OK if changes are made.

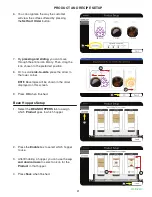
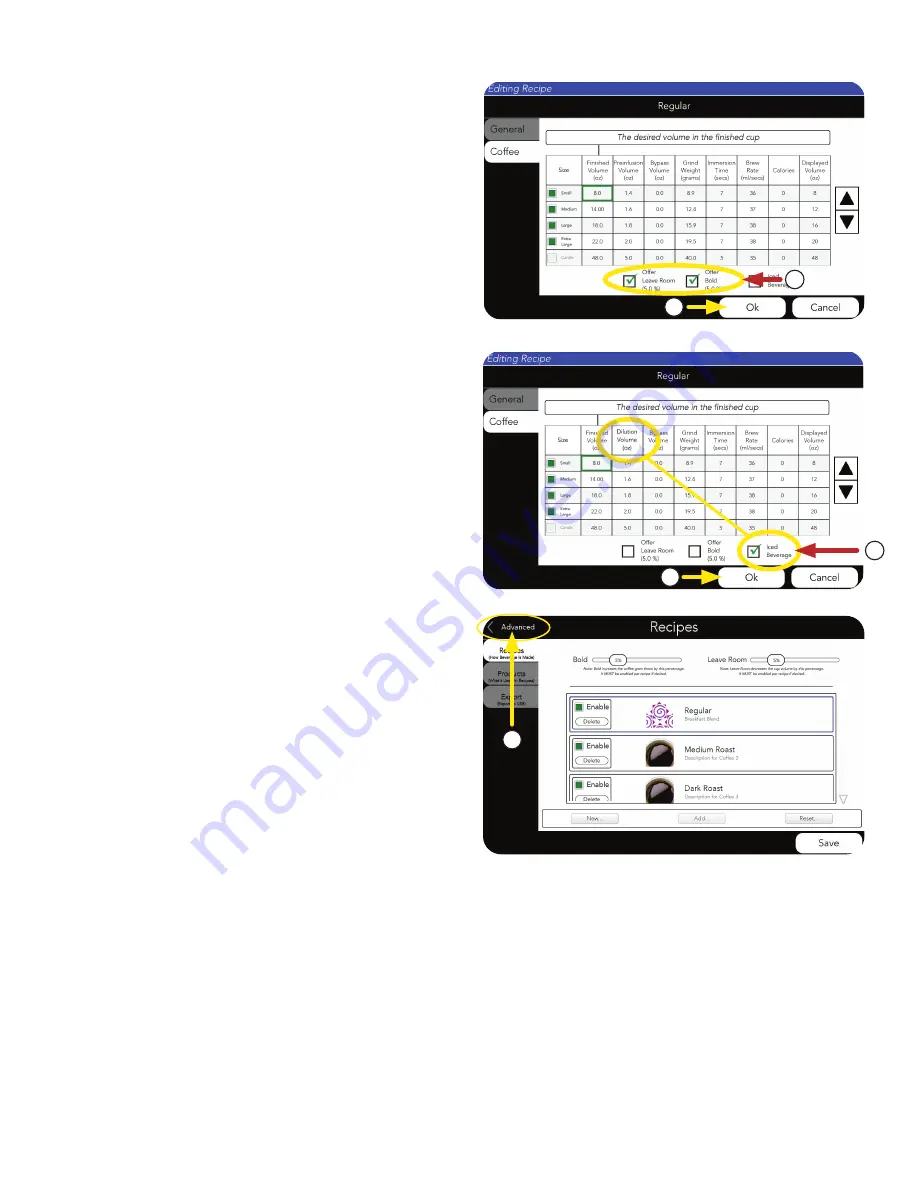
1.  Press the square for either (as shown).

• 

Leaving Room in a beverage means using  

1 - 10% less total water volume, starting with  

the bypass.

• A 

Bold beverage uses 1 - 10% more ground  

coffee above the normal grind weight.


The option to make a 

Bold beverage, or to 

Leave Room, can be enabled from this screen.

3.  When you have all your 

Products and Recipes 

saved, press the 

ADVANCED link to return to 

the 

ADVANCED menu.

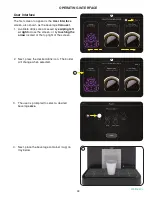
An 

Iced Beverage can be enabled from 

this screen.

NOTE: This programs the machine to 
send the finished drink through the chiller 
before dispensing.

1.  Press the square labeled 

Iced Beverage.

1

1

2

2

3

Содержание Fast Cup

Страница 1: ...038 0000 D 2 21 2019 Bunn O Matic Corporation INSTALLATION OPERATING GUIDE Bunn O Matic Corporation Post Office Box 3227 Springfield Illinois 62708 3227 Phone 217 529 6601 Fax 217 529 6644 www bunn co...

Страница 2: ...approved cleaning supplies constitues improper maintenance Failure to have required preventive maintenance performed by a BUNN technician or authorized Fast Cup service provider Parts replaced under t...

Страница 3: ...3 24 25 Recipe Setup 26 27 Editing Coffee Recipes 28 29 Enabling Products 30 31 Bean Hoppers Setup 31 32 OPERATING INTERFACE User Interface 33 34 Cancelling Beverage Preparation 34 35 ADA Operating In...

Страница 4: ...DA this equipment must be installed with adequate backflow prevention to comply with federal state and local codes For models installed outside the U S A you must comply with the applicable Plumb ing...

Страница 5: ...rder to avoid a hazard Machine must not be immersed for cleaning Cleaning and user maintenance shall not be made by children unless they are older than 18 years and supervised This appliance is intend...

Страница 6: ...ter check the voltage and color coding of each conductor at the electrical source 3 Connect the dispenser to the power source 4 If plumbing is to be hooked up later be sure the dispenser is disconnect...

Страница 7: ...meters of the machine Note the length of the power cord is regulated by the machine s UL certification the length and type of cord cannot be substituted Machine total amp draw 24 0 amps at 208VAC Det...

Страница 8: ...INITIAL SETUP Plumbing Hook Up The plumbing connection is a 3 8 male flare fitting located on the lower left rear of the machine as shown NOTE Water pipe connections and fixtures directly connected t...

Страница 9: ...in 1 Open Customer Access door 1 Open Customer Access door 1 Open Customer Access door 2 Remove packing and tape from Grounds Bin Keys for Service Access Door 2 Lock is located on right side of Ground...

Страница 10: ...automatically connect to the drain line when the tray is installed in the correct position under the brewer As directed in the International Plumbing Code of the International Code Council and the Fo...

Страница 11: ...e bean chutes or bean detection sensors 4 Hoppers should sit flat when in place correctly Left Center Right 4 5 Push the hopper Locking Lever to the back This locks the hopper in place and allows bean...

Страница 12: ...op of machine If bean hoppers are already locked in place go to Step 3 2 When placed push gate handle back 3 Remove lid s 4 Pour whole coffee beans in hopper s NOTE Apply roast decals if available 5 O...

Страница 13: ...on by setting the power switch to the ON position 5 The door must be closed to begin the initialization sequence it may take 60 90 seconds and the machine will reset in preparation for user operation...

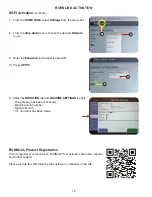
Страница 14: ...nistrator bunnlink bunnlink com BUNNLINK ACTIVATION 2 Once the QR code is scanned on a smart phone or tablet this screen will appear Enter the pin 6601 When the digits are entered in the text boxes cl...

Страница 15: ...en cycles to ensure the board has completely shut off WI FI Activation BUNNLINK ACTIVATION NOTE BUNNlink Models Only Purchase is required if not preinstalled on machine If you experience any issues wi...

Страница 16: ...te BUNNLINK ACTIVATION 7 From the HOME PAGE select Settings from the menu bar 8 From the drop down menu choose the desired Network to join 11 Select the BUNNLINK tab from MACHINE SETTINGS to verify Th...

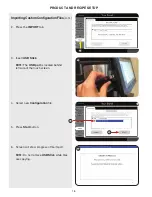
Страница 17: ...il SERVICE ACCESS appears on the display 2 Select the ADVANCED icon 3 Next enter the passcode 6601 If you have a USB stick with custom files follow these steps If not go to Product Setup on page 16 Im...

Страница 18: ...iguration file 5 Press Start button 6 Screen will show progress of file import NOTE Do not remove USB Stick while files are copying 3 Insert USB Stick NOTE The USB port is located behind left side of...

Страница 19: ...figuration files 8 Press Reboot button to complete import After the machine updates the HOME screen should appear and the Products and variables you imported should be available NOTE This will restart...

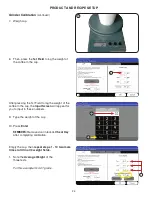
Страница 20: ...e 1 field NOTE There is a second field if you need more space to name your product 6 Type the name of your coffee for example Regular 7 Press Return NOTE The Product Name Line 1 and Product Descriptio...

Страница 21: ...age is chosen press OK PRODUCT AND RECIPE SETUP 12 You can choose to edit or create new Products or move on to creating or editing a coffee Recipe by pressing the RECIPE tab 11 Press OK to complete th...

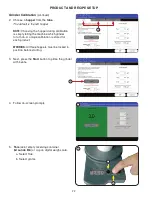
Страница 22: ...calibration is stored for each product 3 Next press the Start button to prime the grinder with beans 4 Follow on screen prompts WARNING All three hoppers must be locked in position before starting PR...

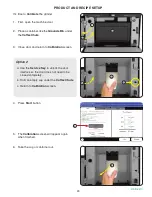
Страница 23: ...Chute c Return to Calibration screen 6 Take the cup or container out 5 The Calibration screen will appear again when finished Option 2 PRODUCT AND RECIPE SETUP 1 First open the machine door 3 Close d...

Страница 24: ...lock Cheat Key after completing calibration After pressing the 1st Field to log the weight of the coffee in the cup the Input Screen will appear for you to input in these numbers Empty the cup then re...

Страница 25: ...enter or Right button is selected the recipe will need to be recalibrated if it s moved from the specified grinder to either of the other two grinders Or it can be applied to All 3 The input screen wi...

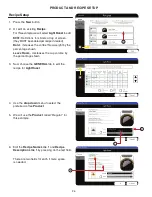
Страница 26: ...creen they MUST be enabled per recipe if desired Bold increases the coffee throw weight by the percentage shown Leave Room decreases the cup volume by the percentage shown 1 2 3 4 Use the drop down me...

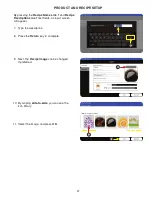
Страница 27: ...eferred By pressing the Recipe Name Line 1 and Recipe Description Line 1 text fields an input screen will appear 7 Type the description 8 Press the Return key to complete 7 8 9 10 By swiping side to s...

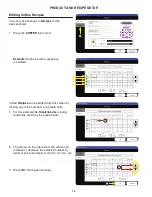
Страница 28: ...ox is enabled Coffee Recipes can be edited from this screen by clicking any of the numbers in the table cells 1 For this example the Small Volume is being revised as shown by the green border 1 1 3 Pr...

Страница 29: ...1 10 more ground coffee above the normal grind weight The option to make a Bold beverage or to Leave Room can be enabled from this screen 3 When you have all your Products and Recipes saved press the...

Страница 30: ...e Graphic User Interface will be set up through the Product Setup button Enabling Products 2 Next select the BEVERAGES OFFERED tab 3 Choose the Enable boxes for the beverages you want available to bre...

Страница 31: ...r to scroll side to side press the arrow in the lower corner NOTE Beverages will be shown in the order displayed on this screen 9 Press OK when finished 1 Select the BEAN HOPPERS tab to assign which P...

Страница 32: ...RECIPE SETUP 5 Select SERVICE ACCESS to return to HOME screen The HOME screen should appear and the Products and variables you just created should be available You are ready to serve 5 Bean Hoppers S...

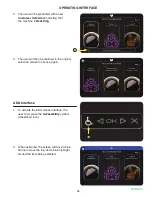
Страница 33: ...ng left or right across the screen or by touching the arrow located at the top right of the screen 2 Next press the desired drink icon The border will change when selected User Interface OPERATING INT...

Страница 34: ...ed is an iced beverage the screen will prompt the user to fill the cup with ice prior to placing the beverage container cup on the tray OPERATING INTERFACE The user can stop a beverage preparation dur...

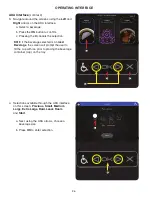
Страница 35: ...he user will then be returned to the original selection screen to choose again 1 To activate the ADA screen interface the user must press the Accessibility symbol wheelchair icon 2 When activated the...

Страница 36: ...cing the beverage container cup on the tray OPERATING INTERFACE 4 Selections available through the ADA interface on this screen Previous Small Medium Large Extra Large Bold Leave Room and Start ADA In...

Страница 37: ...37 OPERATING INTERFACE c Navigate to the START button using the ADA arrows d Press OK to complete selection d c...

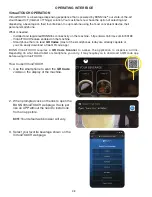
Страница 38: ...most convenient device their personal smartphone What is needed Installed and registered BUNNlink connectivity on the machine https www tfaforms com 4743165 VirtualTOUCH feature enabled on the machine...

Страница 39: ...chine Press DISPENSE NOTE This is to confirm that you are standing in front of the machine and ready to take the drink 7 Allow time for the beverage to finish dispensing before removing the cup Enjoy...

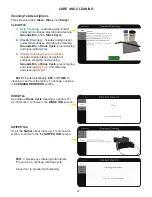
Страница 40: ...ing cloth provided to clean the acrylic door panel General The use of a damp cloth rinsed in any mild non abrasive liquid detergent is recommended for cleaning all surfaces on Bunn O Matic equipment S...

Страница 41: ...Drip Tray Weekly Cleaning every 3 weeks includes wiping interior and exterior surfaces emptying and cleaning Grounds Bin a Rinse Cycle plus removing and cleaning Drip Tray and removing and cleaning Sw...

Страница 42: ...lower door is opened and closed Follow the close ups below for this step Close ups of steps a Open Lower Door c Use Brush to sweep loose grounds from Brewing Chamber into Grounds Bin a b b Raise Upper...

Страница 43: ...CARE AND CLEANING 4 Place a Tabz Cleaning Tablet in the the opening on top of the machine 4 d 3 3 Press Next to continue d Remove clean and replace Grounds Bin e Close both Doors Daily Cleaning contin...

Страница 44: ...ntinued 6 6 Press Start to continue NOTE This process can be stopped by pressing the Cancel button This will reset the machine 5 Place the Cleaning Tube under the dispense nozzle 5 Drip Tray 1 When we...

Страница 45: ...Brush to sweep loose grounds from Brewing Chamber into Grounds Bin a b b Raise Upper Door NOTE Upper Door can be opened and Swiper handle can be pulled approximately 3 4 forward to allow grounds to b...

Страница 46: ...Tray 4 Remove Drip Tray 5 4 NOTE Screen images will differ if Grounds Chute is installed NOTE Wash both Drip Tray and Grate Weekly Cleaning continued CARE AND CLEANING d d Remove and clean the Grounds...

Страница 47: ...the operator informed Cleaning will take approximately 10 minutes NOTE This process can be interrupted by pressing the Pause button CARE AND CLEANING 9 Press Done button when complete 9 Weekly Cleani...

Страница 48: ...1 2 Press Next to begin 3 Complete cleaning steps listed Press Next button when finished NOTE Next the screen will say Preparing the brew chamber for cleaning please wait 3 CARE AND CLEANING Weekly Cl...

Страница 49: ...ose ups of steps a If Upper Door is not open raise now for access a b Push Release Lever to the left c Pull Swiper out d Pull Upper Door down b d c 5 Press Next button when complete 5 Weekly Cleaning...

Страница 50: ...steps a Wash and rinse the top of the Swiper assembly b Wash and rinse the bottom of the Swiper assembly a b CARE AND CLEANING d Install Swiper making sure it fully latches clicks d NOTE If Swiper is...

Страница 51: ...rip Tray NOTE Screen will transition to next step once Drip Tray is removed Program allows about 15 seconds 7 8 Clean Drip Tray 9 8 NOTE Wash both Drip Tray and Grate 9 Re install Drip Tray 10 install...

Страница 52: ...he machine 12 NOTE The doors must be closed to continue with cleaning process CARE AND CLEANING 14 14 Press Start to continue NOTE This process can be stopped by pressing the Cancel button This will r...

Страница 53: ...tomatic Clean cycle will start A progress bar will appear to keep the operator informed NOTE This process can be interrupted by pressing the Pause button 15 Press Done button when complete 15 Weekly C...

Страница 54: ...om the Care and Cleaning screen will prepare the equipment for rinsing Follow the directions shown on the screen 2 Press the Start button RINSE Tab As Needed NOTE This process can be interupted by pre...

Страница 55: ...on NOTE This process can be stopped by pressing the Cancel button 1 Selecting the Swiper tab from the Care and Cleaning screen to show steps to remove the Swiper 1 2 Close ups of SWIPER Tab screens a...

Страница 56: ...ide Release Lever to the left d Lower the Upper door 6 Press Next to continue CARE AND CLEANING d 7 The screen will now show steps needed to wash and re install the Swiper SWIPER Tab Continued c Remov...

Страница 57: ...d rinse the top of the Swiper assembly b Wash and rinse the bottom of the Swiper assembly a b SWIPER Tab continued c Install Swiper making sure it fully latches clicks c NOTE If Swiper is not found af...

Страница 58: ...otted time for touch screen cleaning has expired the system will reset and return to the home screen 3 During Touch Screen Cleaning a countdown screen will appear indicating time remaining to clean th...

Страница 59: ...nter the passcode 6601 4 Press the REMINDERS icon 4 3 Setting a preferred DAY and TIME for Weekly cleaning reminder 2 2 Select the ADVANCED icon 1 Select SERVICE ACCESS CLEANING REMINDER CARE AND CLEA...

Страница 60: ...ge the Time then AM or PM 7 Press SAVE if changes are made 8 Press ADVANCED to return to SERVICE ACCESS screen 5 Use the drop down menu to select the preferred Day of the Week to clean 6 7 8 5 CARE AN...

Страница 61: ...s events Notices 4 Service Contact information is also provided 5 Use the Up or Down Arrows shown on the right side of the screen to scroll through the events list 6 Press the Refresh button located i...

Страница 62: ...Touch and hold the BUNN logo for a few seconds until SERVICE ACCESS appears on the display 2 Select the ADVANCED icon 3 Next enter the passcode 6601 4 Touch the YOUR BRAND icon YOUR BRAND 1 2 3 4 cont...

Страница 63: ...select the area you want to customize Options Available a Select LOGO field CHANGE BRANDING LOGO NOTE Logo size should be up to 500 x 53 pixels b The Branding Logo screen will appear Scroll side to si...

Страница 64: ...e Color icon is selected the color of this text and the beverage descriptions will be changed 7 i The color picker will apear Use the sliders to choose a color b If a new color is chosen press Save YO...

Страница 65: ...yout check box c If a new layout is chosen press OK b Layout screen appears NOTE Images will conform to the size selected The optimal size for the layout selected is shown in the upper right corner of...

Страница 66: ...fter the machine updates the HOME screen will appear with any changes that were saved You are ready to serve YOUR BRAND 4 Touch and hold the BUNN logo for a few seconds until the screen starts to rese...

Страница 67: ......

Отзывы: