49
SERVICE (cont.)
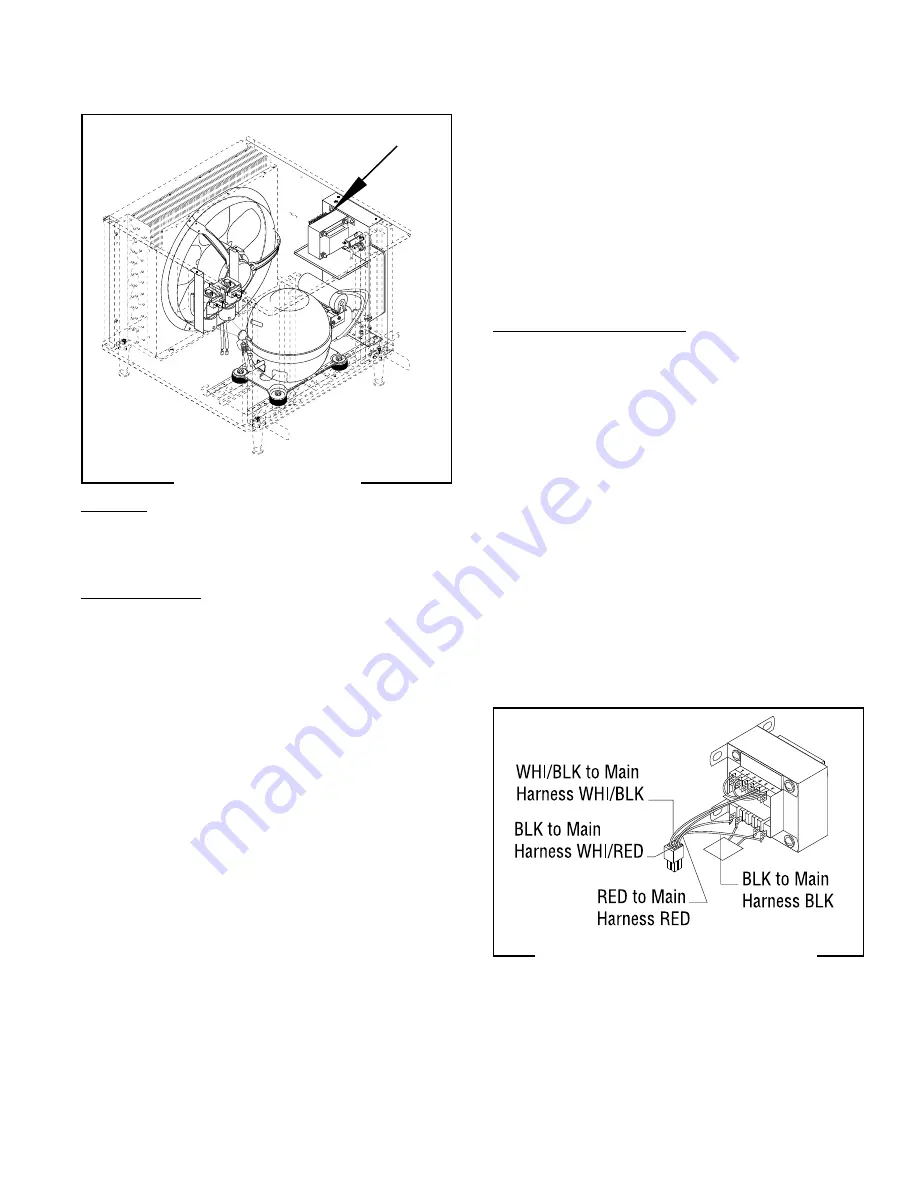
TRANSFORMER
FIG. 51 TRANSFORMER TERMINALS
P1329
R2
2
FIG. 50 TRANSFORMER
P1342
Location:
The transformer is located inside the chassis on
the upper rear side of the component bracket.
Test Procedures:
1. Disconnect the dispenser from the power source.
2. Disconnect the plug from the transformer to the
connector from the dispenser main wiring har-
ness.
3. With a voltmeter, check the voltage across the
white/red wire and the white/black wire in the
dispenser main wiring harness connector. Con-
nect the dispenser to the power source. The indi-
cation must be:
a) 120 volts ac for 120 volt models.
b) 230 volts ac for 230 volt models.
4. Disconnect the dispenser from the power source.
If voltage is present as described, proceed to #5.
If voltage is not present as described, refer to the
Wiring Diagram and check the dispenser main wiring
harness.
5. Reconnect the plug from the transformer to the
connector from the dispenser main wiring har-
ness.
6. Connect the dispenser to the power source.
7. Disconnect the lamp cord from the lamp cord
connector.
8. With a voltmeter, check the voltage across the
inside of lamp cord socket and the outside with the
DAY/NIGHT switch in the “-” down position. The
indication must be approximately 12.6 volts dc.
9. Disconnect the dispenser from the power source.
If voltage is present as described, the transformer is
operating properly.
If voltage is not present as described, replace the trans-
former.
Removal and Replacement:
1. Remove the four #8-32 locking screws securing
the component bracket to the chassis.
2. Pull component bracket from the chassis far
enough to gain access to the transformer.
3. Disconnect the connector from the dispenser main
wiring harness from the plug on the transformer.
4. Remove the four #8-32 locking screws securing
the transformer to the component bracket.
5. Remove transformer and discard,
6. Position new transformer on the component
bracket and secure with four #8-32 locking screws.
7. Reconnect the plug on the transformer to the
connector on the dispenser wiring harness.
8. Refer to Fig. 51 and reconnect the wires.
9. Position component bracket in the chassis and
secure with four #8-32 locking screws.
27646 122200
Содержание CDS-2
Страница 51: ...51 COOLANT SCHEMATIC DIAGRAM CDS 2 27646 022500 ...
Страница 54: ...54 27646 022500 ...
Страница 55: ...55 27646 022500 ...
Страница 56: ...56 27646 022500 ...
Страница 58: ...58 27646 022500 ...
Страница 59: ...59 27646 022500 ...
Страница 60: ...60 27646 022500 ...


