


4
Click
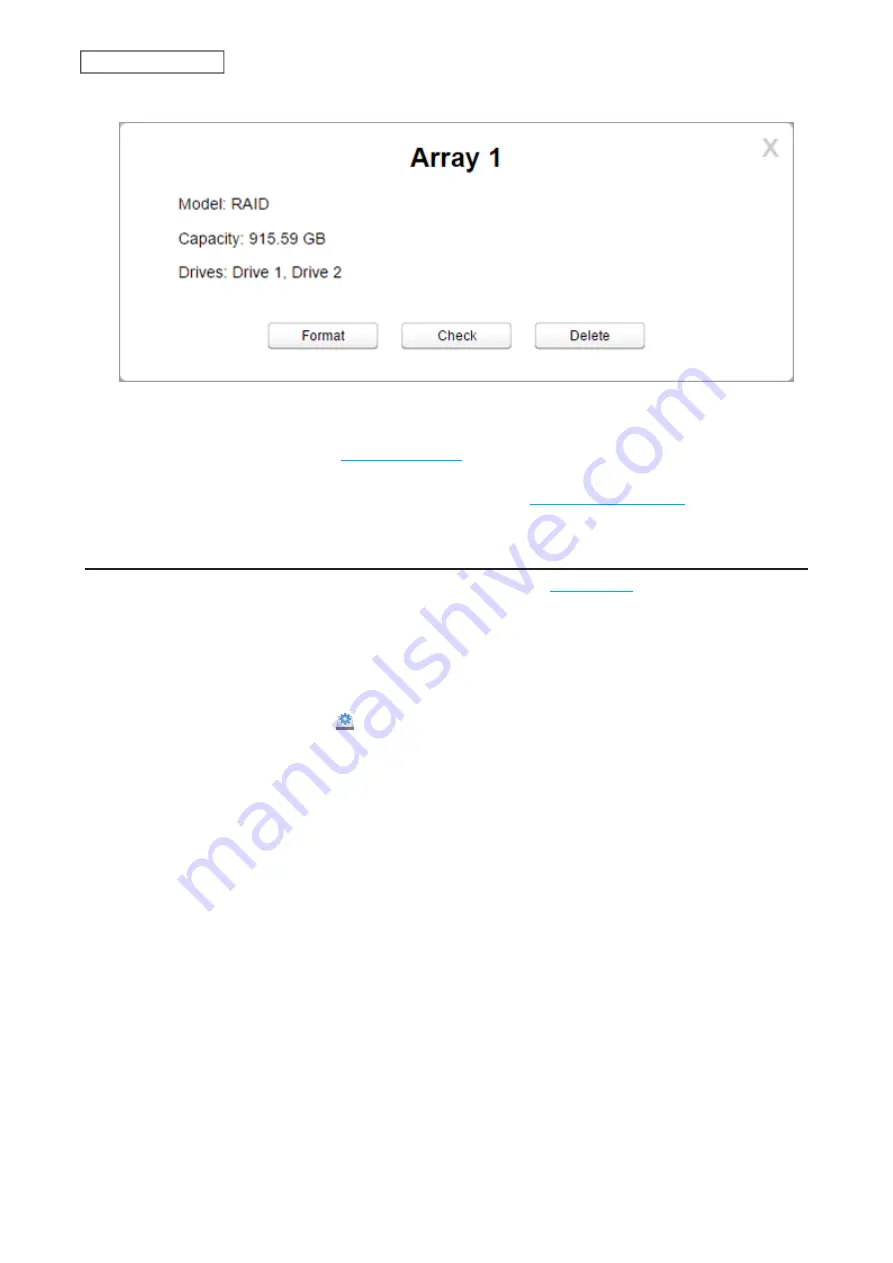
Delete
.
5
Two different warnings will be displayed. Read them carefully and click
Yes
for both.
6
Format the drive by referring to the
section below.
Once JBOD is configured, the default shared folders will automatically be created only on the drive that is initially
formatted. Create a shared folder on the other drives by referring to the
section in chapter
7.
Changing the RAID Mode
To change the RAID mode, first put the drives into JBOD by referring to the
section above. Then, follow
the procedure below.
Note:
You can also configure the RAID settings, including changing the RAID mode, using the initial setup wizard,
but you will lose all settings on the LinkStation.
To launch the initial setup wizard, initialize the LinkStation settings from
System Settings
>
Reset
, then follow the
procedure on the screen to finish changing the RAID mode.
1
From Settings, click
Disk Manager
( ).
38
Chapter 5 Disk Manager
Содержание LinkStation 500
Страница 38: ...2 Click the RAID tab 3 Click the array to delete 37 Chapter 5 Disk Manager ...
Страница 40: ...2 Click the RAID tab 3 Click Create RAID Array 39 Chapter 5 Disk Manager ...
Страница 57: ...3 The system log window will open 56 Chapter 6 System Information ...
Страница 59: ...3 Click Add 4 Enter a folder name and configure the desired settings then click OK 58 Chapter 7 Services ...
Страница 66: ...2 Click Folder Setup 3 Select a shared folder for the DLNA server 65 Chapter 7 Services ...
Страница 77: ...76 Chapter 7 Services ...
Страница 82: ...Groups Adding a Group 1 From Settings click System Settings 2 Click Groups 3 Click Add 81 Chapter 8 System ...
Страница 97: ...2 From Settings click System Settings 3 Click Firmware 4 Click Browse 96 Chapter 8 System ...
Страница 100: ...2 Click Folder Setup 3 Choose the folder to set as a backup destination 99 Chapter 8 System ...
Страница 104: ...6 Click Refresh The Buffalo NAS devices will be added to the list 7 Close the window 103 Chapter 8 System ...
Страница 108: ...2 Click Folder Setup 3 Choose a shared folder as your backup destination for Time Machine 107 Chapter 8 System ...
Страница 110: ...2 Click Time Machine 109 Chapter 8 System ...
Страница 111: ...3 Click Select Backup Disk 4 Select the shared folder then click Use Disk 110 Chapter 8 System ...
Страница 118: ...3 Enter the new password twice and click Apply 4 Tap Close when completed 117 Chapter 9 Configuring from Mobile Devices ...


