45
USB Settings
LinkStation USB Setup - Printer Share Installation (continued)
◗
The
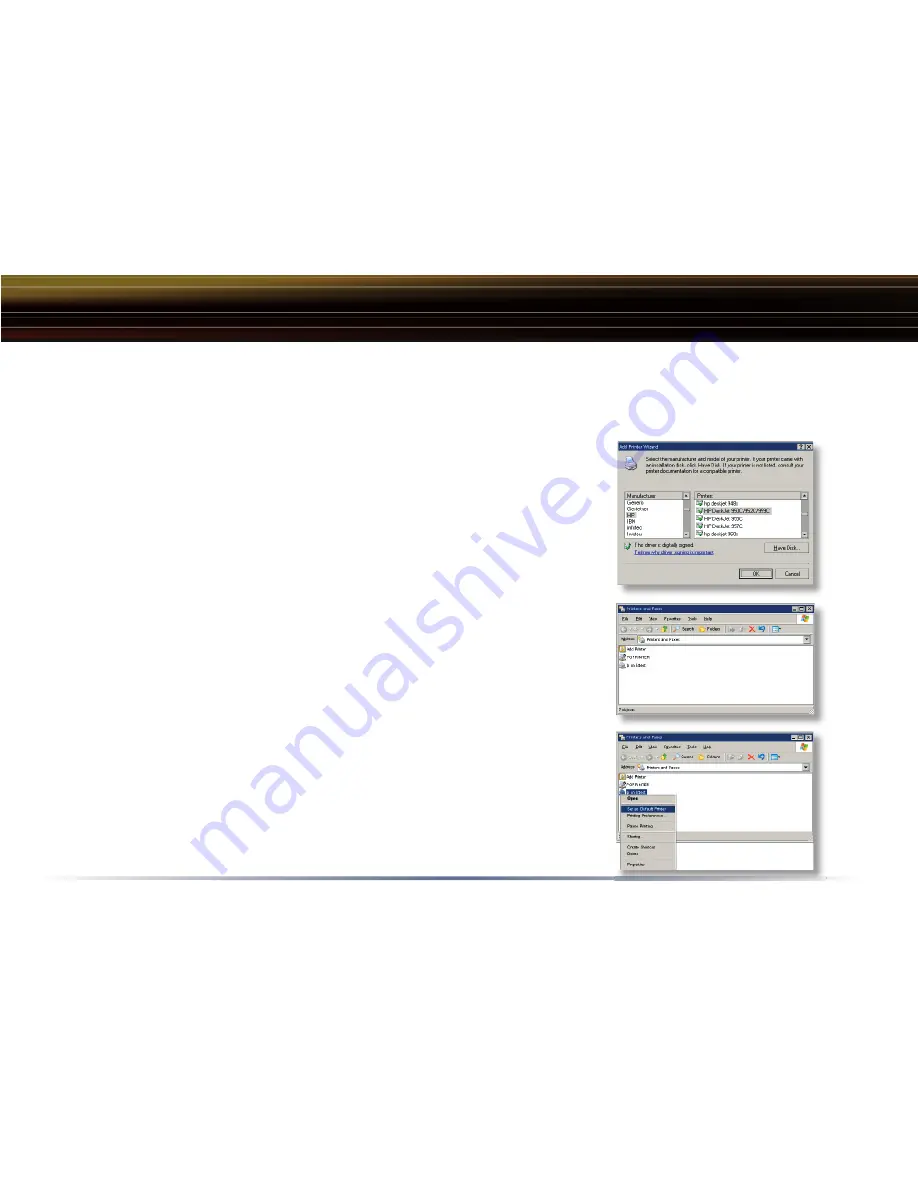
‘Add Printer Wizard’
will launch. Select the proper driver
for your printer. If the specifi c printer is not in the list, you will be
required to insert the CD that came with your printer into your
PC’s CD-ROM drive and press the
‘Have Disk’
button. Please
refer to your printer documentation for more clarifi cation. Press
the
‘OK’
button when fi nished.
◗
The printer is now successfully installed. To further confi gure
and test the printer, open your PC’s Control Panel. The Control
Panel can be accessed through ‘My Computer’ or through the
Start Menu. Once the Control Panel is open, double click on the
‘Printers and Faxes’
icon.
◗
If this is the only printer installed on the PC, then it will
automatically be set as the default printer. However, if it is not
the only printer on the PC then it is not set as default. If you
would like to make it default, right click on the
‘lp’
printer icon
and select the
‘Set as Default Printer’
option.


