


How to scan to a computer
53
10
e
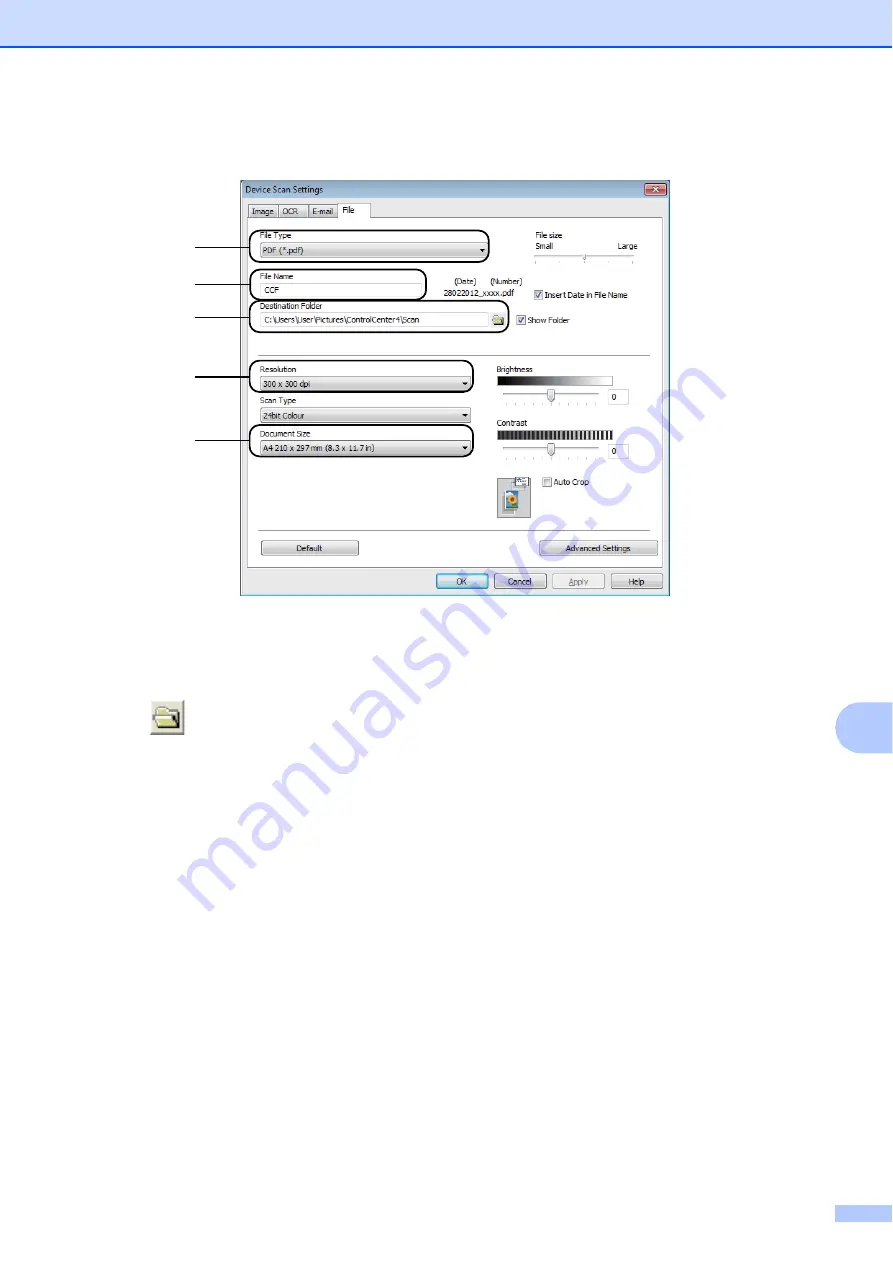
Choose the
File
tab. You can change the default settings.
1 Choose
PDF (*.pdf)
from the
File Type
drop-down list.
2 You can enter the file name you want to use for the document.
3 You can save the file to the default folder, or choose your preferred folder by clicking the
(
Browse
) button.
4 You can choose a scanning resolution from the
Resolution
drop-down list.
5 You can choose the document size from the
Document Size
drop-down list.
f
Click
OK
.
1
2
4
5
3


