CHANGING THE EMBROIDERY FOOT
G
ettin
g R
ea
d
y
Basic operations
B-43
B
1
a
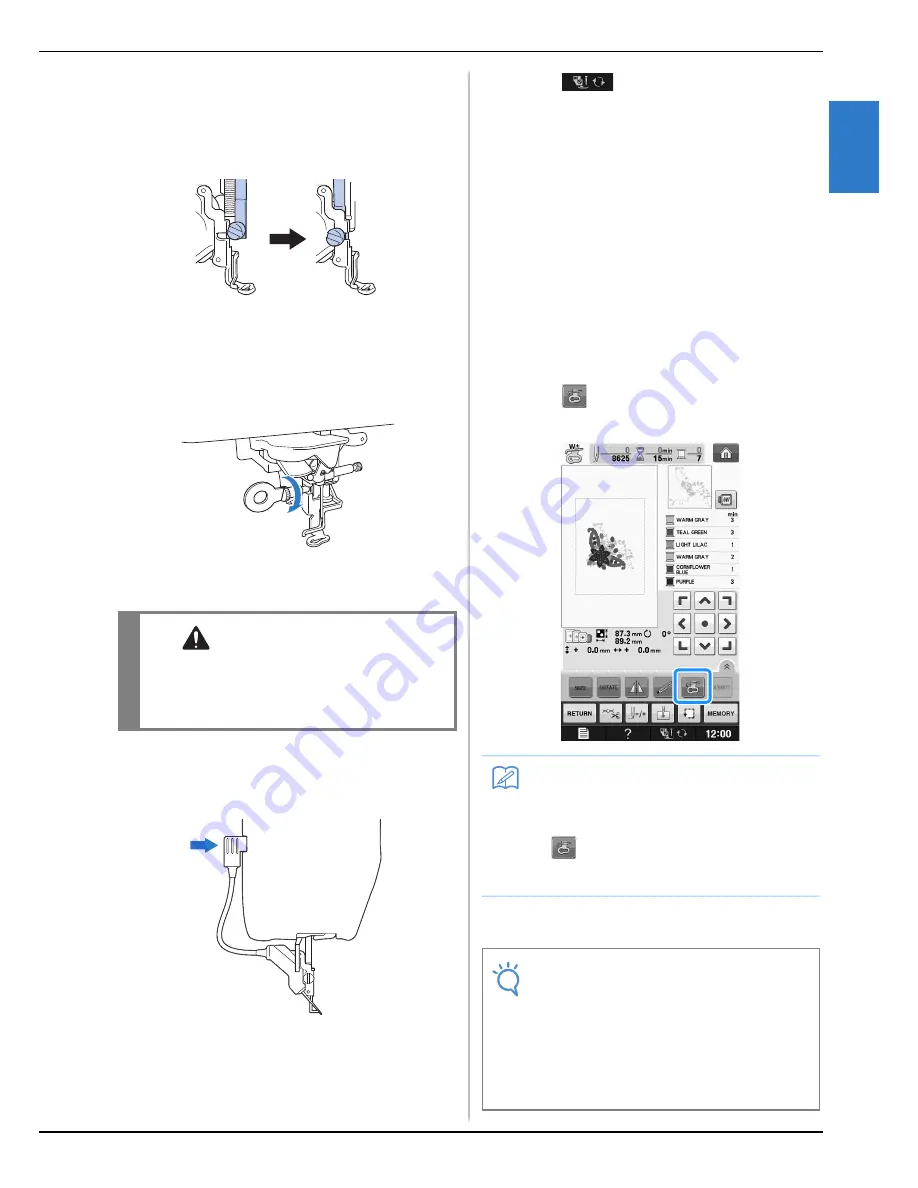
Position the embroidery foot “W+” with
LED pointer or “W” on the presser foot bar
by aligning the notch of the presser foot to
the large screw.
Side view
b
Hold the embroidery foot in place with
your right hand, and then use the included
screwdriver to securely tighten the
embroidery foot screw.
→
For users of embroidery foot “W”, skip step
c
and
go to step
d
.
c
Plug the connector of the embroidery foot
“W+” with LED pointer into the jack on the
back of your machine.
d
Press
to unlock all keys and
buttons.
→
All keys and operation buttons are unlocked, and
the previous screen is displayed.
■
Checking the Needle Drop Point
With the Embroidery Foot “W+”
with LED Pointer (For Embroidery
foot “W+” with LED pointer user
only)
Before beginning to embroider when using the
embroidery foot “W+” with LED pointer, carefully
read the procedures described in the “Embroidery”
and “Embroidery Edit” chapters.
a
Press
in the embroidery screen.
→
The LED pointer indicates the needle drop point.
*
The LED pointer turns off automatically by lowering
the presser foot or returning to the previous page.
CAUTION
• Use the included screwdriver to firmly tighten
the screw of the embroidery foot. If the screw
is loose, the needle may strike the embroidery
foot and possibly cause injury.
Memo
• When the LED pointer is turned on, the
presser foot height is automatically adjusted
according to the fabric thickness.
• If
is pressed again, the fabric thickness
is remeasured and the presser foot is set to
the optimum height.
Note
• With bulky fabrics, the position may not be
accurate due to the various depths of the
fabrics.
• With fabric that has a very uneven surface
such as quilting, the fabric thickness may
not be correctly measured. In this case, the
pointer indication should be used only as a
reference.
Содержание 882-D80
Страница 16: ...NAMES OF MACHINE PARTS AND THEIR FUNCTIONS B 14 ...
Страница 53: ...USING FUNCTIONS BY CONNECTING THE ACCESSORY TO THE MACHINE Getting Ready Basic operations B 51 B 1 ...
Страница 64: ...USING SENSOR FUNCTIONS IN EMBROIDERY EMBROIDERY EDIT MODE B 62 ...
Страница 82: ...ATTACHING THE EMBROIDERY FRAME E 18 b Pull the embroidery frame toward you ...
Страница 119: ...EMBROIDERY APPLICATIONS Embroidery Embroidering E 55 E 1 ...
Страница 150: ...USING THE MEMORY FUNCTION E 86 ...


